The access control filter allows you to control incoming and outgoing network traffic.
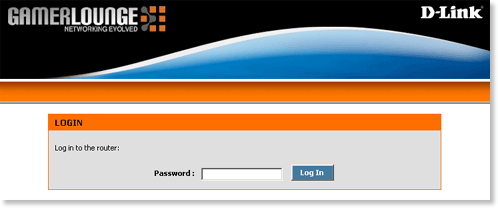
Step 1 Open a web browser and type the IP address of the gaming router in the address bar (default is 192.168.0.1). Press Enter.
Step 2 The default password is blank (nothing). Click Log In.
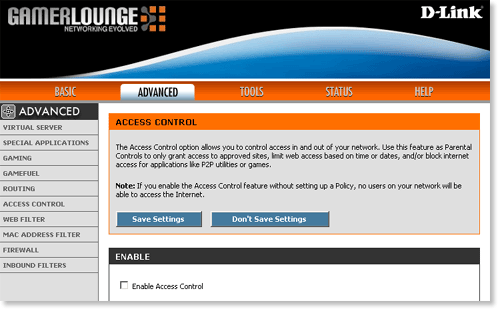
Step 3 Click Advanced at the top and then click Access Control on the left side.
Step 4 In the Enable section select Enable Access Control.
Step 5 In the Add Access Control Rule section select Enabled and configure the following:
- Policy Name - Enter a name to identify the policy.
- Machine IP Address - Enter the LAN IP address of the computer or select it using the drop-down list to the right.
- Schedule - Select Always.
- Web Filter - Select this option to apply the settings configured on the Web Filter page.
- Log Internet Access - Select this option to log Internet traffic for this policy in the log.
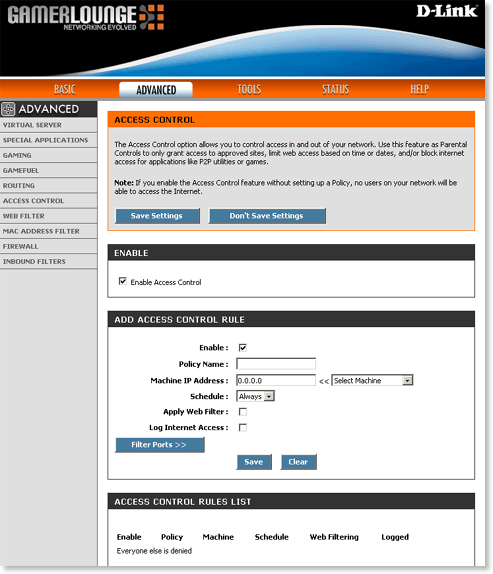 Step 6 Click Filter Ports.
Step 7 Configure the following:
- Enabled - Select Enabled to enable this rule.
- Name - Enter a name to identify this rule.
- Dest IP Start - Enter the first WAN IP address that you want to control access to.
- Dest IP End - Enter the last WAN IP address that you want to control access to.
- Protocol - Select the protocol (TCP or UDP).
- Dest Start Port - Enter the first WAN port that you want to control access to.
- Dest End Port - Enter the last WAN port that you want to control access to.
Repeat Step 7 if you wish to add more rules.
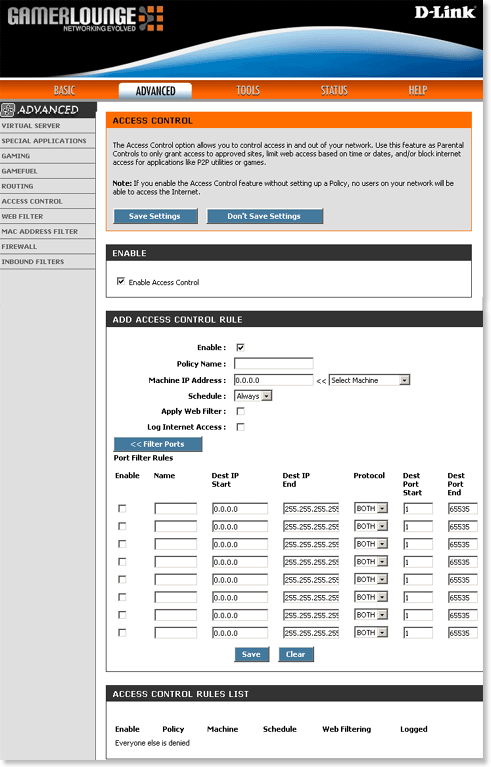
Step 8 Click Save Settings at the top to save the new settings.