To setup recording to the microSD Card, configuration must be performed within the Web Interface of the DCS-942L. This can be done using the Cameras IP address or using the mydlink web portal.
Option 1: mydink Portal
Step 1: Go to www.mydlink.com and log into your account
Step 2: Select your DCS-942L and click on the Settings Tab
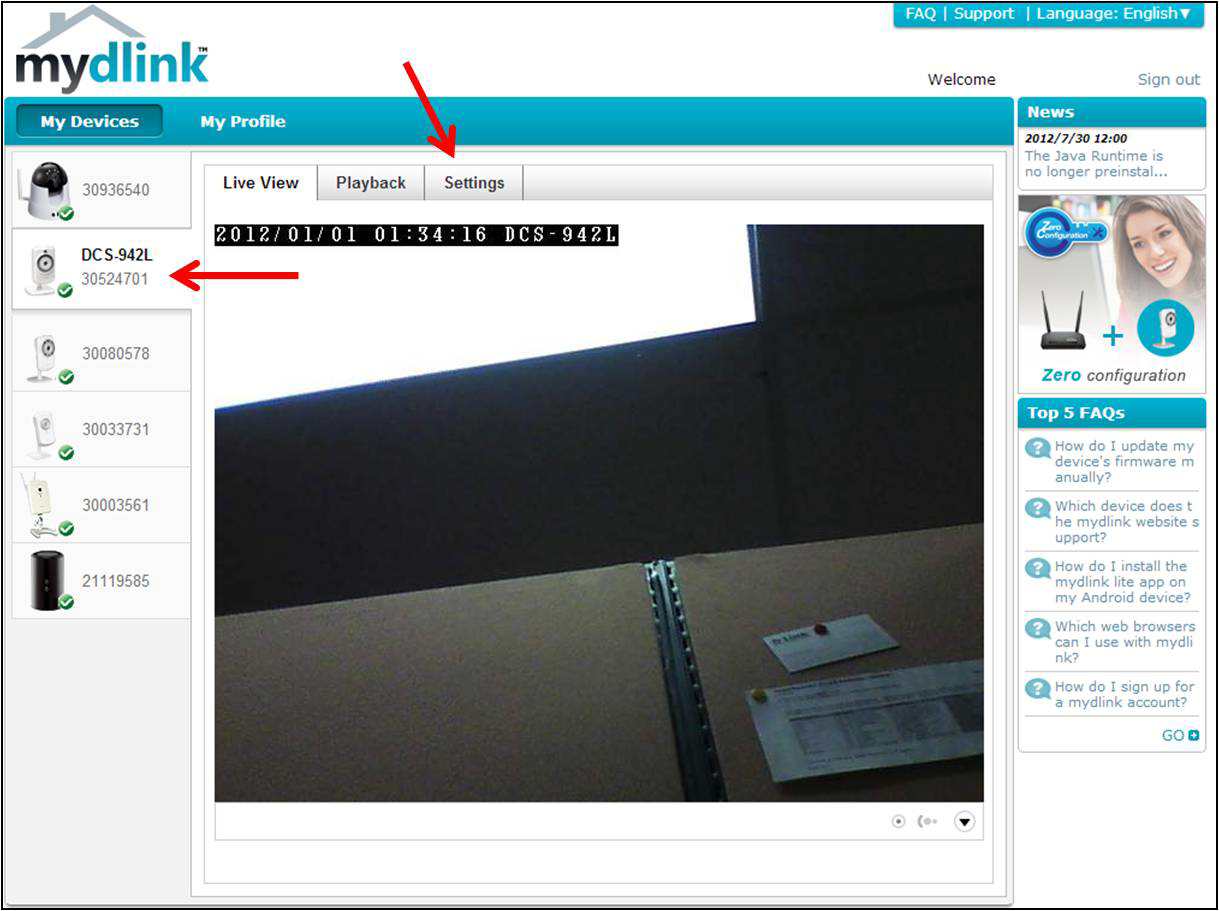
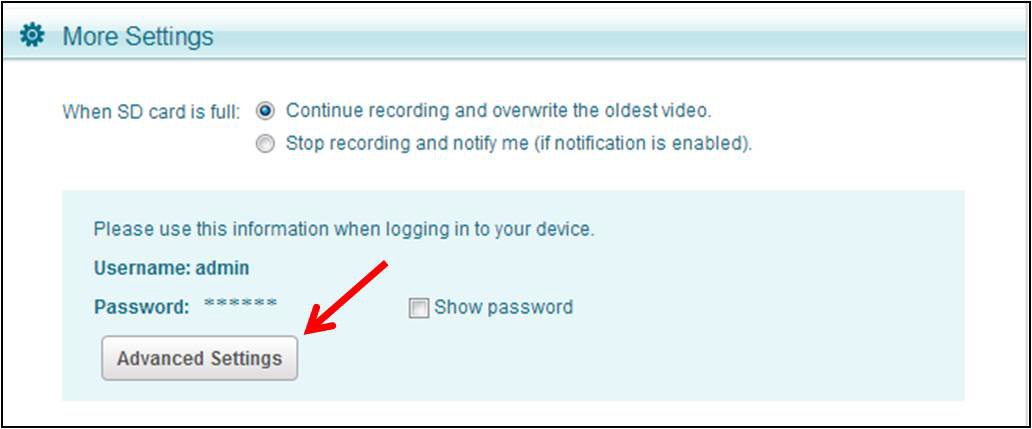
Step 3: Click Advanced Settings
Option 2: Using the Camera IP Address
Note: If you already know the IP address of your DCS-942L, skip to the next section "Configuring your DCS-942L for recording"
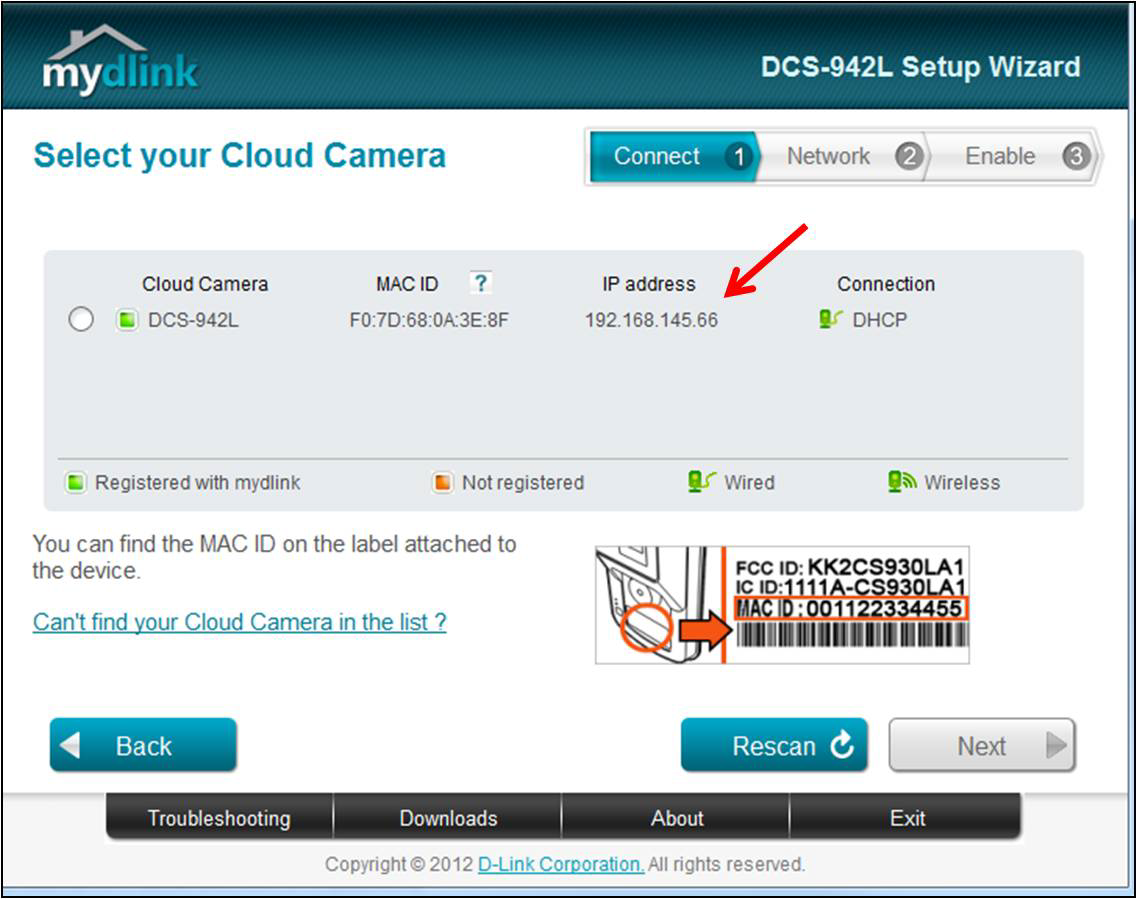
Step 1: Launch the Install Wizard for the DCS-942L
Step 2: Click Next until the wizard searches for your camera
Step 3: When found, record the IP address of the camera you want to configure for recording.
Configuring your DCS-942L for recording
Step 1: Open your internet browser and type the IP address of your DCS-942L into the address bar
Step 2: When prompted, enter your username and password for the camera (The default username is admin and there is no password)
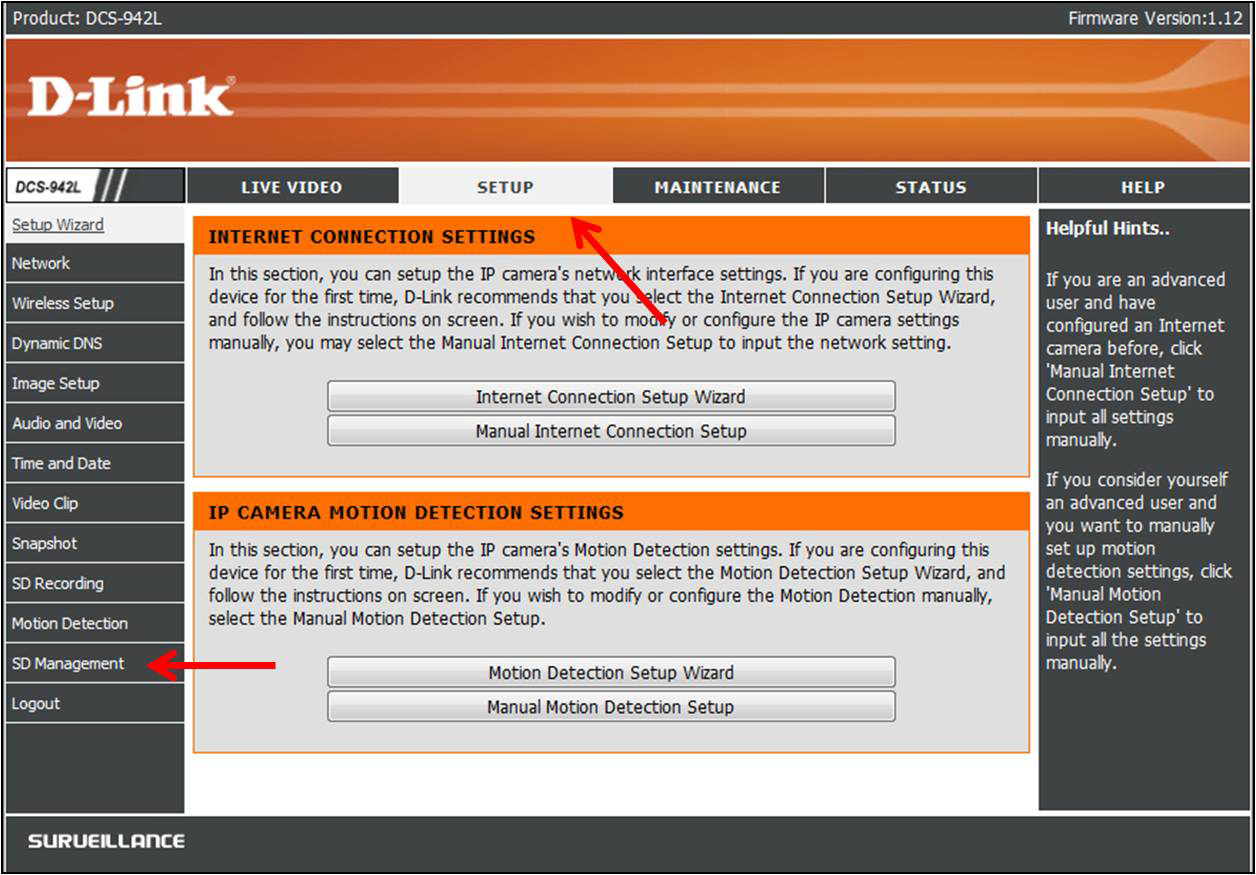
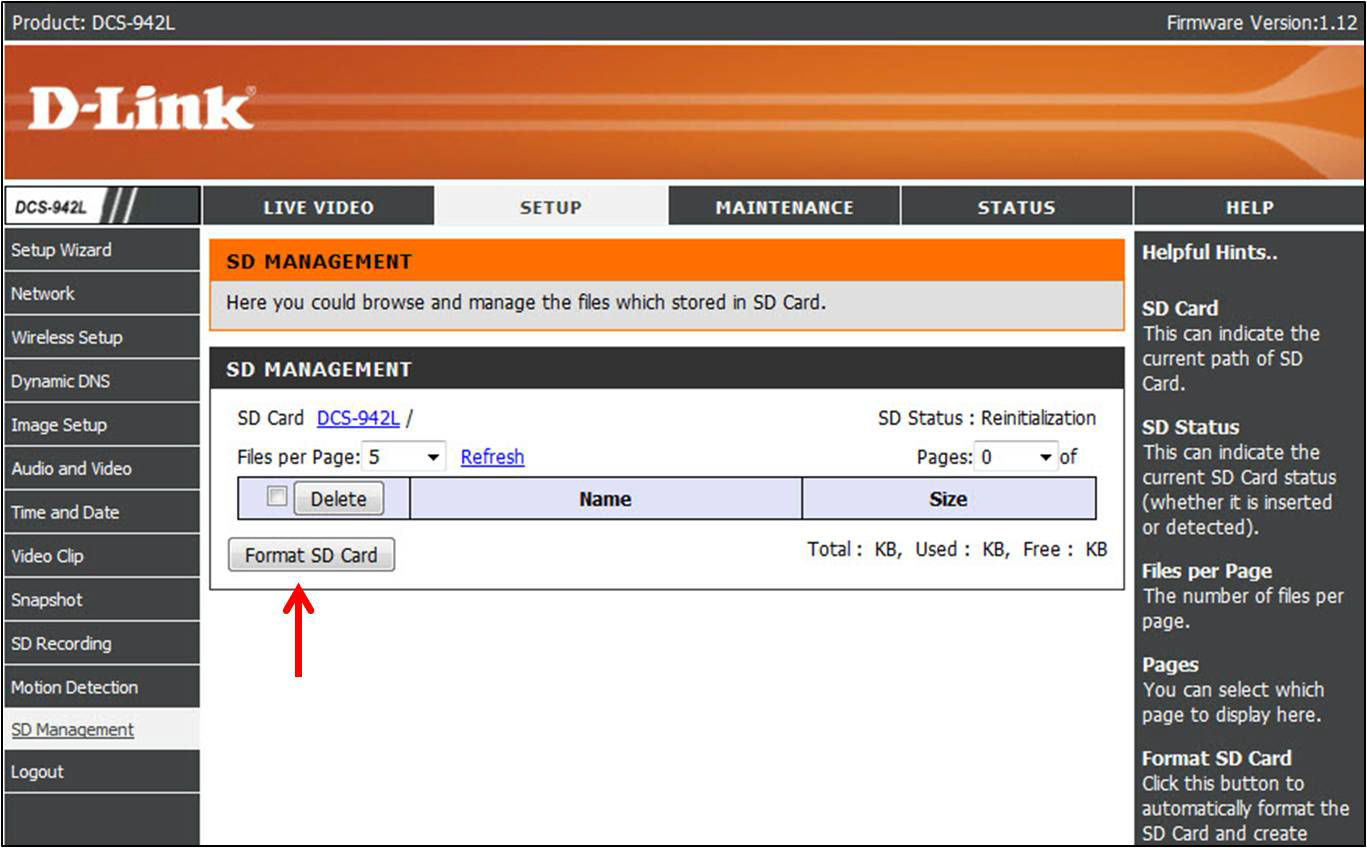
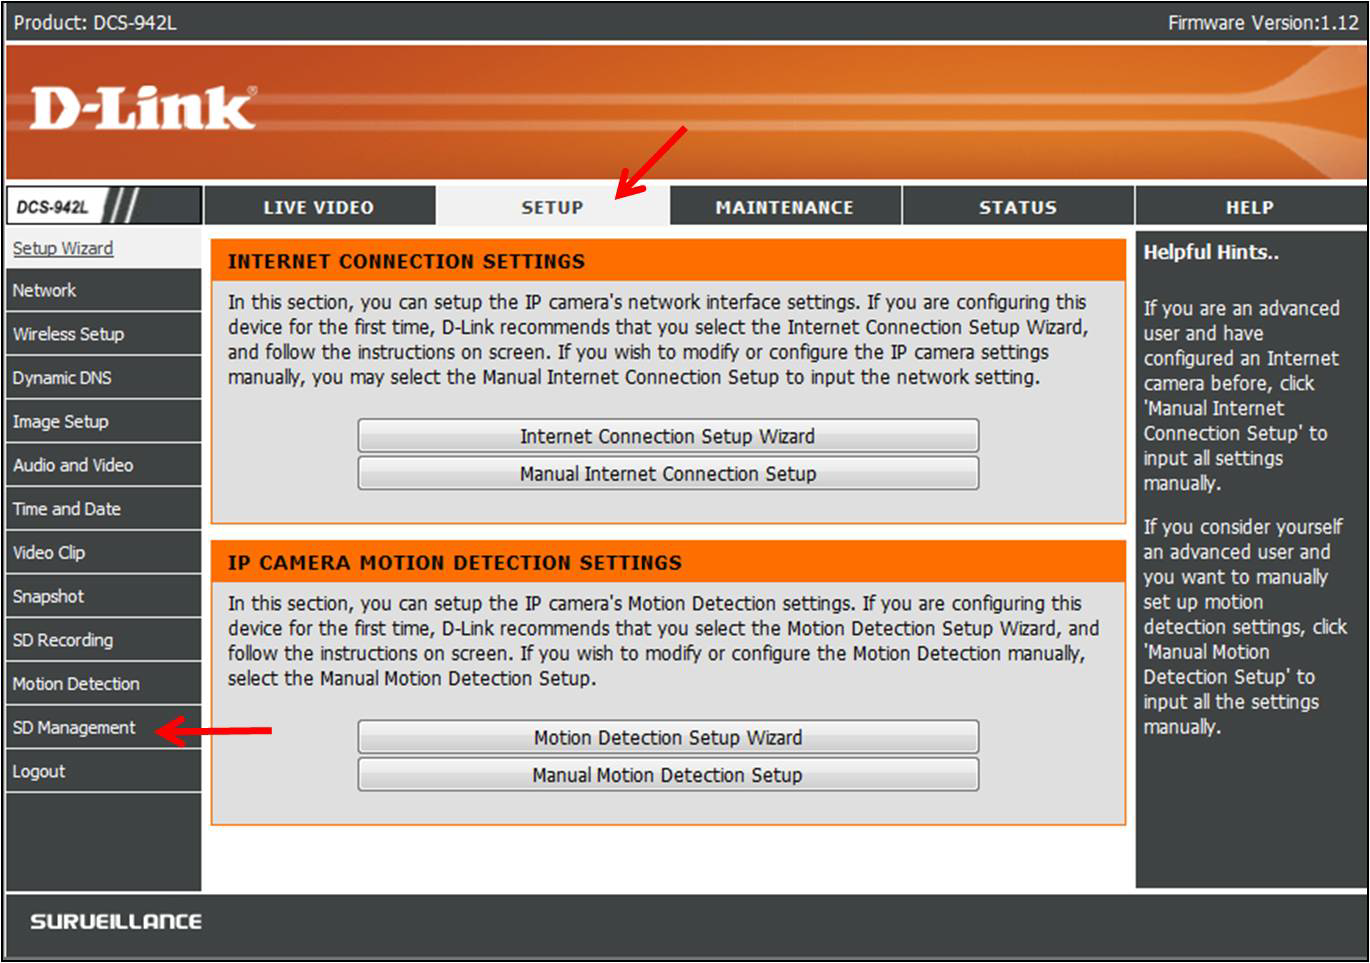
Step 3: Click on the Setup Tab and then click SD Management on the left side
Note: You must format the installed SD card to allow the DCS-942L to read it. Formatting will cause all data on the SD card to be erased.
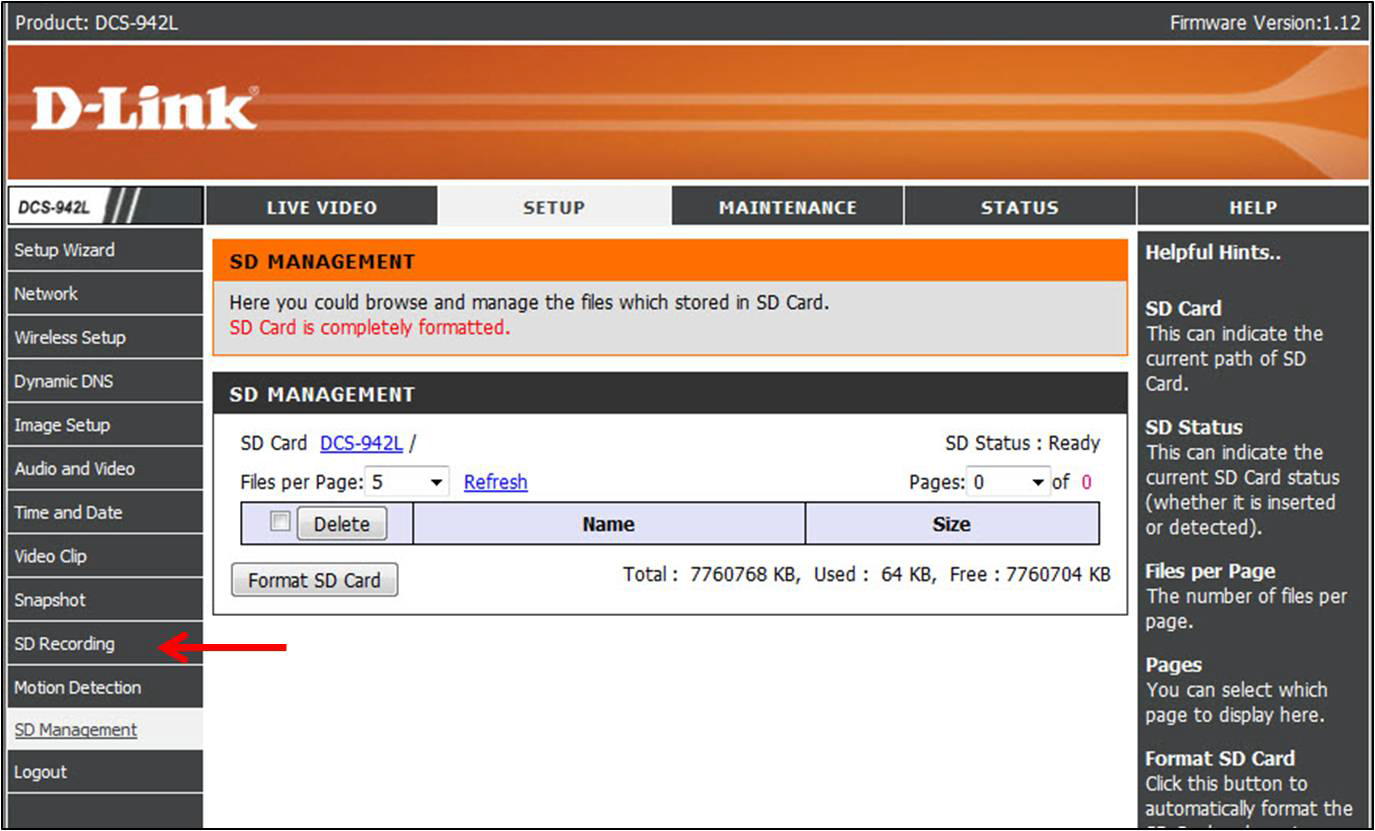
Step 4: Click Format SD Card
Step 5: Click SD Recording
Step 6: Configure recording to the SD
- Check to Enable
- Trigger by:
- Always- Record 24/7
- Motion: Record only when motion is enabled (Note: Motion detection must be configured)
- Schedule: Record on user-defined schedule
- Recording type:
- Snapshot: Record my taking snap shots
- Video: Record by capturing video
- Recording Length: Specify how long each video file will be (1-6 minutes per file)
- SD Card:
- Keep free Space: Specify how much space to leave on the SD Card (Will always leave this much room on SD Card)
- Cyclic: Selecting this option will cause the oldest folder/files to be deleted when space is needed for more recording.
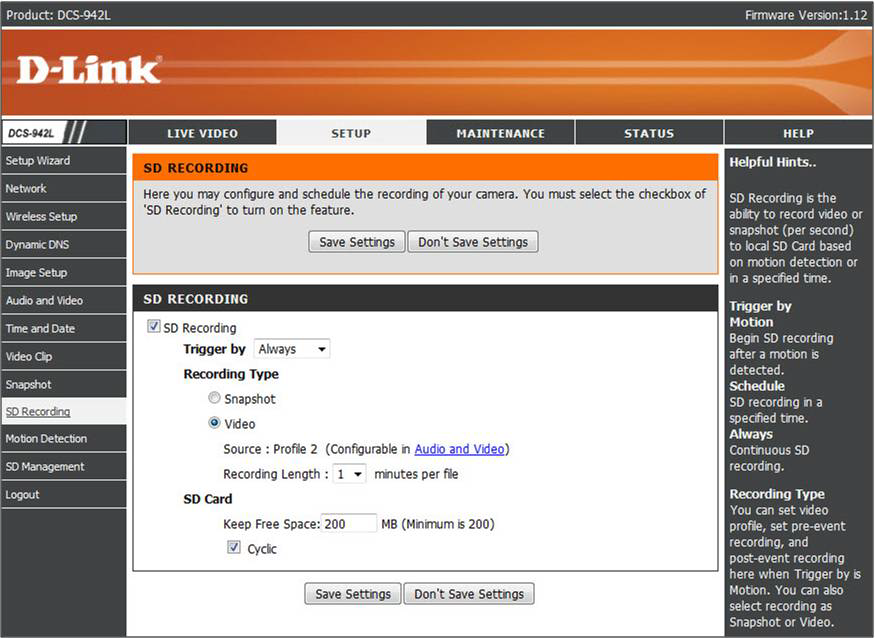
Click Save Settings
Viewing/Playback
Playback can be done directly from the mydlink portal or you can download the files to a computer for local playback.
Viewing on mydlink Portal
Step 1: Log into your mydlink account at
www.mydlink.com
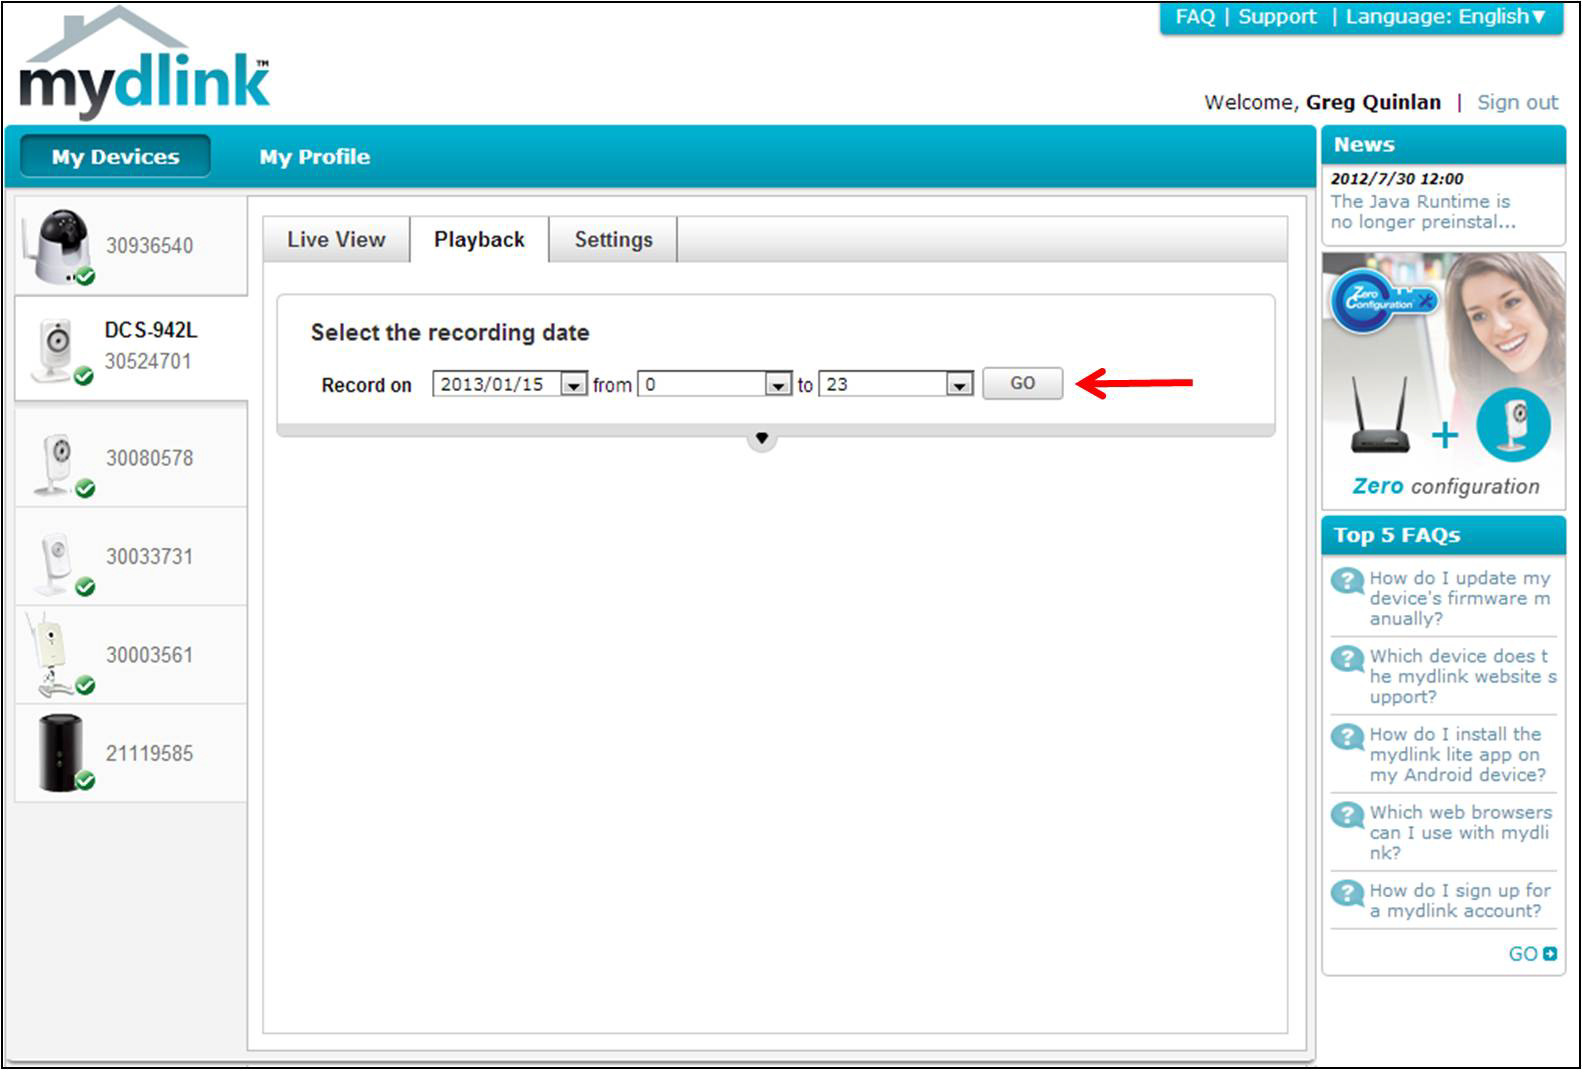
Step 2: Select your DCS-942L
Step 3: Click
Playback
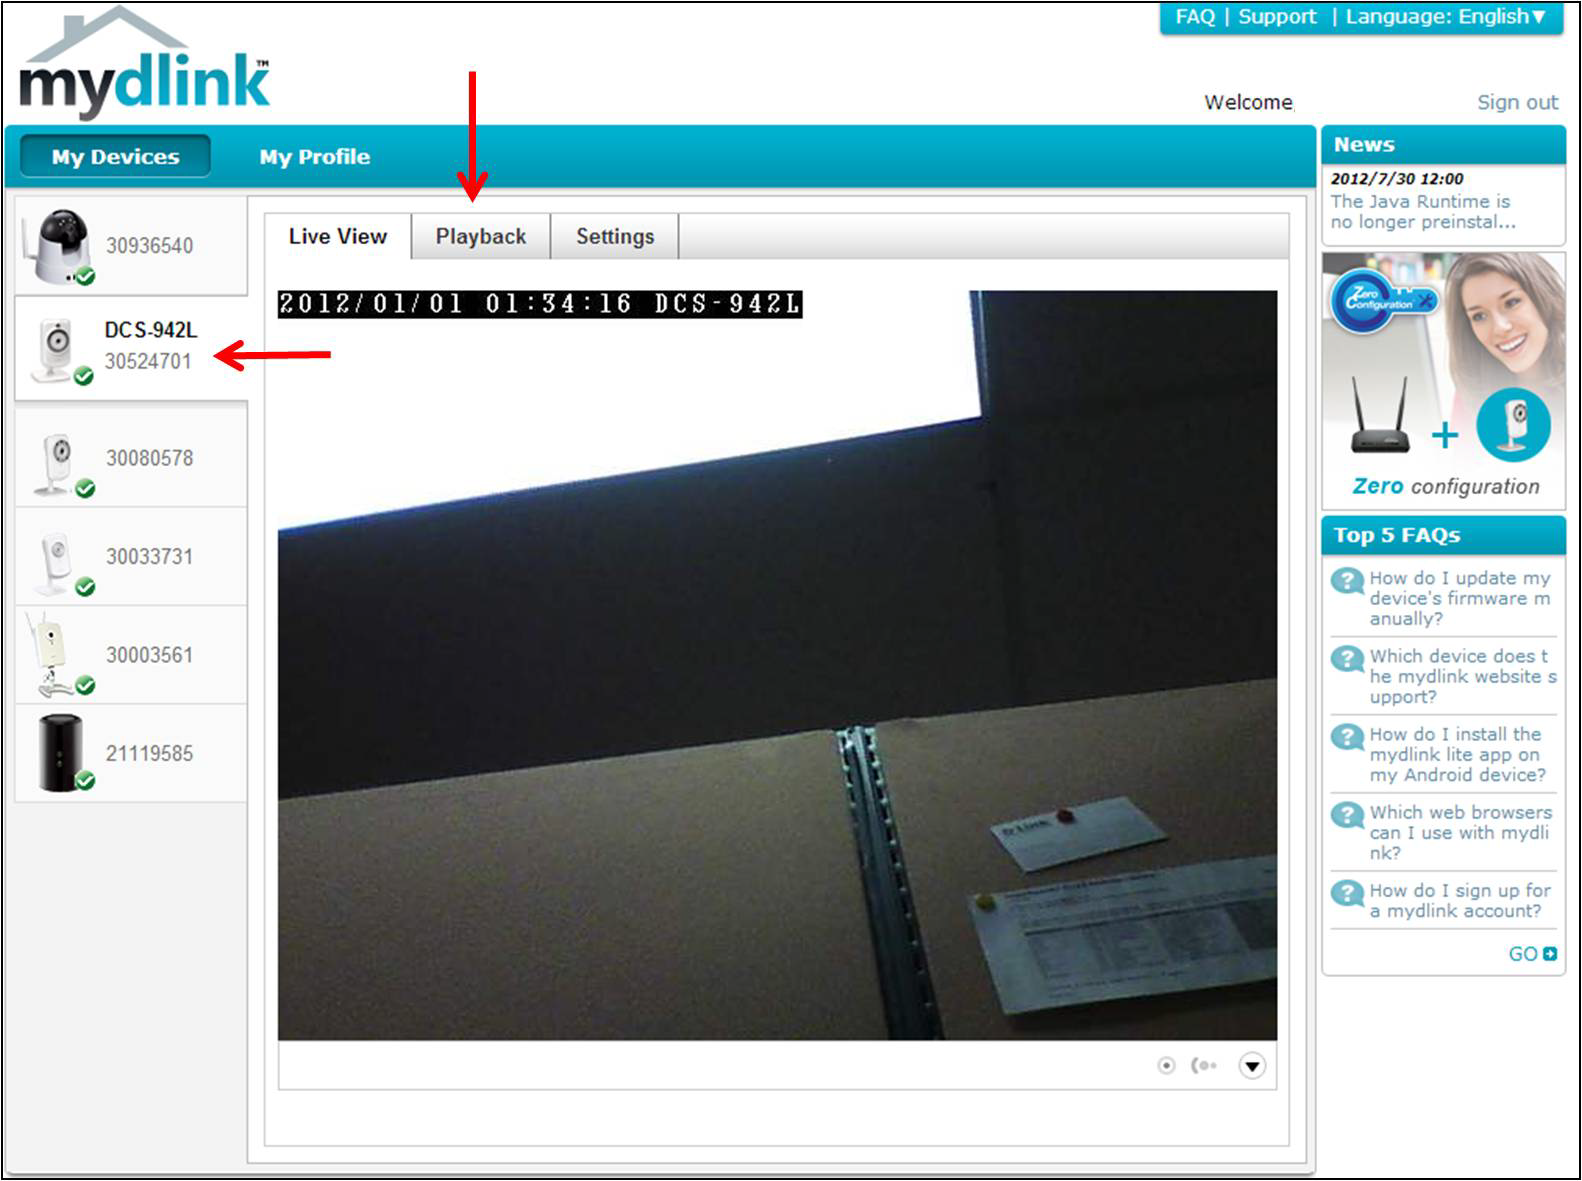
Step 4: Select the record date and Click
GO
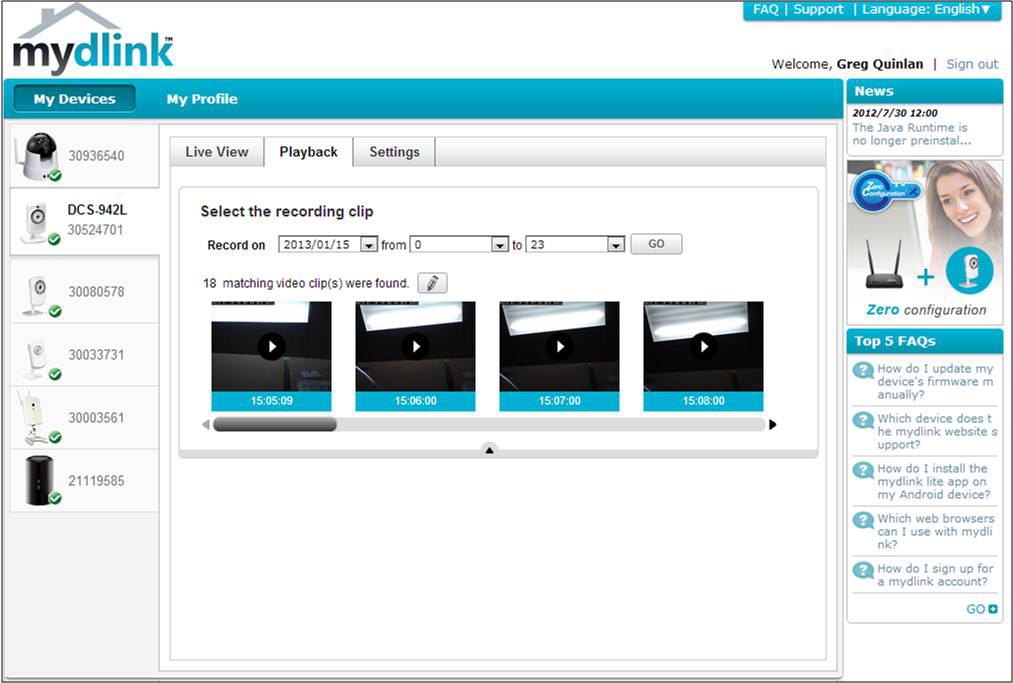
Step 5: Select the recording to playback
Local Playback/Downloading
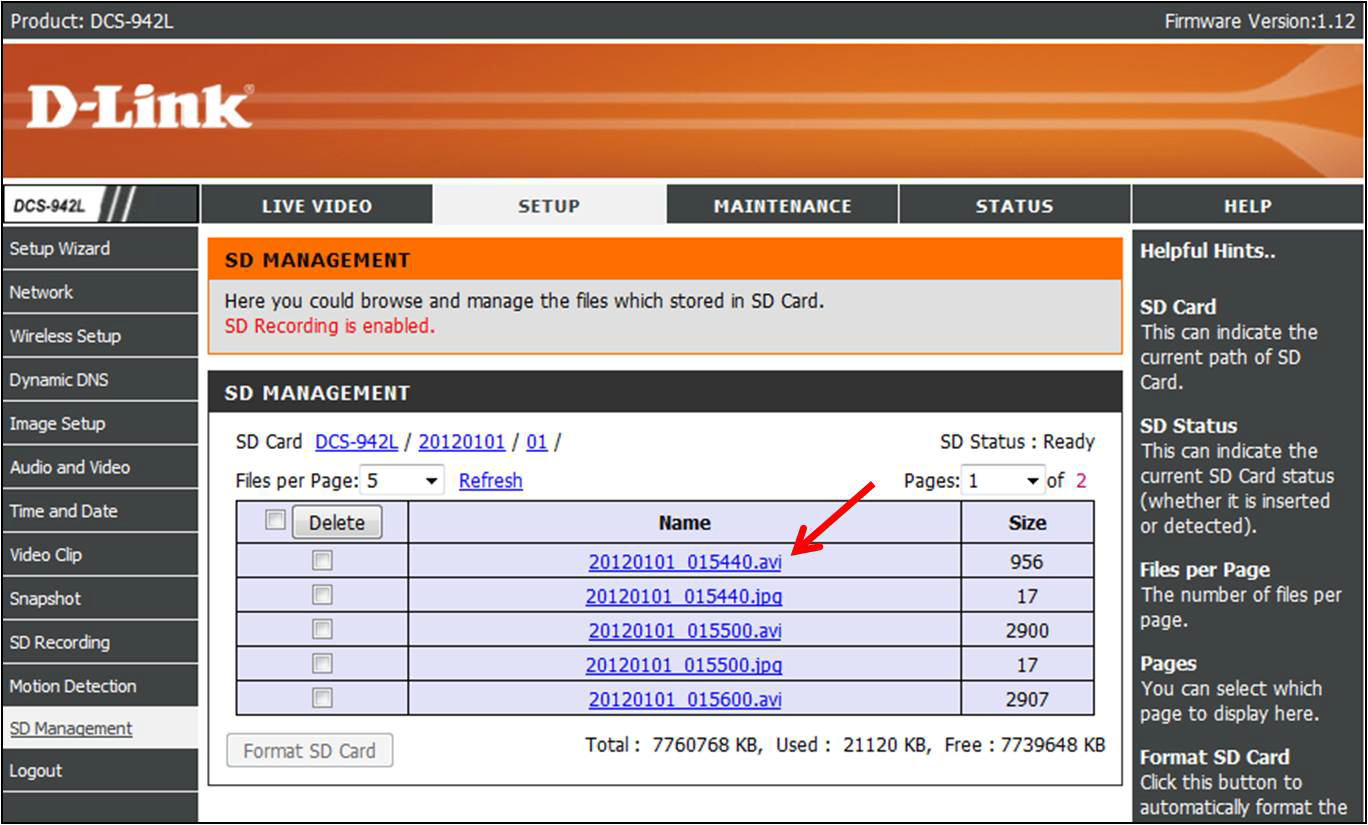
Step 1: Click on the Setup Tab and then SD Management on the left Side
Step 2: Select the day of recording (under Name)
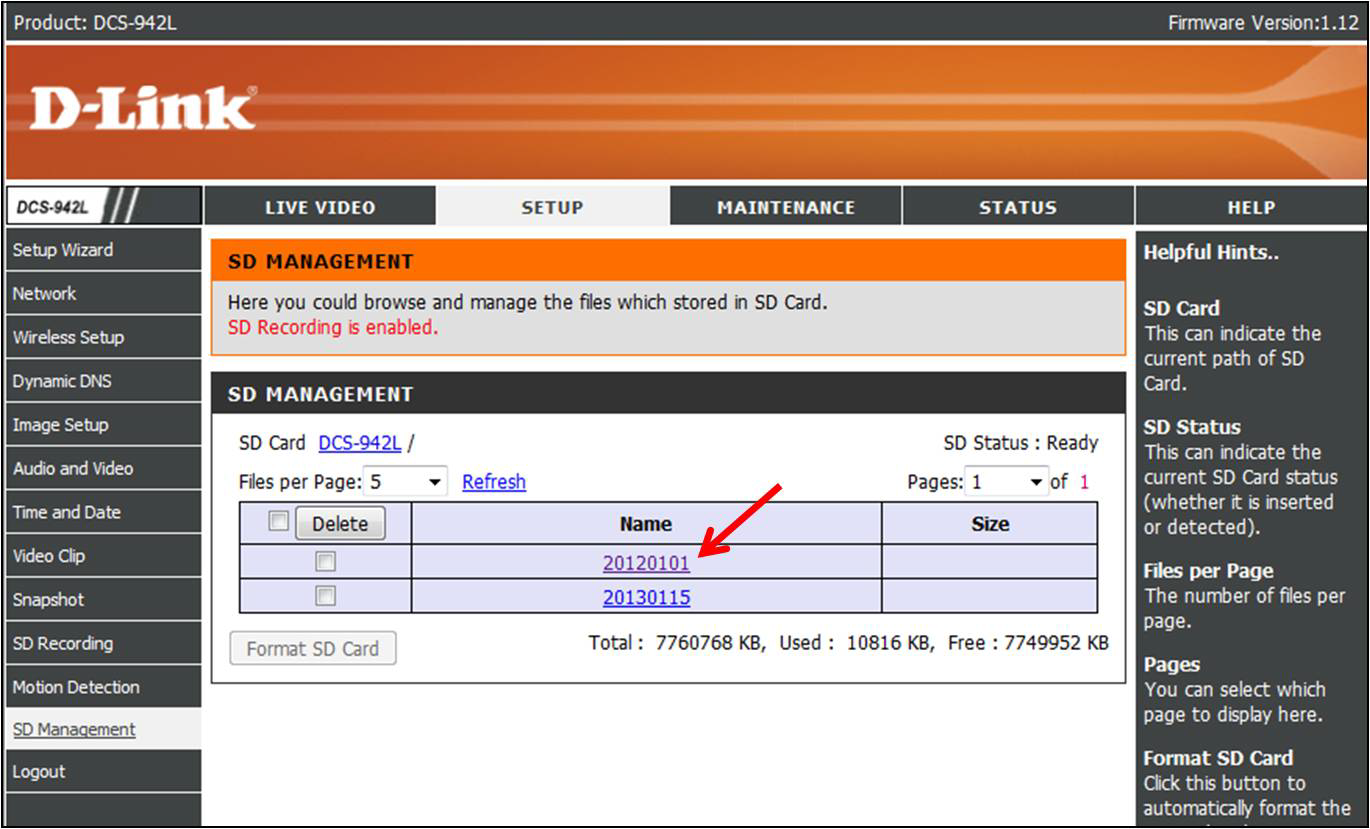
Step 3: Select the file to view/download
Step 4: Choose to open or save the file
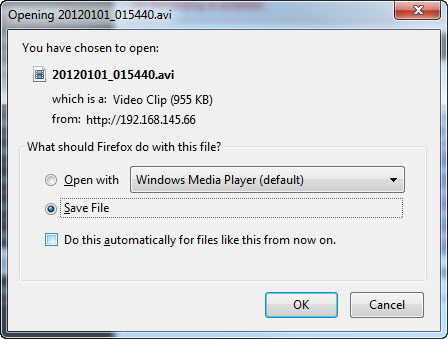
Note: You must have a video player installed on your computer to playback the file (ie. Windows Media Play/VLC)