This FAQ will demonstrate setting up transparent mode for remote desktop for a computer running on the LAN port with a public IP address assigned.
Note: You may consider binding a secondary IP address on one NIC that match the new network segment for this configuration.
Step 1: Open the web browser and type the IP address of the router in the address bar (default is 192.168.1.1) and press Enter.
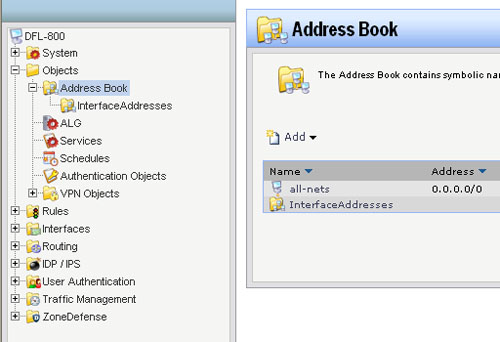
Step 2: On the left side, click on Objects, select Address Book, and select Interface Addresses.
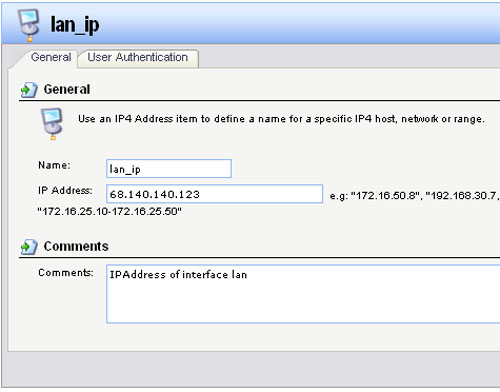
Step 3: Click on lan_ip and change the lan_ip to the public IP address you wish to use, click OK.
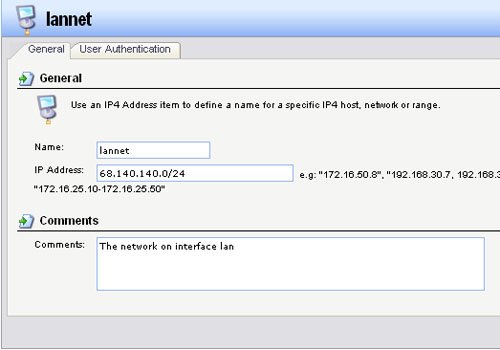
Step 4: Click on lannet and change the lannet to the public network segment, click OK.
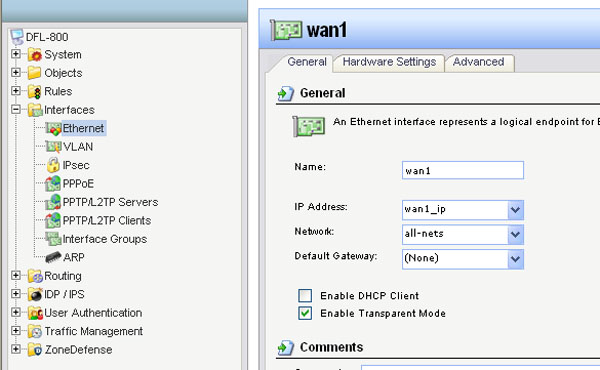
Step 5: Click on Interfaces, select Ethernet and select Wan1 and configure as followed:
- Name: wan1
- IP address: Wan1_ip
- Network: all-nets
- Default Gateway: None
- Enable Transparent Mode: check to enable
Click OK.
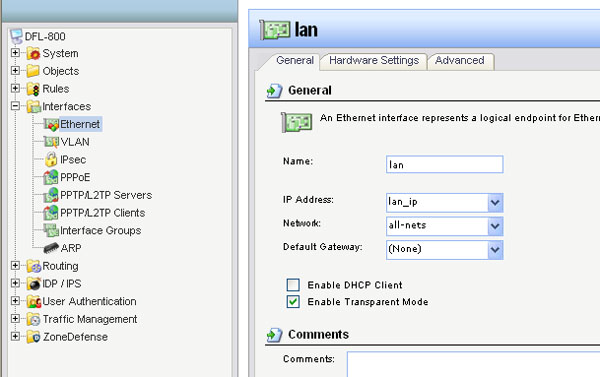
Step 6: Click on Interfaces, select Ethernet and select lan and configure as followed:
- Name: lan
- IP address: lan_ip
- Network: all-nets
- Default Gateway: None
- Enable Transparent Mode: check
Click OK.
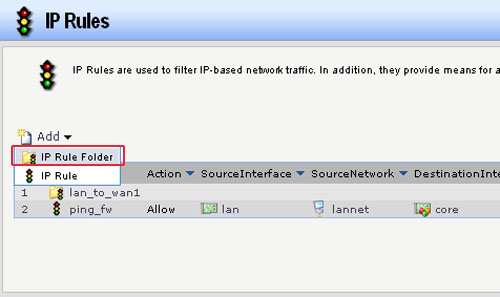
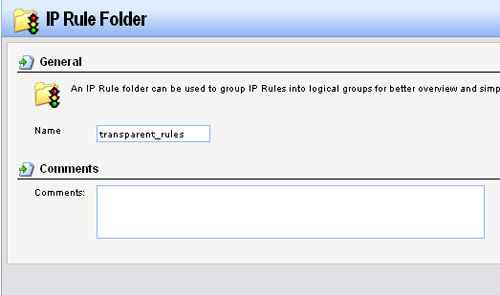
Step 7: Click on Rules, select IP Rules, select Add and choose IP Rule Folder.
Step 8: Name the IP rule folder as desired. Click OK.
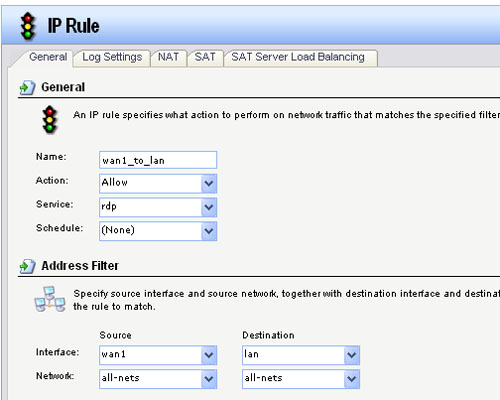
Step 9: Click Add to add a new IP Rule and configure the new IP Rule as followed:
- Name: enter a name as desired
- Action: Allow
- Service: rdp
- Schedule: None
- Source Interface: Wan1
- Source Network: all-nets
- Destination Interface: lan
- Destination Network: all-nets
Click OK.
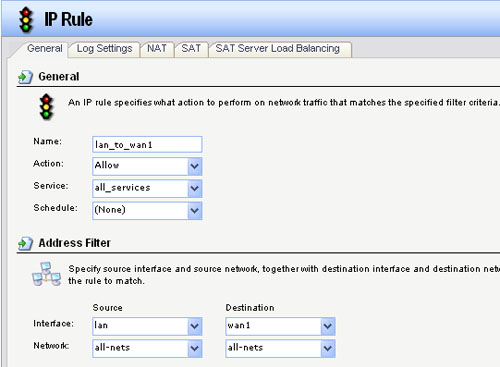
Step 10: Click Add to add new IP Rule and configure the new IP Rule as followed:
- Name: enter a name as desired
- Action: Allow
- Service: all_services
- Schedule: None
- Source Interface: lan
- Source Network: all-nets
- Destination Interface: Wan1
- Destination Network: all-nets
Click OK.
Step 11: Click on Configuration tab and select Save and Activate. Click OK to activate and save the changes.
