Note: This example will demonstrate how to configure a LAN-to-LAN IPSec VPN tunnel
between two DIR-130/330.
In this example:
Local Network is on 192.168.0.0/24
Remote Network is on 192.168.1.0/24
Configuration of Local Network
Step 1: Open your web browser and type in the IP address of the router (192.168.0.1 by default). Enter the username (admin by default) and password (blank by default), and then click OK.
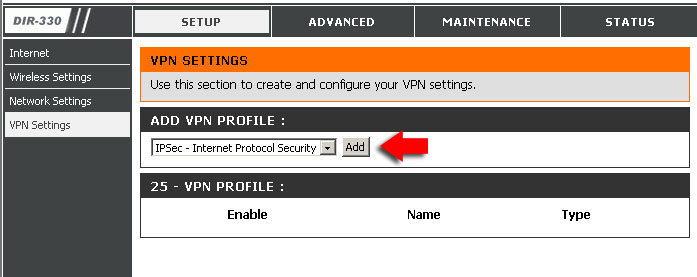
Step 2: Click on SETUP and select VPN SETTINGS. Choose IPSec from the ADD VPN PROFILE dropdown menu and click Add.

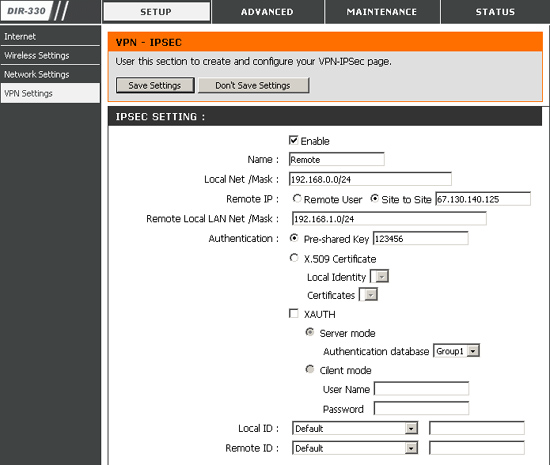
Step 3: Configure the IPSec VPN as followed:
- Enable Settings: check box to enable
- Name: enter a name for the VPN
- Encapsulation Mode: Tunnel
- Remote IP: select Site to Site and enter the remote Gateway
- Remote Local LAN Net /Mask: enter the remote LAN network and Subnet Mask
- Authentication Protocol: enter a Pre-shared Key (must be the same as the Remote Side)
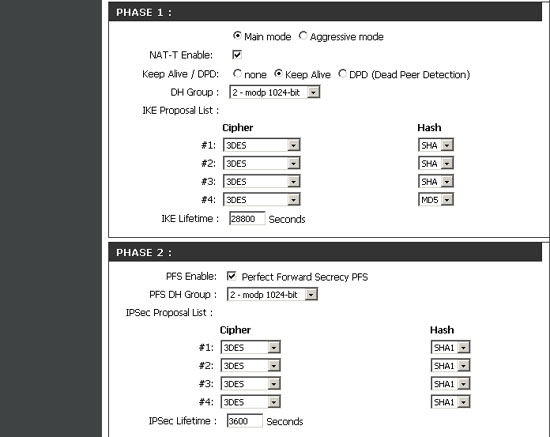
- Phase 1 IKE Proposal List: leave as is
- NAT-T Enabled: leave as is
- PFS: check to enable
- Phase 2 IPSec Proposal List: leave as is

Step 4: Click Save Settings.
Configuration of Remote Network
Note: Both sides cannot be on the same subnet.
Step 1: Open your web browser and type in the IP address of the router
(192.168.0.1 by default). Enter the username (admin by default) and password
(blank by default), and then click OK.
Step 2: Click on SETUP and select VPN SETTINGS. Choose
IPSec from the ADD VPN PROFILE dropdown menu and click Add.
Step 3: Configure the IPSec VPN as followed:
- Enable Settings: check box to enable
- Name: enter a name for the VPN
- Encapsulation Mode: Tunnel
- Remote IP: select Site to Site and enter the remote Gateway
- Remote Local LAN Net /Mask: enter the remote LAN network and Subnet Mask
- Authentication Protocol: enter a Pre-shared Key (must be the same as the
Remote Side)
- Phase 1 IKE Proposal List: leave as is
- NAT-T Enabled: leave as is
- PFS: check to enable
- Phase 2 IPSec Proposal List: leave as is

Step 4: Click Save Settings.
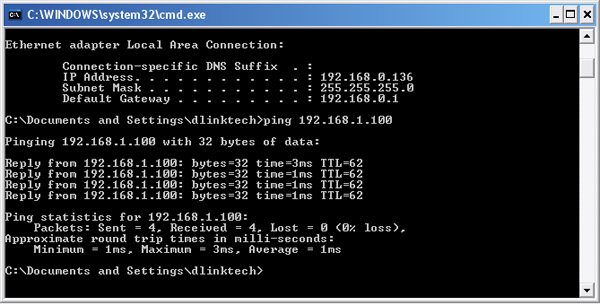
Step 5: The tunnel should be established. To verify connection, open a command prompt and ping to a client on the other network.