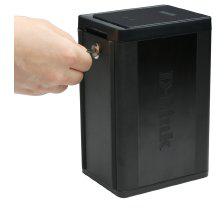
Step 1: Please install at least one 3.5 SATA hard drive before turning on the NVR. Use the key to unlock the faceplate from the bottom of the NVR.
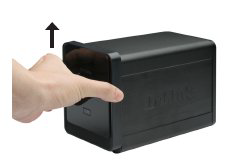
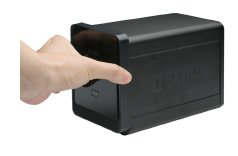
Step 2: Slide the faceplate up until it unlatches from the device.
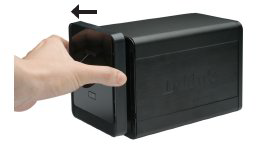
Step 3: Once the faceplate is unlatched, pull it off the device, exposing the drive bays.
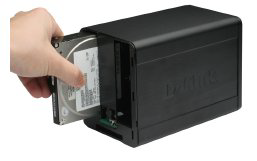
Step 4: Insert a 3.5 SATA hard drive into an available drive bay. Make sure to align the drive connector to the SATA connector on the bottom edge inside the drive bay of the NVR. Gently push the drive in until it connects. When a drive is inserted properly, you will feel it seat into the connector. Some hard drives that are thin or oddly shaped may need to be guided carefully into position. If a drive is not properly seated, the LED will not illuminate once the device has been powered on.
Optional: When installing an optional second Hard Disk, please repeat Step 4. To avoid data incompatibility in RAID 1 operation, use identical SATA drives from the same manufacturer. Formatted drive capacity for RAID 1 operation is dependant on the Hard Disk with the lowest capacity.
Step 5: Attach the faceplate to the front of the device.
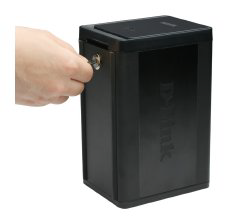
Step 6: Lock the faceplate to secure the Hard Disks.