Step 1: Log into your camera through the web interface.
Step 2: Enable Motion Detection
Step 3: Select the Setup tab.
Step 4: Select Event Setup on the left hand side.
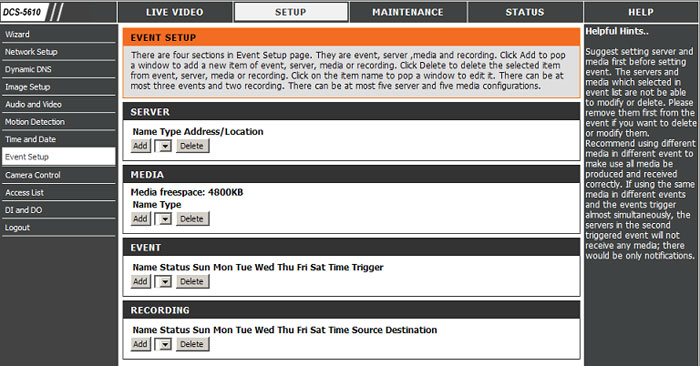
Step 5: Click Add under SERVER.

Step 6: Enter the desired Server name in the field provided

Step 7: Select Network Storage and enter your Network storage information in the fields provided.
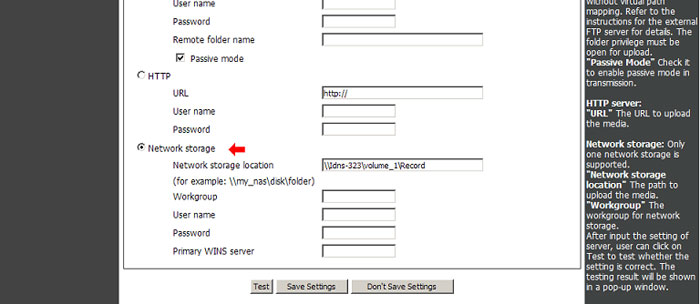
Step 8: Click Save Settings.
Note: Test can be used to verify a working folder path on your NAS.
Step 9: Click Add under MEDIA.

Step 10: Enter the Media Name in the field provided.
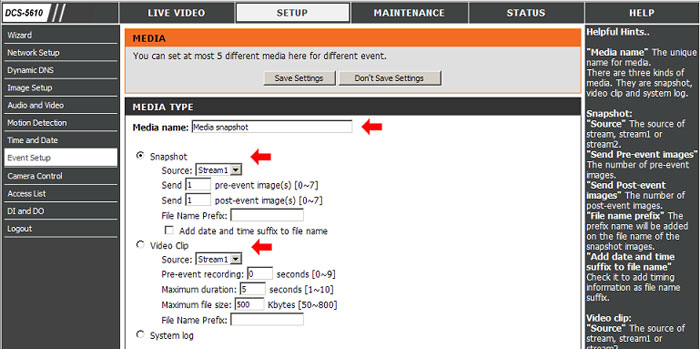
Step 11: Click the Snapshot radio button or Video Clip and configure the settings
Step 12: Click Save Settings.
Step 13: Click Add under EVENT.

Step 14: Under EVENT enter the Event Name in the field provided and check the Enable this event box.
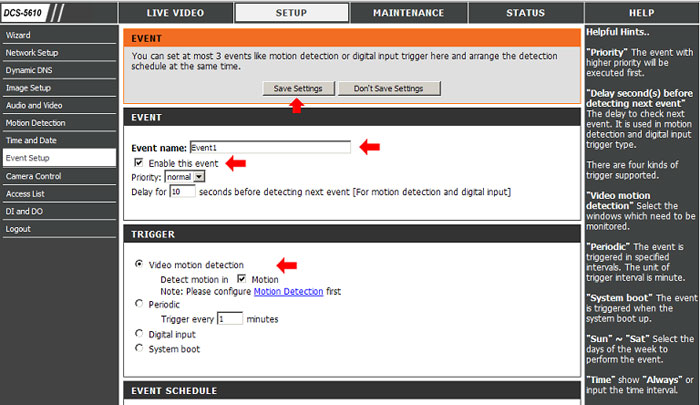
Step 15: Now under TRIGGER click the Video motion detection radio button and check "Detect motion in" box for the motion detection windows that will monitored during this event.
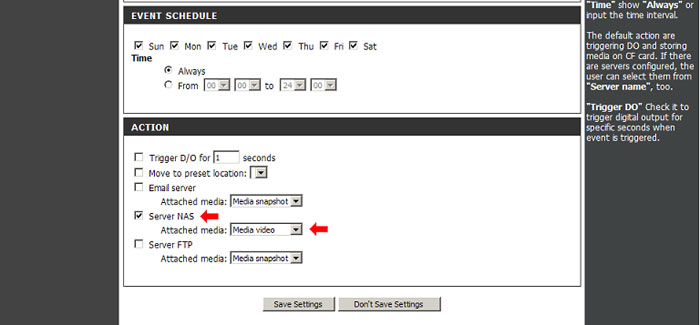
Note: EVENT SCHEDULE is set to all the time by default.
Step 16: Now under ACTION check the box for the server created in Step 6 and drop-down to the Media name created in Step 10.
Step 17: Click Save Settings.