Step 1: Launch D-ViewCam and click Schedule Configuration

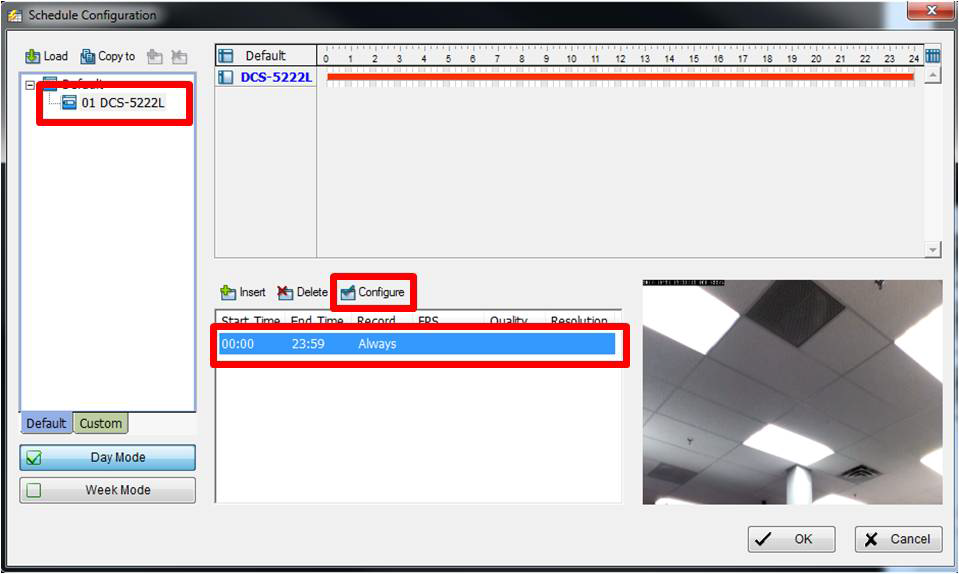
Step 2: Select the camera(s) you want to apply the recording schedule to, select or create a schedule (by default it is 24 Hours) and click Configure
Step 3: Under Mode, ensure Always Record is selected
Step 4: Under the Time Section, specify the time when you want the recording to occur and click OK.
Note: If you want to record Audio, ensure to select "Record Audio" from the audio section
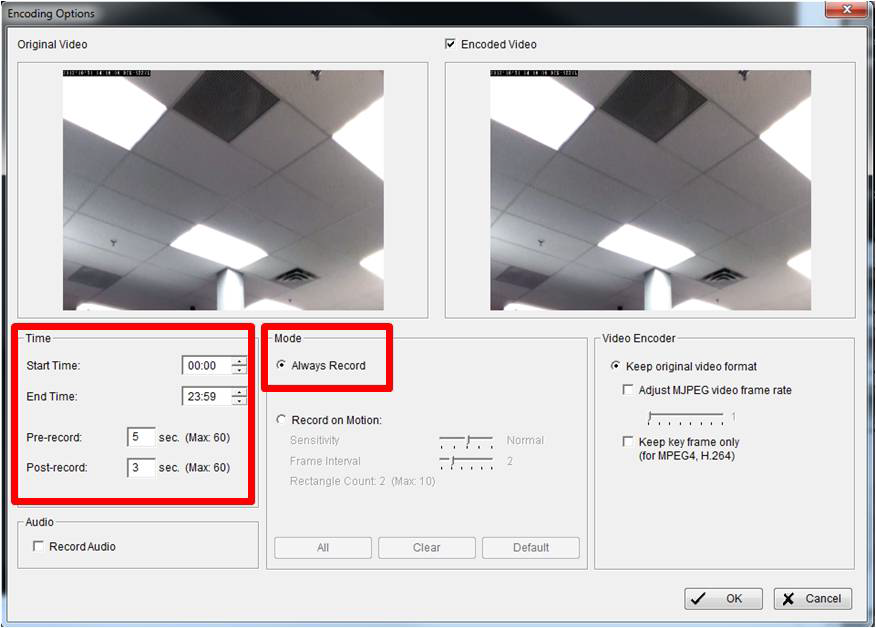
Click OK to close the Encoding Options and Click OK again to Close the Schedule Configuration.
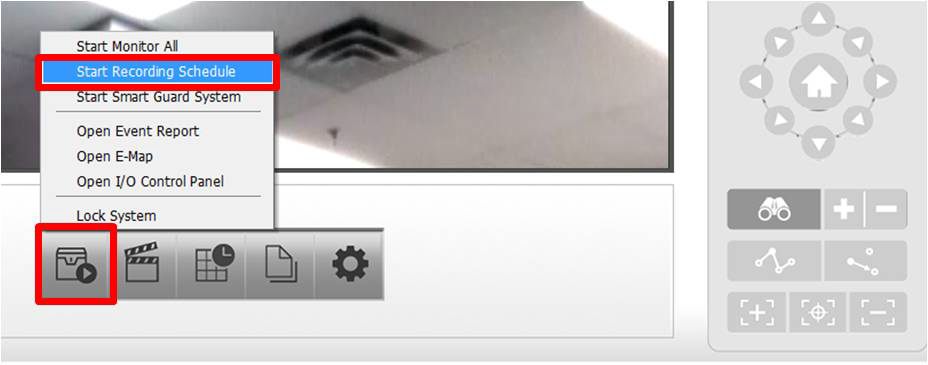
Step 5: Click the Start Menu and click Start Recording Schedule
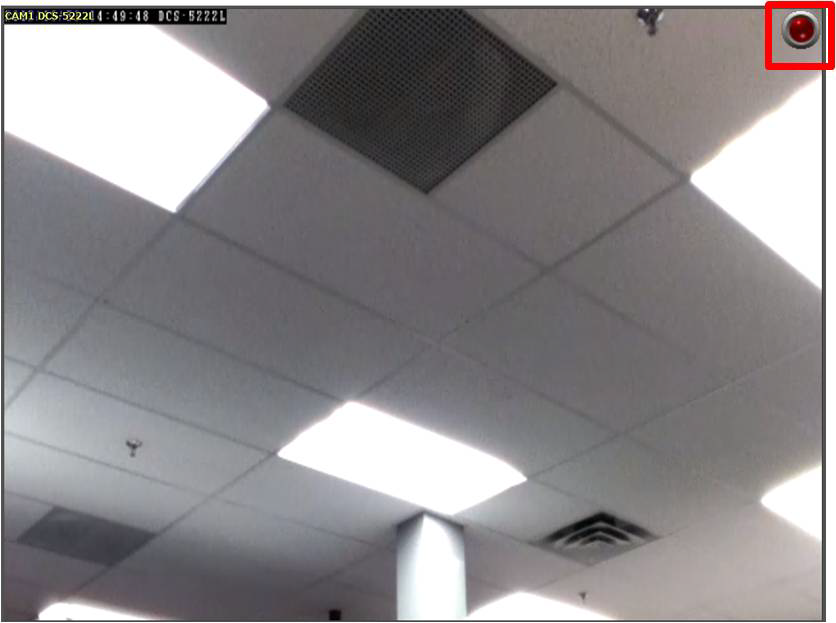
Note: A Red circle will appear in the top right corner of each camera with Recording Configured. This indicates that it is recording.