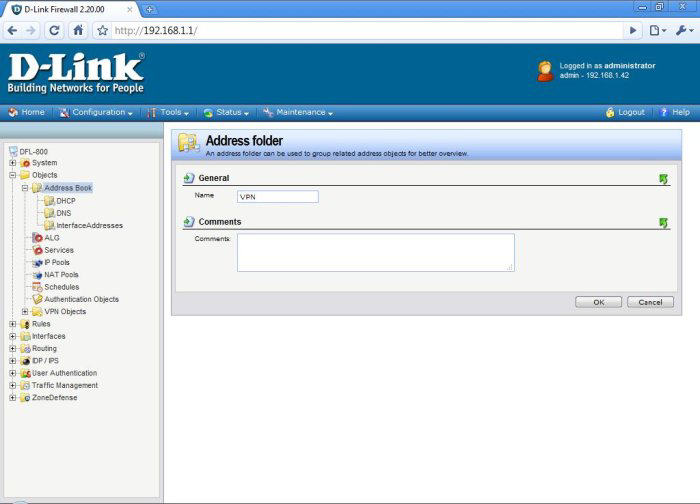
Step 1: Lets begin by navigating to the Address Book by choosing Objects->Address Book.
Step 2: Please Click Add->IP Folder and create a folder to hold your L2TP Over IPSec IP Address Objects, in this example it is called VPN.
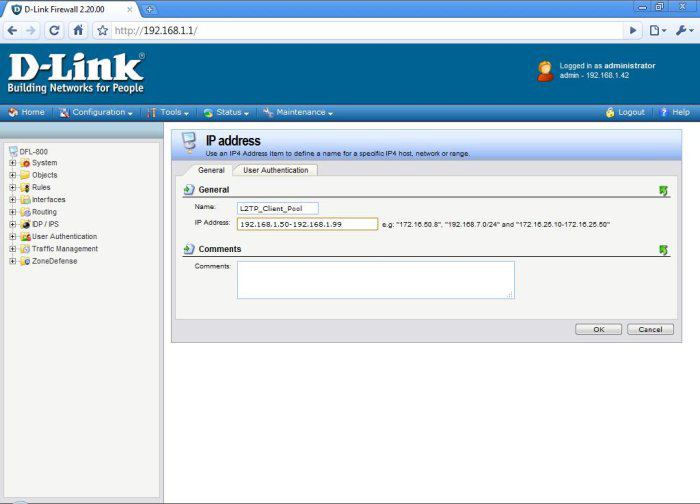
Step 3: Then click Add->IP4 Address to add an IP Object to assign L2TP client IPs from, In this example it is called L2TP_Client_Pool and is 192.168.1.50-192.168.1.99.
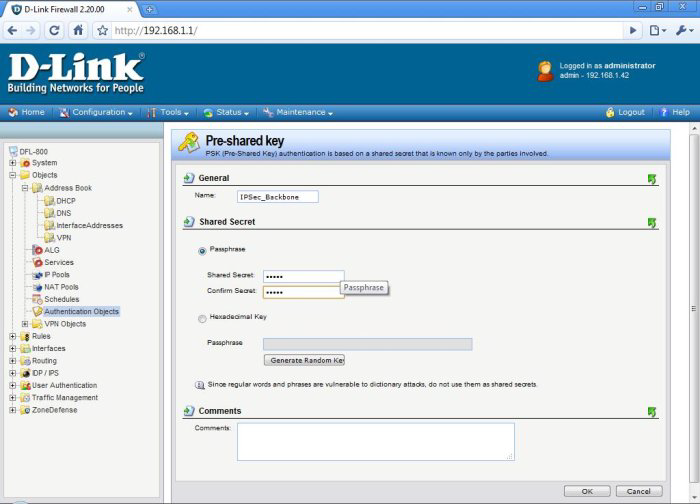
Step 4: Navigate to Authentication Objects by choosing Objects->Authentication Objects.
Step 5: Click Add->Pre-shared key, for our example I named it IPsec_Backbone and used a secret of dlink.
Step 6: Please go to IPSec Servers by clicking Interfaces->IPsec.
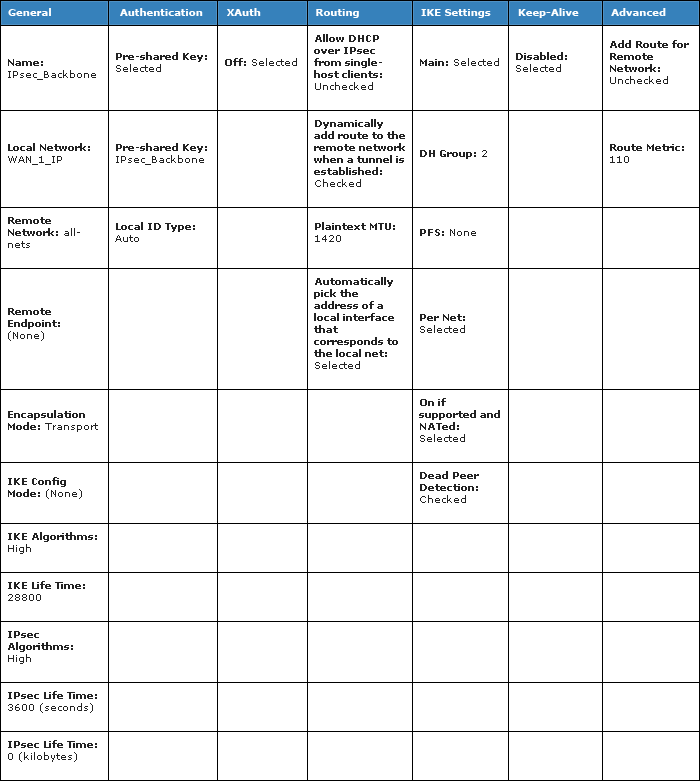
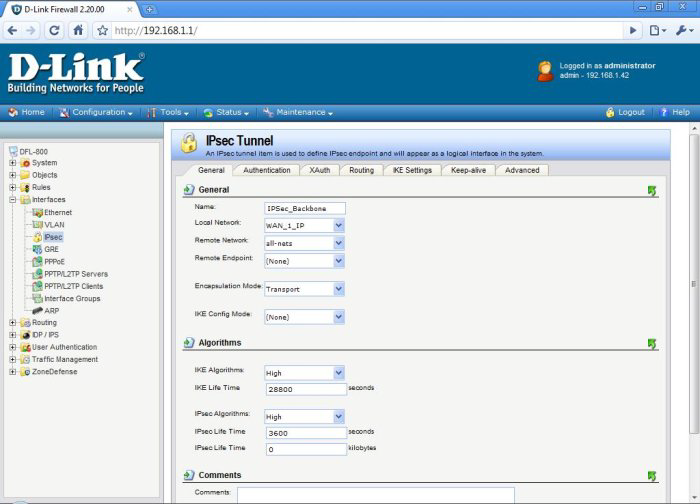
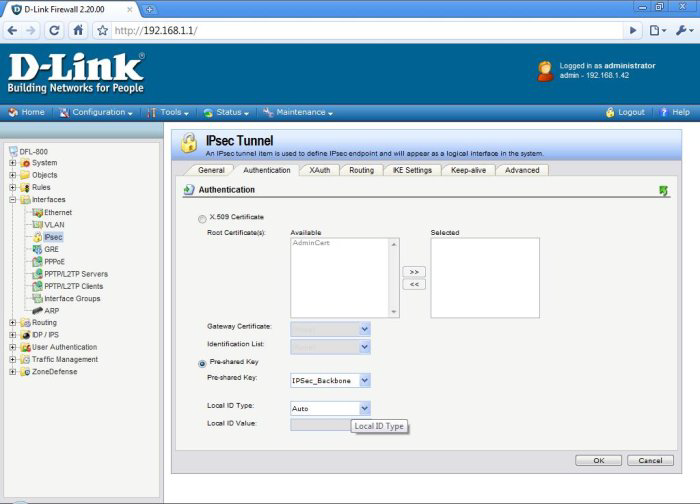
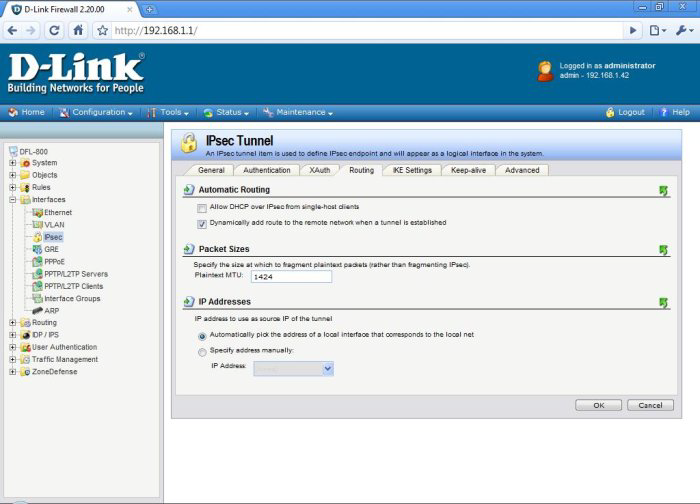
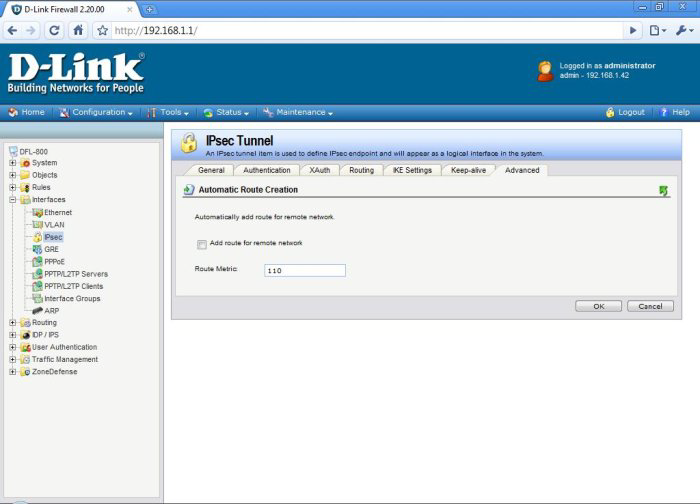
Step 7: Add an IPsec Server by clicking Add->IPsec Tunnel, the nesccesarry settings are in the chart below.
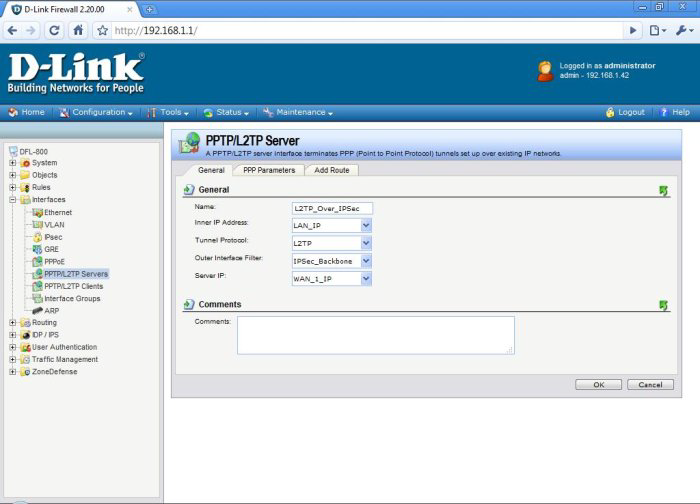
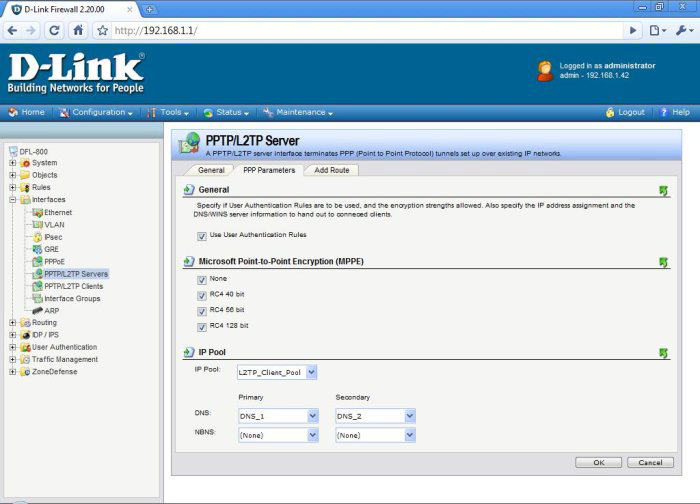
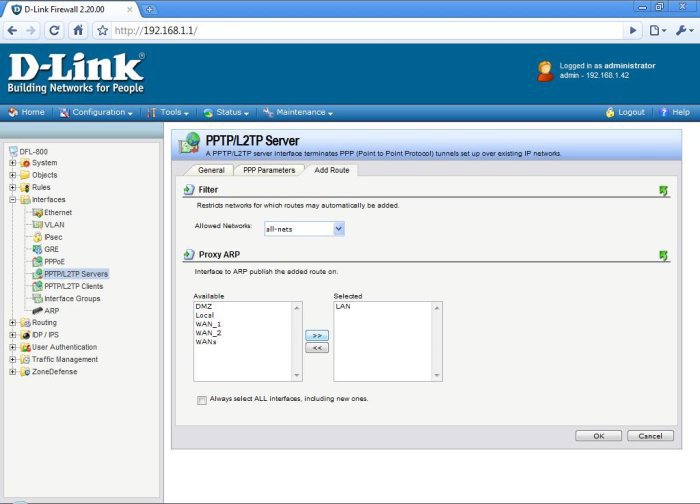
Step 8: Navigate to L2TP Servers by clicking Interfaces->PPTP/L2TP Servers.
Step 9: Add an L2TP Server by choosing Add->PPTP/L2TP Server. Please match the below settings.

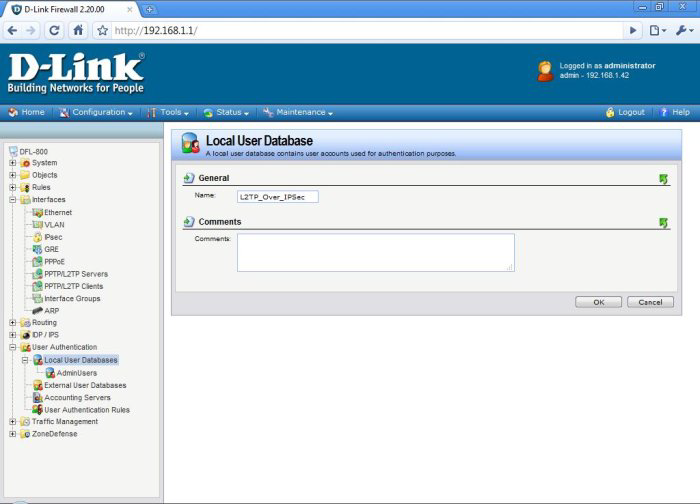
Step 10: Browse to User Databases by choosing User Authentication->Local User Databases.
Step 11: Add a User Database by clicking Add->Local User Database. Name it L2TP_Over_IPsec.
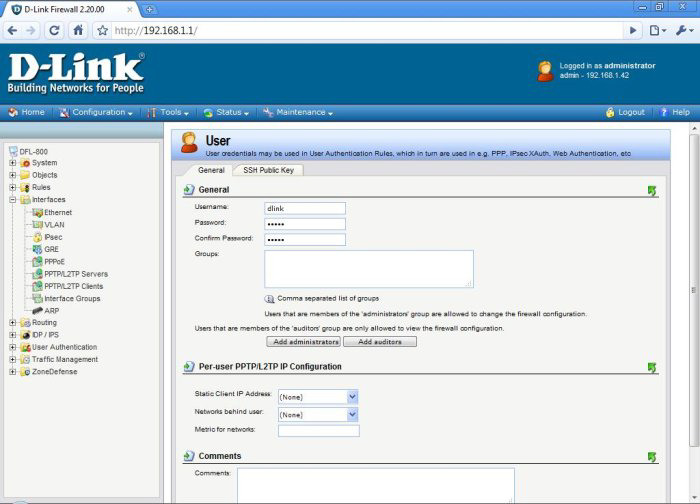
Step 12: Add a User by clicking Add->User. Please assign a Username and Password of your choice.
Step 13: Navigate to User Authentication Rules by clicking User Authentication->User Authentication Rules.
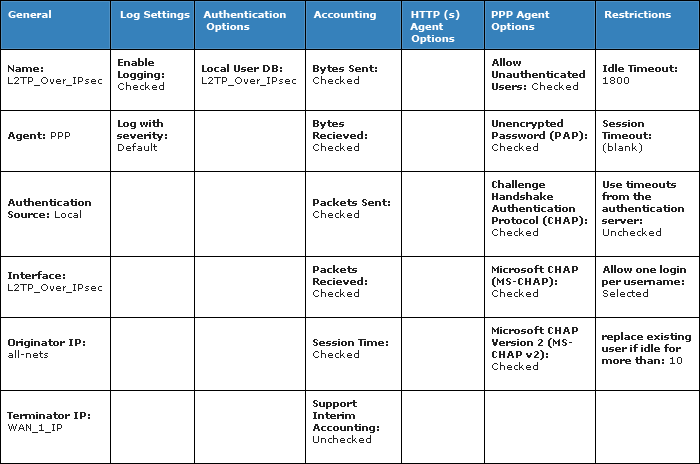
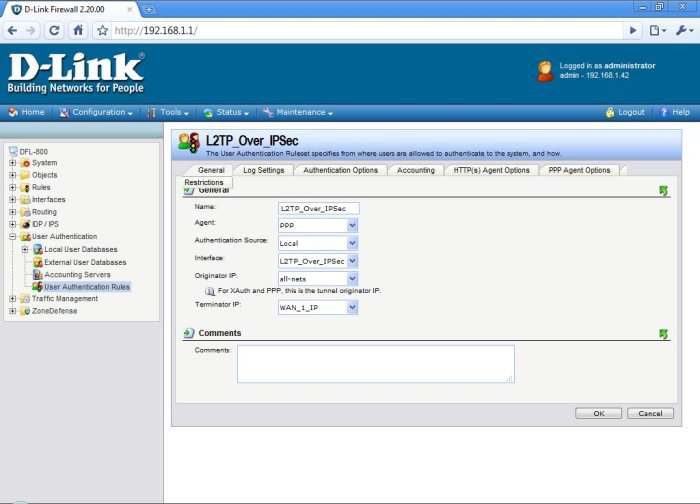
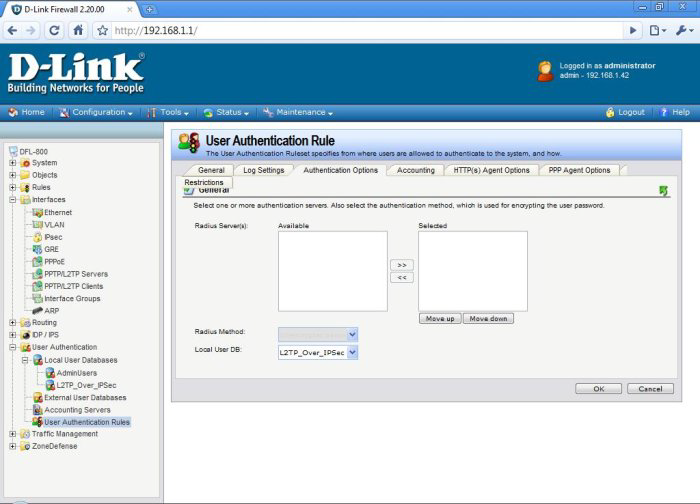
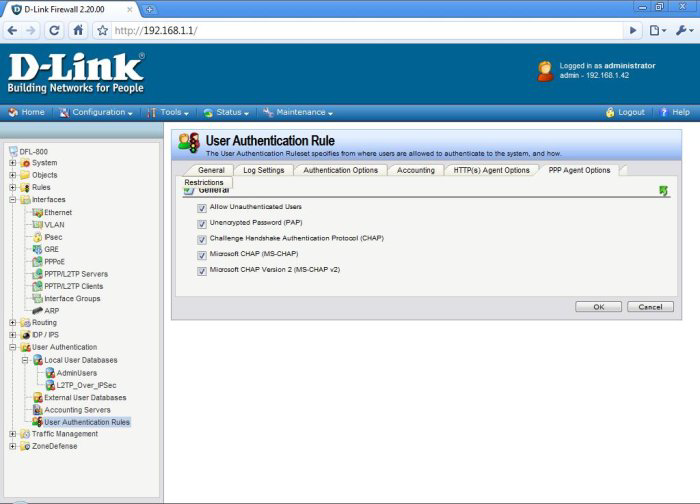
Step 14: Add an User Authentication Rule by clicking Add->User Authentication Rule. The correct settings can be found in the table below.
Step 15: Please visit the IP Rules secion by clicking Rules->IP Rules.
Step 16: Add a rule to allow VPN clients to ping the LAN IP of the DFL by choosing Add->IP Rule and filling in the below settings.
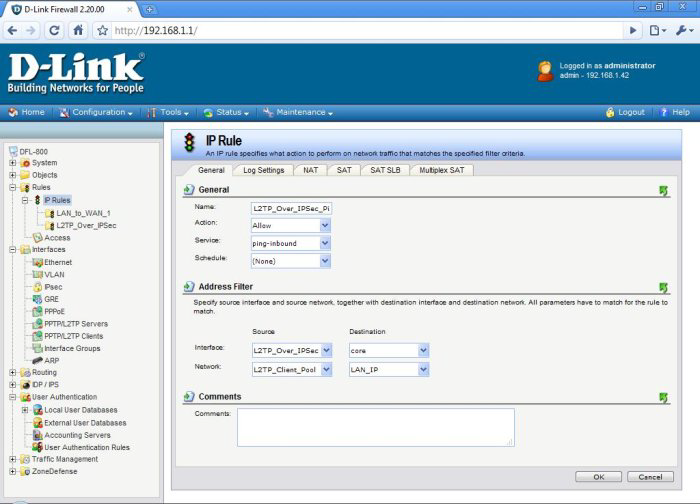
Name: L2TP_Over_IPsec_Ping_FW
Action: Allow
Service: ping-inbound
Schedule: (None)
Source Interface: L2TP_Over_IPsec
Source Network: L2TP_Client_Pool
Destination Interface: core
Destination Network: LAN_IP
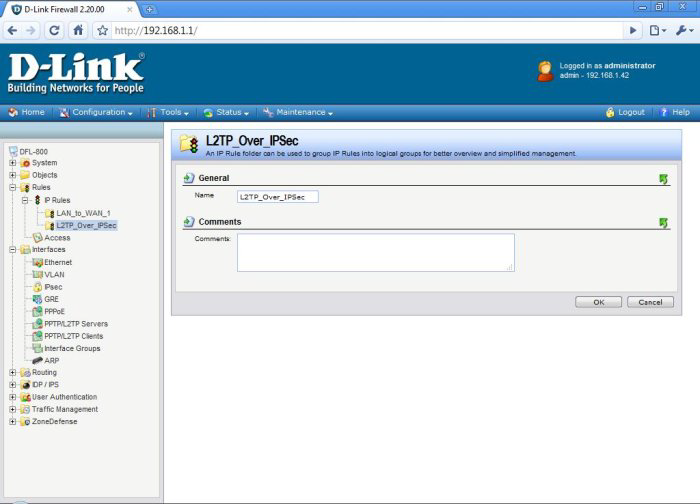
Step 17: Add an IP Rule Folder by clicking Add->IP Rule Folder. Name this new folder L2TP_Over_IPsec.
Step 18: Add an Ingress IP Rule for the VPN by choosing Add->IP Rule and filling in the below settings.

Name: L2TP_Over_IPsec_Ingress
Action: Allow
Service: all-services
Schedule: (None)
Source Interface: L2TP_Over_IPsec
Source Network: L2TP_Client_Pool
Destination Interface: LAN
Destination Network: LAN_Net
Step 19: Add an Egress IP Rule for the VPN by choosing Add->IP Rule and filling in the below settings.
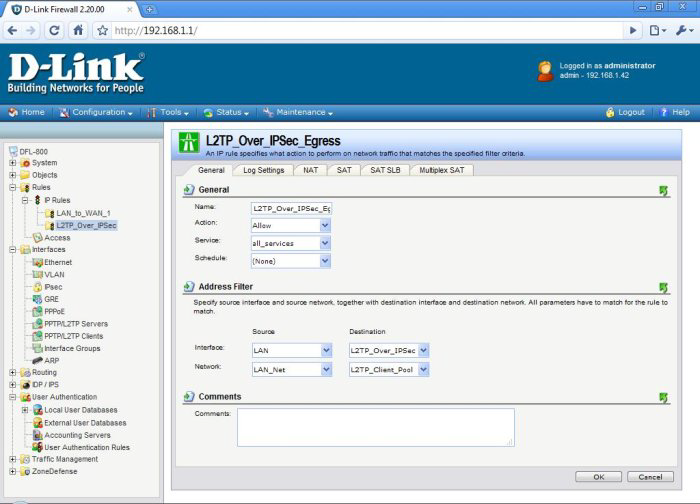
Name: L2TP_Over_IPsec_Egress
Action: Allow
Service: all-services
Schedule: (None)
Source Interface: LAN
Source Network: LAN_Net
Destination Interface: L2TP_Over_IPsec
Destination Network: L2TP_Client_Pool
Step 20: Add L2TP Internet Access IP Rule by choosing Add->IP Rule and following the below template.
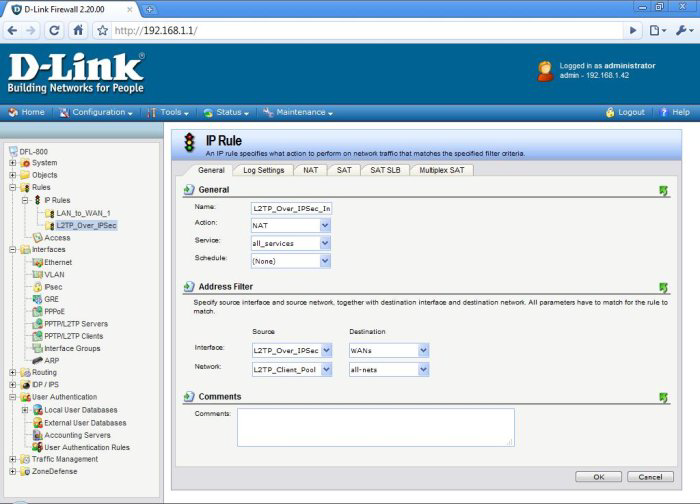
Name: L2TP_Over_IPsec_Internet
Action: NAT
Service: all-services
Schedule: (None)
Source Interface: L2TP_Over_IPsec
Source Network: L2TP_Client_Pool
Destination Interface: WAN
Destination Network: all-nets
Step 21: Save and Activate your changes by clicking Configuration->Save and Activate. Once you have logged back in you will have completed yout L2TP over IPsec Tunnel configuration.