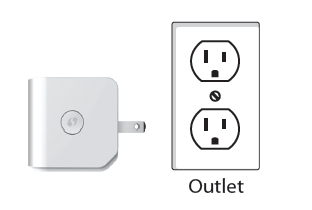
Step 1: Plug the DCH-M225 into a wall outlet within wireless range of your router.
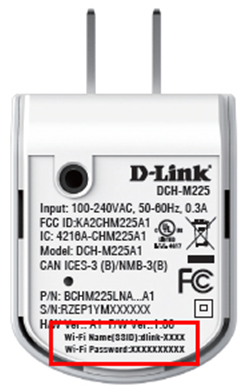
Step 2: Locate the Wi-Fi name (SSID) and password for your DCH-M225 device. These details are printed on the specification sticker on the underside of the device.
Open the wireless utility on your computer, select the name (SSID) of the DCH-M225 network, and when prompted, enter the password (both of these are also found on the included Wi-Fi Configuration Card).

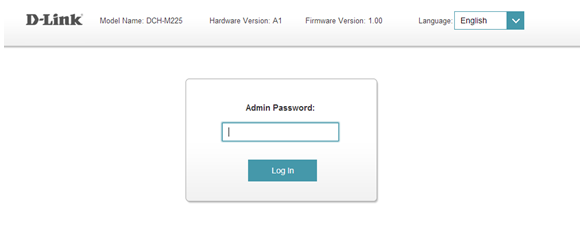
Step 3: Open a web browser and enter http://dlinkap.local in to the address bar. You can also use the IP address http://192.168.0.50.

Step 4: If this is your first time logging in to the router, the Setup Wizard will start automatically. Otherwise, enter the login credentials for the Admin account. If you have not changed the defaults, leave the password field blank. Click Log In.
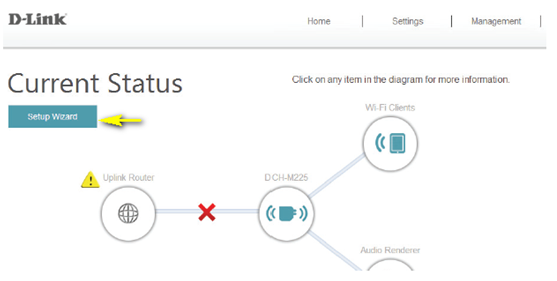
Step 5: If the Setup Wizard does not start automatically, or this is not the first time setting up the DCH-M225, click the Setup Wizard button on the main page.
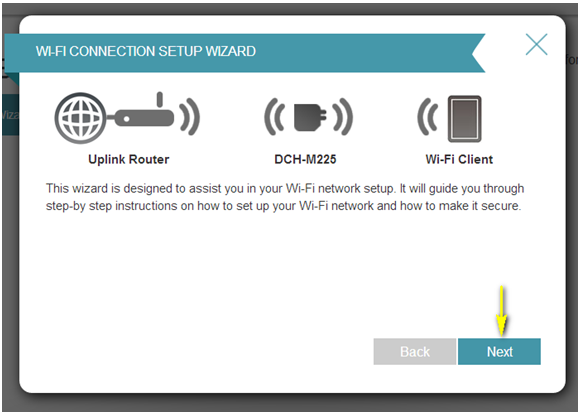
Step 6: A popup window will open. Click Next to commence the Setup Wizard.
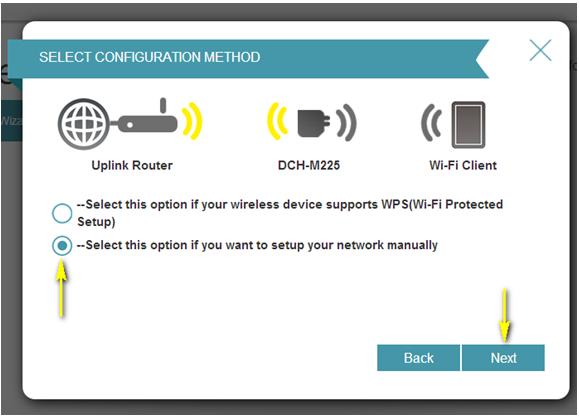
Step 7: If you wish to use Wi-Fi Protected Setup (WPS) to connect the DCH-M225 to your router, select the first option from the setup wizard menu. The Setup Wizard will the guide you through the WPS setup process. To set up your network manually, select the second option. Click Next to continue
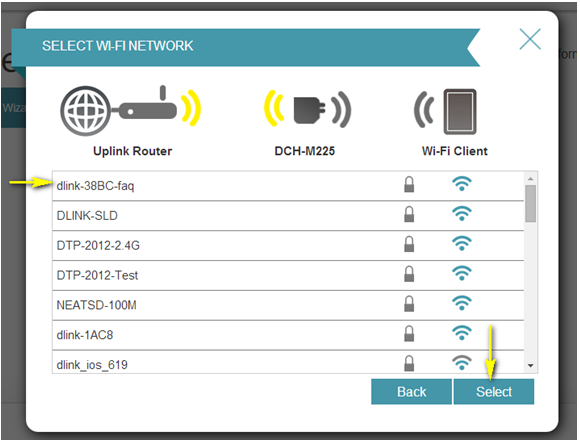
Step 8: To set up your network manually, select the wireless network that you wish to use as your uplink (source) from the list by clicking on it. Once you have selected the uplink network you wish to use, click Select.
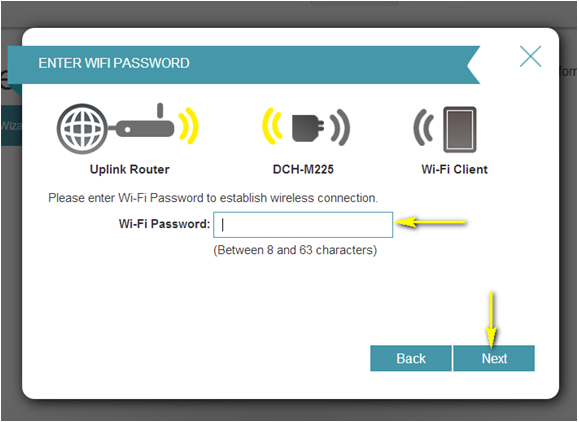
Step 9: Enter the password for your uplink network. Click Next to continue.
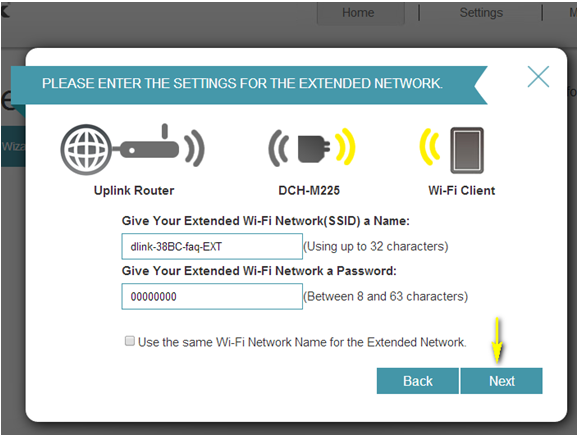
Step 10: The DCH-M225 has a built-in Wi-Fi Extender function which will re-broadcast the Wi-Fi connection from the uplink router as an extended Wi-Fi network to increase your wireless coverage. An SSID and password will automatically be generated. If you wish to change these settings, enter the SSID and password that you wish to apply to the extended Wi-Fi network. If you wish to use the same settings as your source network, check the Use the same Wi-Fi Network Name for the Extended Network box. Click Next to continue.
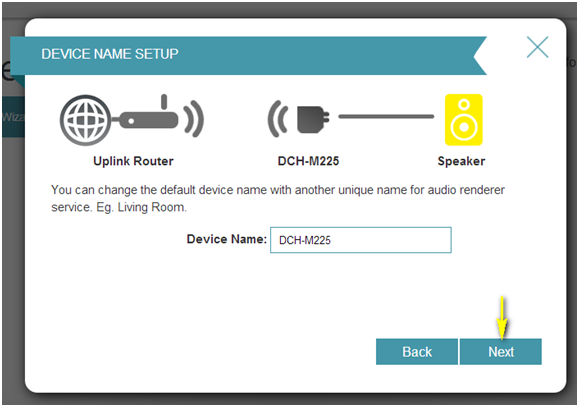
Step 11: If you wish to specify a name for this device to identify it on your network, enter the new device name in the field provided. Click Next to continue.
Step 12: The setup process is now complete. A summary page will appear showing the settings for both the connection to the uplink router, and the extended Wi-Fi network. It is recommended that you make a record of this information for future reference. Click Save to end the Setup Wizard.
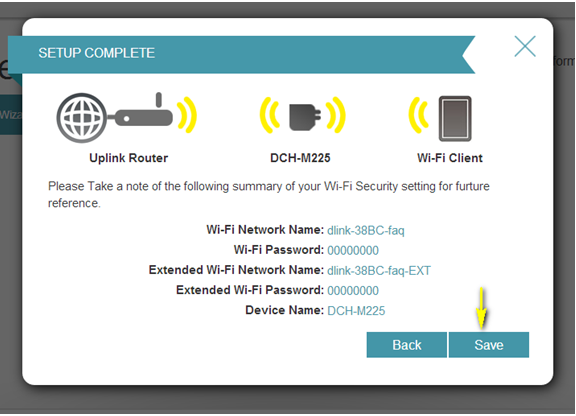
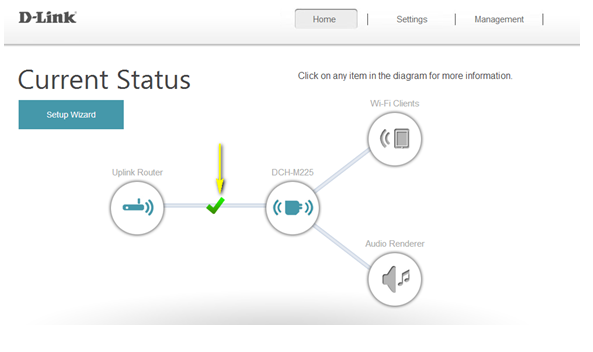
A green check mark between the Uplink Router and DCH-M225 icons indicates that there is a successful connection between the uplink router and DCH-M225.