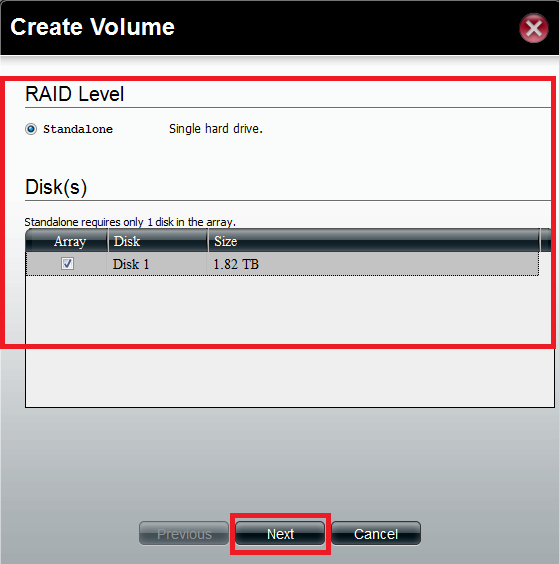
Note: In this example only ONE Hard drive is being used.
Step 1: Log into the setup page of the DNS-1200/1100
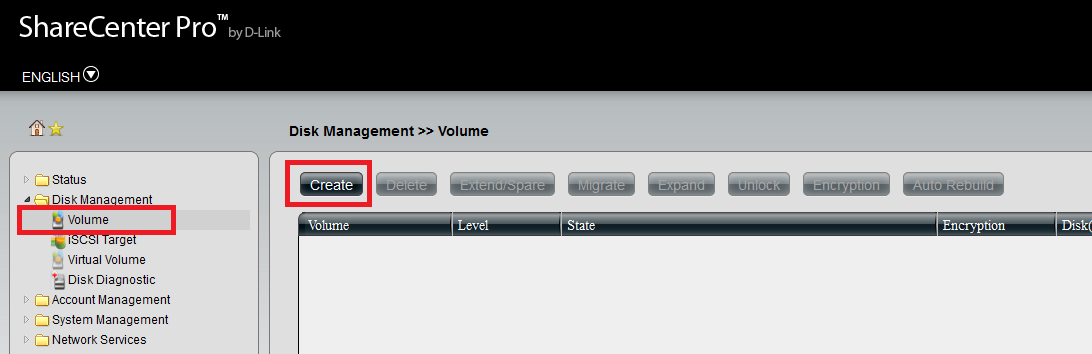
Step 2: Click on Disk Management and then Click on Volume
Step 3: Click on Create
Step: 4 Select Disk for Volume and Click Next
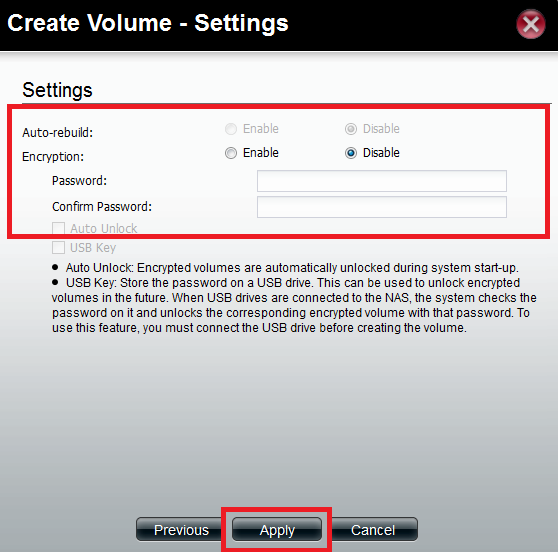
Step: 5 Select Auto-Rebuild (if Applicable)
Step: 6 Select Encryption (If needed)
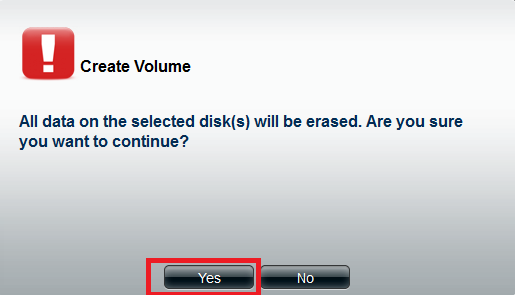
Step: 7 Click Apply
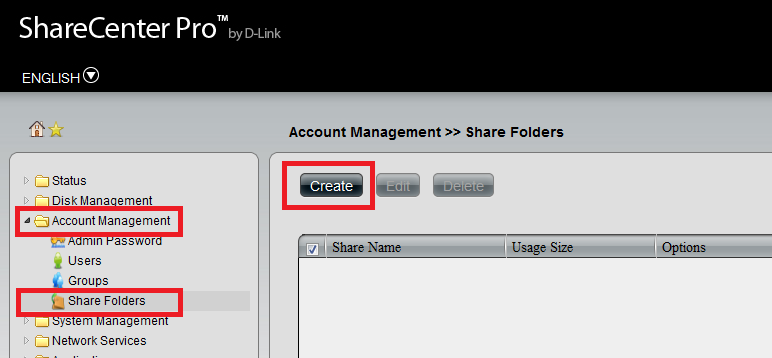
Creating a Network Share
Step 1: Click Account Management and then Share folders
Step 2: Click on Create
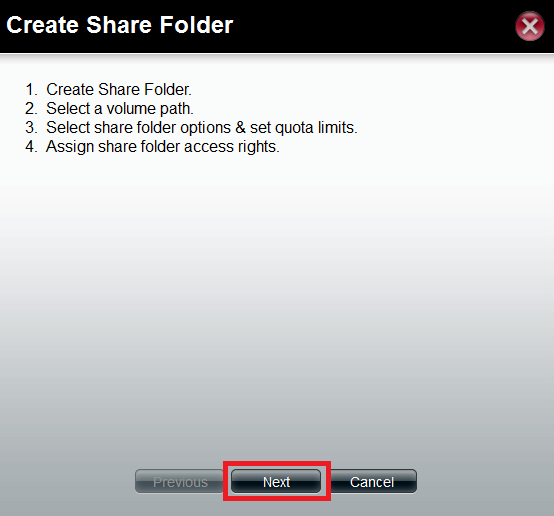
Step 3: Click Next
Step 4: Select Path
Note: This could be the Full volume or create a folder
Note: You will need to double click on the Volume_1 to select it
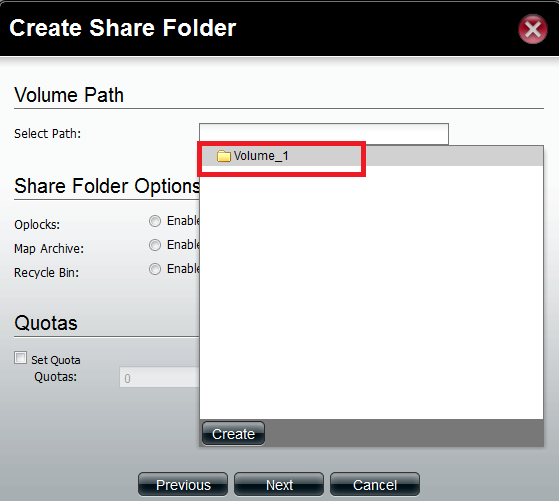
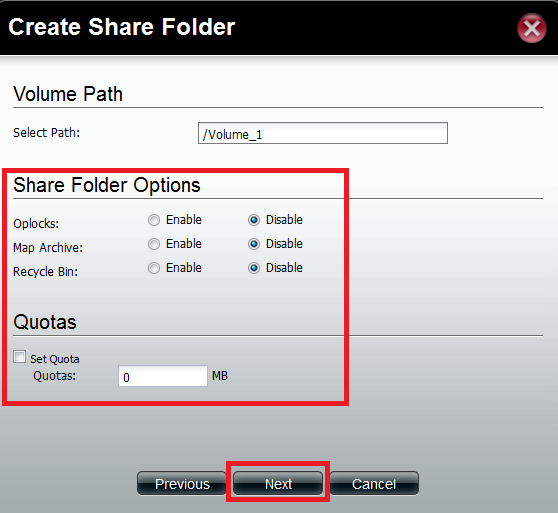
Step 5: Specify Folder Option and Quotas
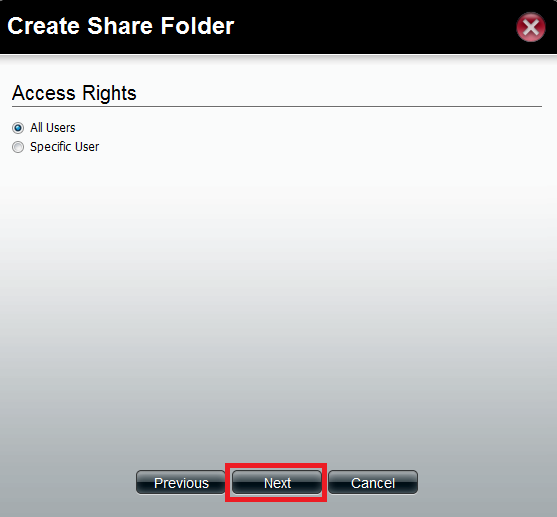
Step 6: Select who can access the folder
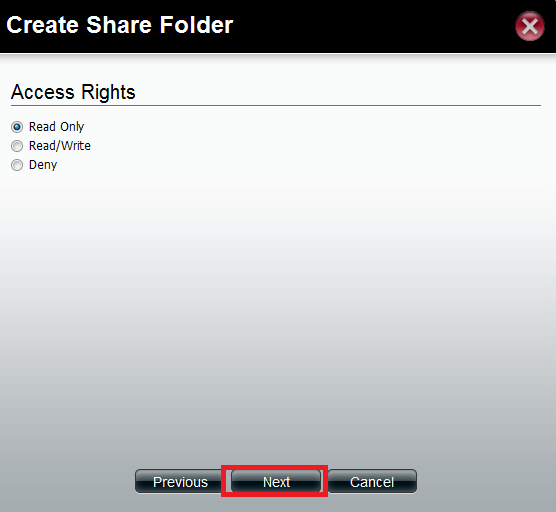
Step 7: Select Permissions
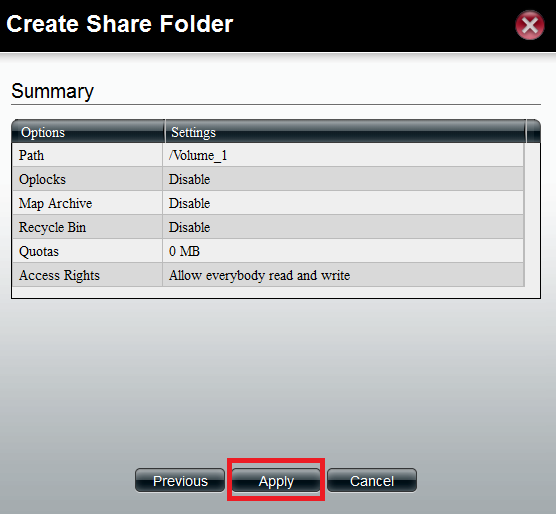
Step 8: Review and Click Apply