Note: The VID of 1 is reserved for internal use and can not be used for VLANs.
Step 1: Open the web browser and type the IP address of the firewall into the address bar, and press Enter. Default IP address for the firewall is:
DFL-210/260/800/860/1600: 192.168.1.1
DFL-260E/860E/1660: 192.168.10.1
Step 2: The default username is admin (all lower case) and the password is admin (all lower case). Click on OK.
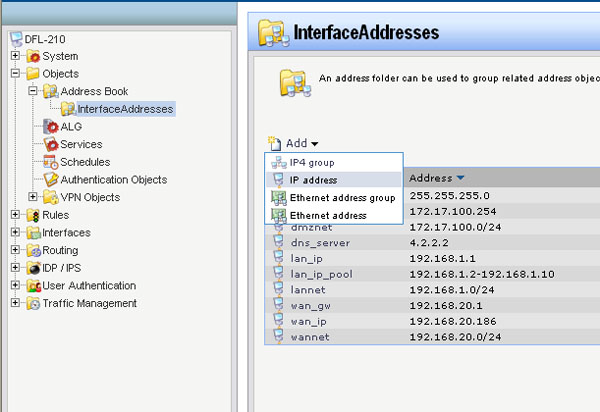
Step 3: Click on the plus sign next to Objects, click on Address Book, and then click on InterfaceAddresses. Click on Add and select IP address / IP4 Address.
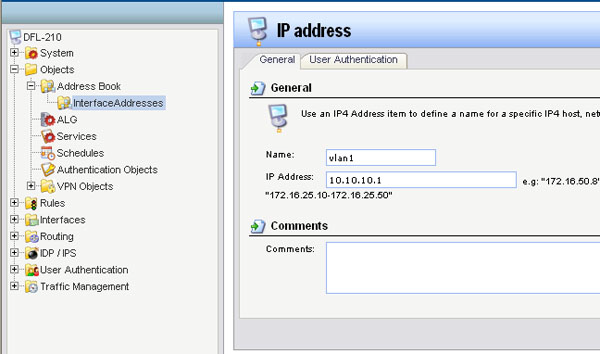
Step 4: Configure the IP address as followed:
- Name: enter a name as desired (vlan1 in this example)
- IP Address: enter desired IP address (10.10.10.1 in this example)
Click on OK.
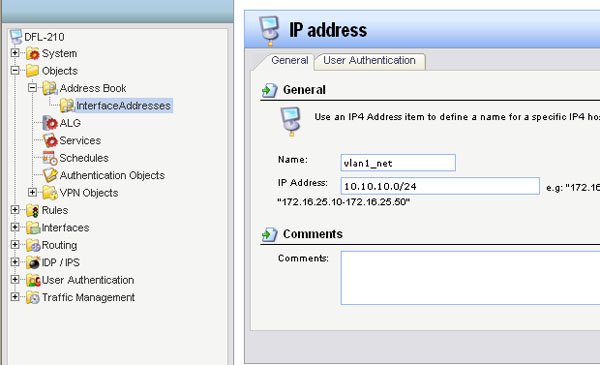
Step 5: Click on Add and select IP address / IP4 Address. Configure it as followed:
- Name: enter a name as desired (vlan1_net in this example)
- IP Address: enter the corresponding subnet (10.10.10.0/24 in this example)
Click on OK.
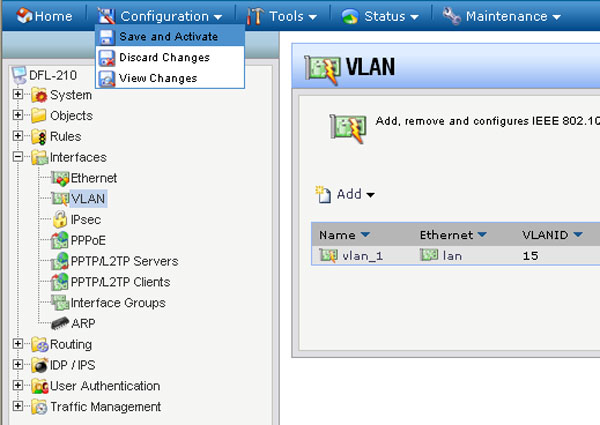
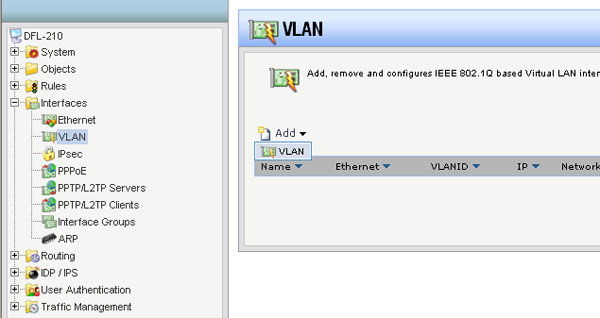
Step 6: Click on the plus sign next to Interfaces, click on VLAN, and then click on Add to create the Vlan.
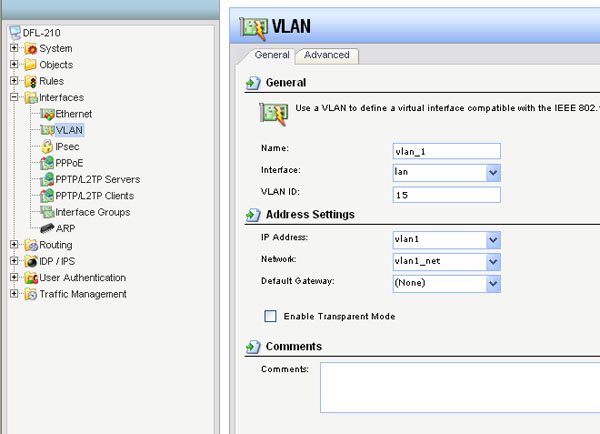
Step 7: Configure the Vlan as followed:
- Name: enter a name as desired (vlan_1 in this example)
- Interface: lan
- VLAN ID: enter the appropriate VID
- IP Address: select the IP address folder created in step 4
- Network: select the IP address folder create in step 5
- Default Gateway: None
Click on OK.
Step 8: Click on the Configuration dropdown menu and select Save and Activate. Click on OK to activate and save the changes.