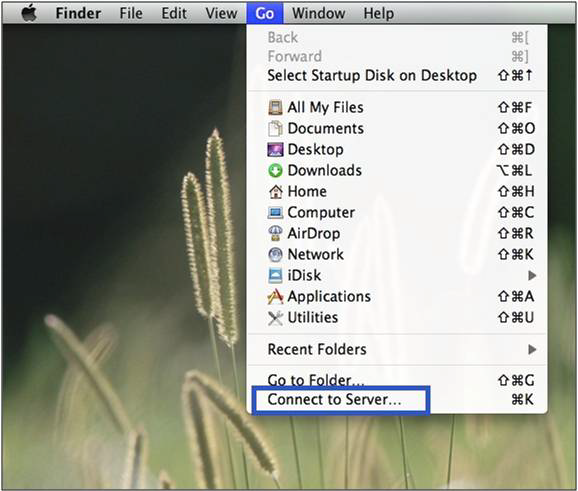
Step 1: Click on Go and select Connect to Server
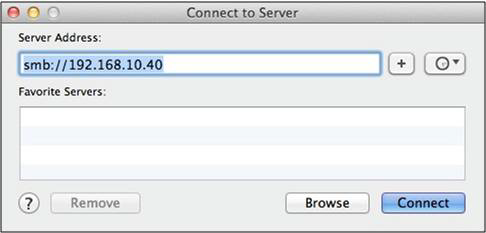
Step 2: Type in the address of the ShareCenter Pro. eg. smb://192.168.10.40
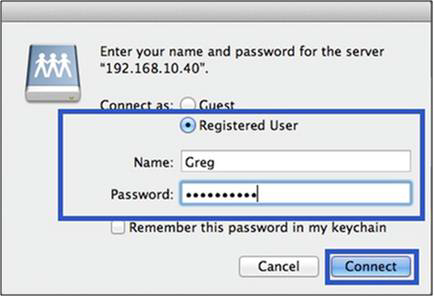
Step 3: Type in your user info and click connect
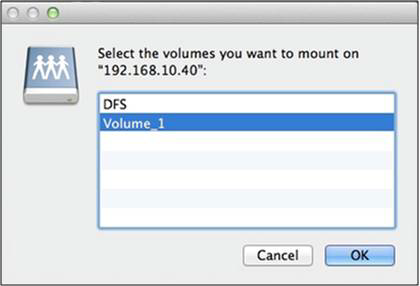
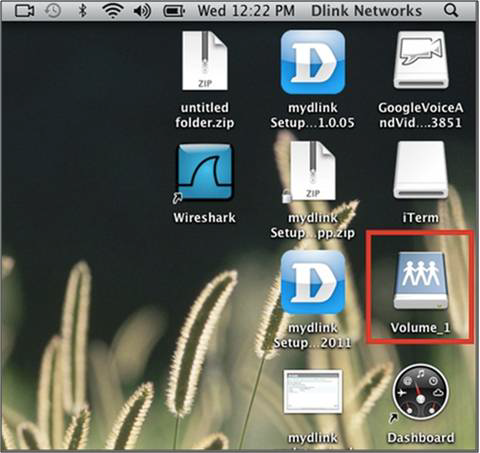
Step 4: Select Volume_1 and click OK
Note: If you are not able to see the volume on the desktop please follow the steps below
Click on Finder then Preferences and under General Tab select connected servers