When DNS Relay is enabled on your router, clients on your network that receive the IP settings from the router (DHCP) will use the router for DNS resolution (e.g. 192.168.0.1). The router will assign its LAN IP address to the client as a DNS server.
If it is disabled, your network clients will receive the public DNS server(s) information that your router receives from your ISP (WAN port settings), bypassing the router for DNS resolution.
To enable/disable DNS Relay:
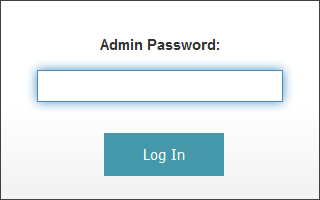
Step 1: Open a web browser and enter http://dlinkrouter.local. or http://192.168.0.1 into the address bar. Enter your password and click Log In.

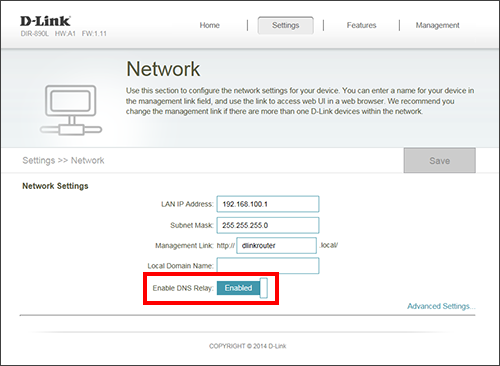
Step 2: Click on Settings and then click Network.
Step 3: Next to Enable DNS Relay, click to Enabled (turn on) or Disabled (turn off).

Step 4: Click Save. Your router may reboot.
If you want to use different DNS servers than what your ISP assigns you, you can manually enter DNS Server IP address(es) on the router which will then be assigned to your clients.
For a list of public DNS servers, visit and read the information at www.lifewire.com/free-and-public-dns-servers-2626062.
To statically assign DNS servers to the router, follow the steps below:
Step 1: Open a web browser and enter http://dlinkrouter.local. or http://192.168.0.1 into the address bar. Enter your password and click Log In.
Step 2: Click on Settings and then click Network. Make sure DNS Relay is set to Disabled.
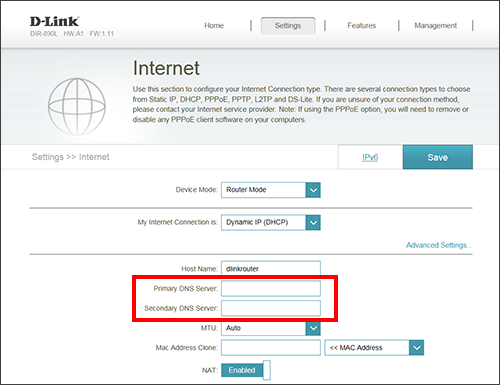
Step 3: Click on Settings and then click Internet.
Step 4: Click Advanced Settings and then next to Primary DNS Server and Secondary DNS Server, enter the IP addresses of the DNS servers you want to use.

Step 5: Click Save. Your router may reboot.