Step 1: Log into the DNS-323/321 configuration web interface and click the Tools tab and select E-Mail Alerts on the left side.
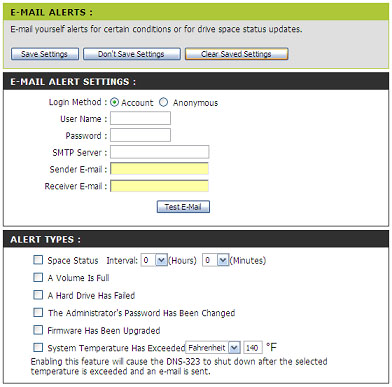
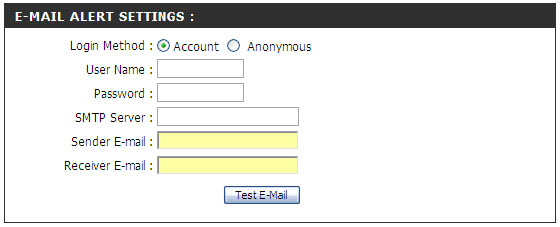
Step 2: Select either Account or Anonymous.
Note: Anonymous does not require a User Name or Password to be entered however you must check with your ISP or Email service if anonymous emailing is allowed.
Step 3: Enter the appropriate user name and password for your e-mail account.
Step 4: Enter the IP address or domain name of your outgoing mail server in the SMTP Server field. If you are unsure of this value, contact your e-mail provider.
Step 5: Enter the from e-mail address (e.g. alerts@dns323.com) in the Sender E-Mail field. This field does not require a valid e-mail address. However, if your e-mail client is filtering spam, make sure you allow this address to be received.
Step 6: Enter the e-mail address you want to send the alerts to in the Reciever E-Mail field . This address must correspond with the SMTP server configured above.
Step 7: Test the E-Mail Alert by clicking the Test E-Mail button and confirm your settings are correct.
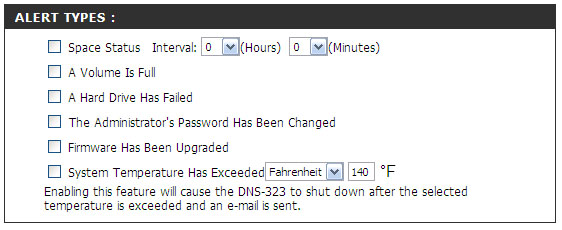
Step 8: Select your E-Mail Alert Types you want to be sent to you and click Save Settings at the top of the menu.
Note: If E-mails notification fail to send please verify the unit has the proper DNS settings in the LAN configuration.