This FAQ is for the DNS-321, DNS-323, DNS-343, or DNS-726-4
Dynamic DNS (DDNS) allows remote administration of the unit or FTP access using a domain name in situations where a static IP address is not available. Each time a new dynamic IP address is pulled, the the Unit updates the IP address with the DDNS service provider.
Step 1: Register with one of the following DDNS providers:
Write down the URL and login information you obtained after registering with one of the above DDNS providers.
Step 2: Log into the web-based configuration of the NAS or NVR.
Step 3: Click the Setup or Tools tab and then click Dynamic DNS or DDNS to the left.
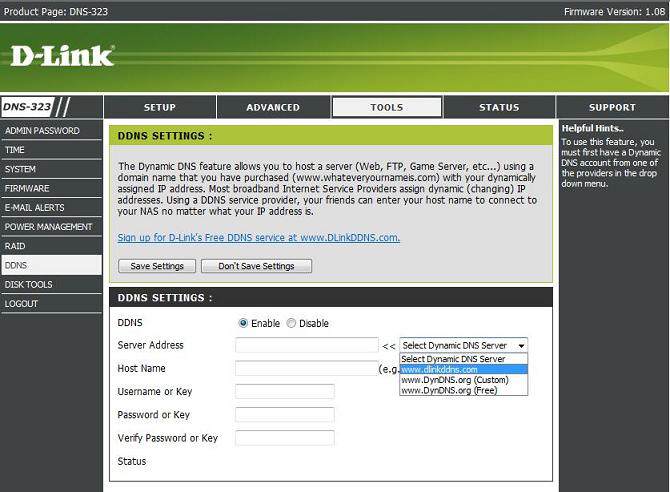
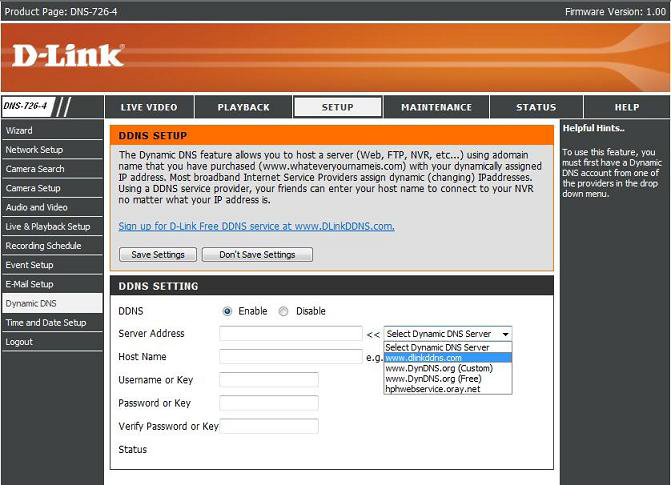
Step 4: Click the Enable DDNS checkbox.
Step 5: Select the provider that you registered with from the drop-down list next to Server Address.
Step 6: Using the information you obtained in Step 1 enter the domain name that you created (i.e. mynas.dyndns.org) in the field by Host Name. Enter your login information for the account in the Username/Key, Password/Key, and verify Password/Key fields.
Step 7: Click Save Settings to save the new settings.
Note: After this is set up, you use the domain name that you registered to access the NAS or NVR remotely. For example, if the domain name that you registered is mynas.dyndns.org, then you would type http://mynas.dyndns.org in the address bar of your internet browser to access the camera remotely.