Step 1: Log in to your access point - How do I log in to my access point?
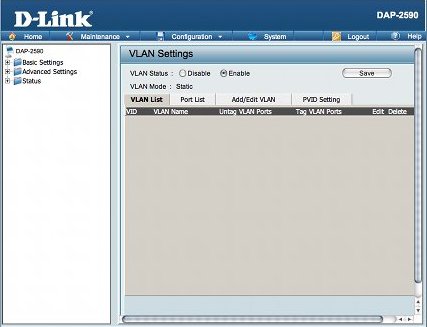
Step 2: Click Advanced Settings > VLAN from the menu on the left side.
Step 3: Select Enable under VLAN Status and then click the Save Button.
Step 4: Click the Trash Can Icon next to the default VLAN to delete the default VLAN.
Step 5: Now we are going to add our VLANs to this AP. We will begin with a default VLAN and then add one or more additional VLANs.
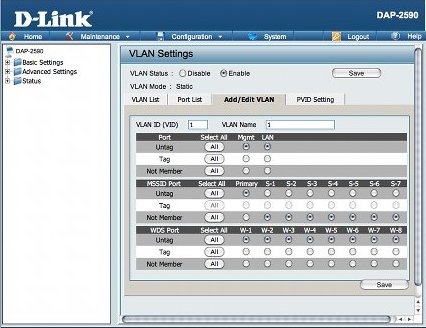
Step 6: Choose the Add/Edit VLAN tab and click the Save Button when you are finished adding a VLAN.
For our default VLAN we are going to use the below parameters:
- Name: 1
- VID: 1
- Mgmt: Untag
- LAN: Untag
- Primary: Untag
- S-1: Not Member
- S-2: Not Member
- S-3: Not Member
- S-4: Not Member
- S-5: Not Member
- S-6: Not Member
- S-7: Not Member
- W-1: Untag
- W-2: Untag
- W-3: Untag
- W-4: Untag
- W-5: Untag
- W-6: Untag
- W-7: Untag
- W-8: Untag
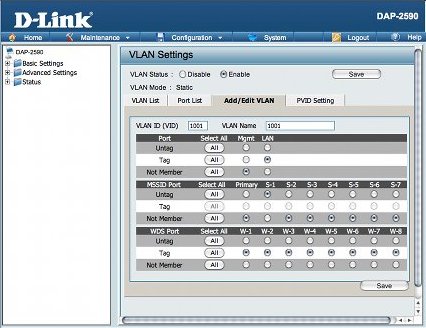
Step 7: For our additional VLANs, which we are going to add in just the same way as out default VLAN, we are going to use the following template:
- Name: Use the values 1001-1007 as you progressively create your VLAN(s)
- VID: Use the values 1001-1007 as you progressively create your VLAN(s)
- Mgmt: Not Member
- LAN: tag
- Primary: Not Member
- S-1 - S-7: Not Member for all but the one that matches the VID minus 1000 (i.e. S-1 for VID 1001 S-7 for VID 1007) which will be untagged.
- W-1: Tag
- W-2: Tag
- W-3: Tag
- W-4: Tag
- W-5: Tag
- W-6: Tag
- W-7: Tag
- W-8: Tag
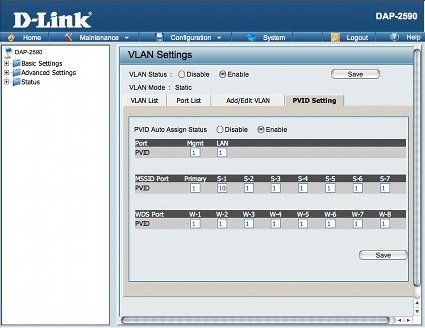
Step 8: Select the PVID Settings tab and ensure that PVID Auto Assign Status is Enabled and then click the Save buttons.
Step 9: Click the Configuration button at the top and then Save and Activate.