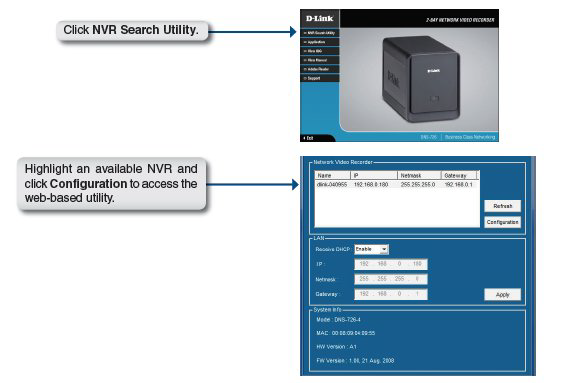
Step 1: Make sure the NVR is connected to a network via a router, a switch, or directly connected to a PC.
Step 2: Turn on the computer and insert the D-Link DNS-726-4 Autorun CD into the CD-ROM drive. The following step-by-step instructions appear when using Windows Vista operating system. The steps and screens are similar for other Windows operating systems.

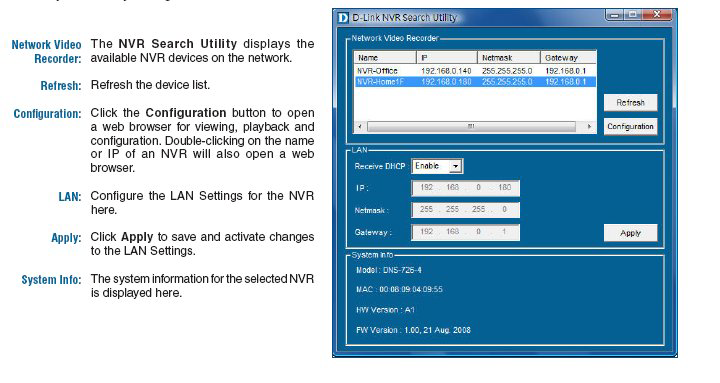
When the NVR is first powered on, during the initial boot sequence, it will wait to be assigned an IP address via DHCP. If it does not receive a DHCP assigned IP address, by default it will have a self-assigned IP address of 192.168.0.32. It is recommended to use the included D-Link NVR Search Utility when accessing and configuring the NVR for the first time. If you would like to change the IP address before logging in or if you are unable to connect to the NVR IP address, you can use the NVR Search Utility provided on the product CD to locate the device on your network and make any necessary changes.
