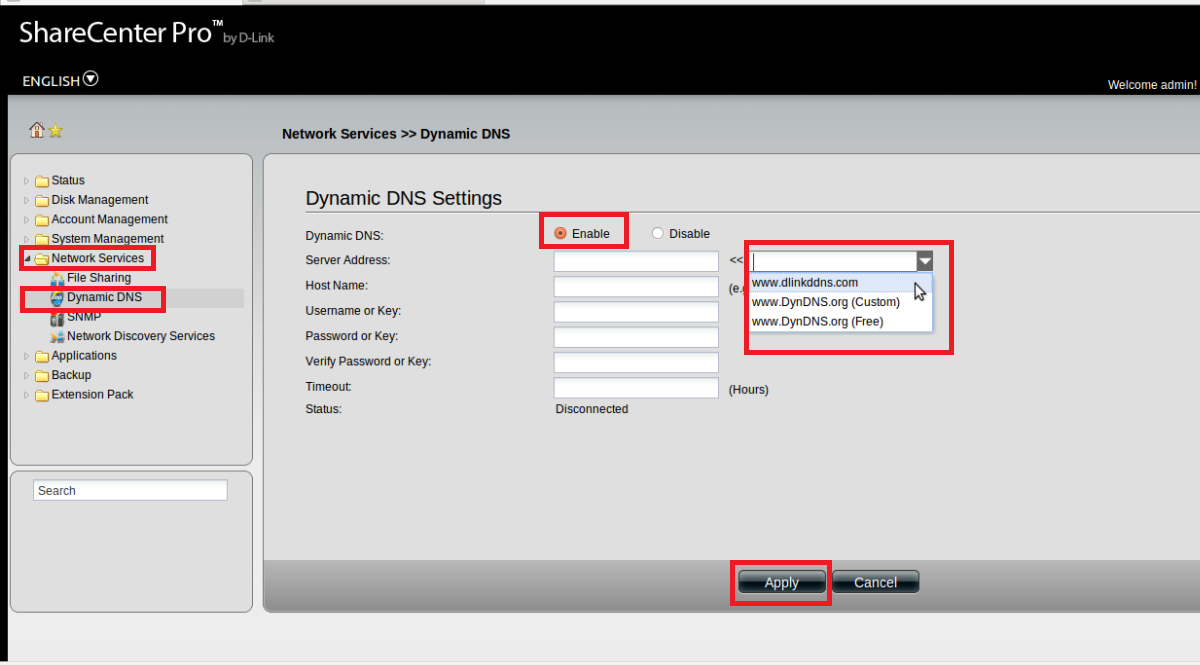
Dynamic DNS (DDNS) allows remote administration of the unit or FTP access using a domain name in situations where a static IP address is not available. Each time a new dynamic IP address is pulled, the the Unit updates the IP address with the DDNS service provider.
Step 1: Register with one of the following DDNS providers:
Write down the URL and login information you obtained after registering with one of the above DDNS providers.
Step 2: Log into the web-based configuration of the ShareCenter Pro
Step 3: Click the Network Services and then click Dynamic DNS

Step 4: Click the Enable DDNS checkbox.
Step 5: Select the provider that you registered with from the drop-down list next to Server Address.
Step 6: Using the information you obtained in Step 1 enter the domain name that you created (i.e. mynas.dyndns.org) in the field by Host Name. Enter your login information for the account in the Username/Key, Password/Key, and verify Password/Key fields.
Step 7: Click Apply to save the new settings.