Step 1: Open Finder

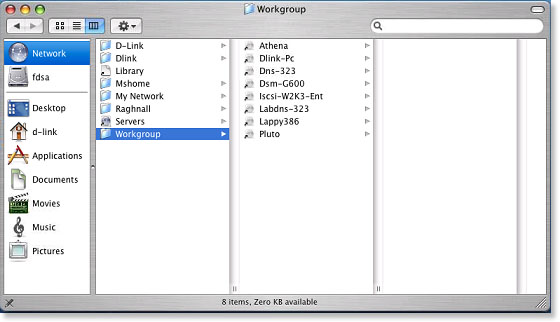
Step 2: Select Network

Step 3: Select your Workgroup
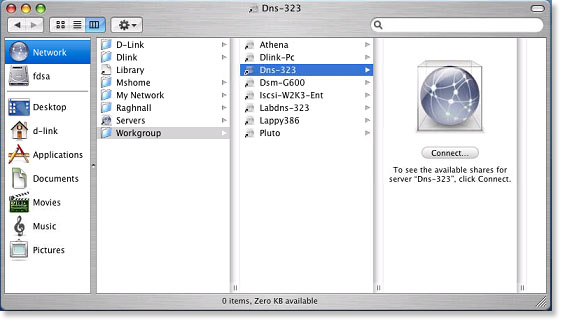
Step 4: You will find the ShareCenter listed by the devices name. The example shown is "Dns-323". Select "Dns-323" and click Connect
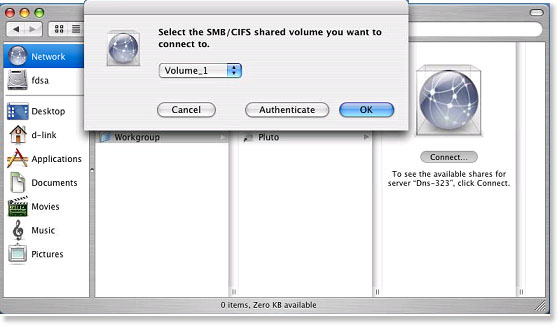
Step 5: Select the folder you would like to mount (e.g., Volume_1) and click OK
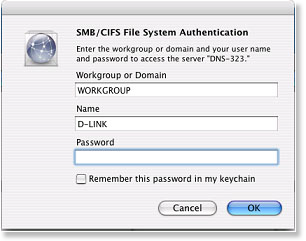
Step 6: You will be prompted for SMB/CIFS File System Authentication. Click OK to authenticate your network drive
Step 7: Your network drive is now mounted. You can access Volume_1 by clicking the Mount icon (\\DNS-323\Volume_1)