Note: This FAQ was created for firmware version 2.05 or above.
Note: You need to disable any pop up blockers on your computer.
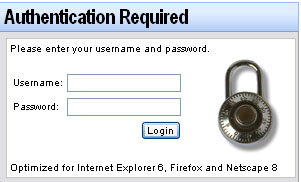
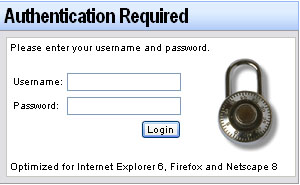
Step 1: Open a web browser and type the IP address of the DFL in the address bar (default is 192.168.1.1), press Enter.
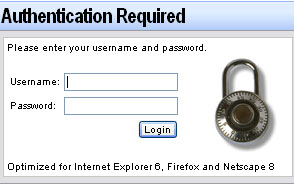
Step 2: Enter username and password. Default username is admin and default password is admin.
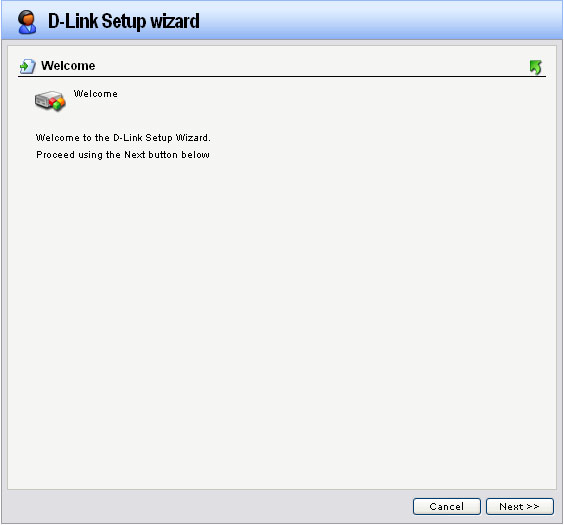
Step 3: The web GUI will begin with the D-Link setup wizard, or select the Setup Wizard button (available in firmware 2.26 or higher). Click on Next.

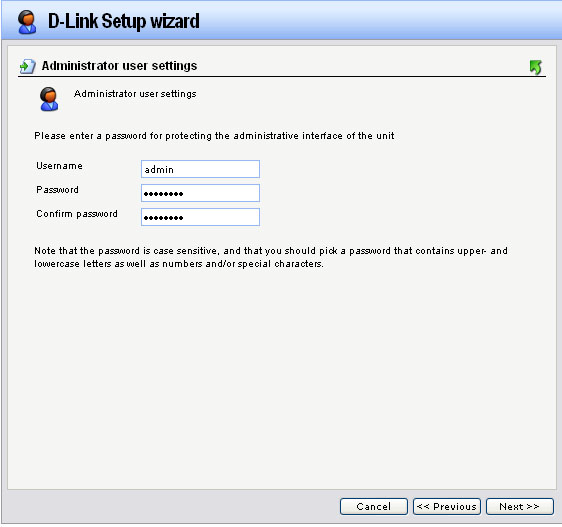
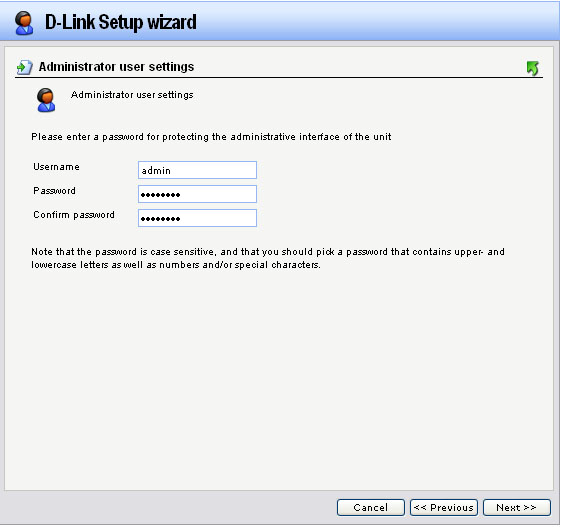
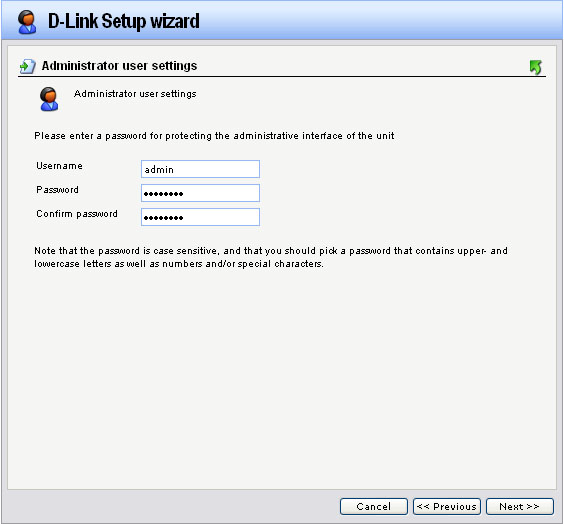
Step 4: Here you can set a new password, by entering the new password and re-typing the password to confirm, click Next.
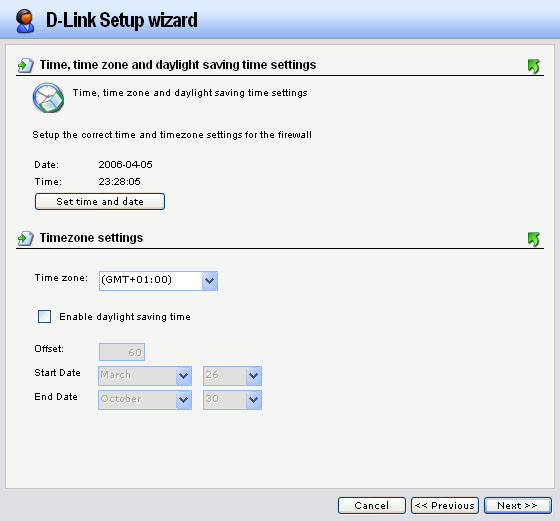
Step 5: Select the appropriate time zone and click Next.
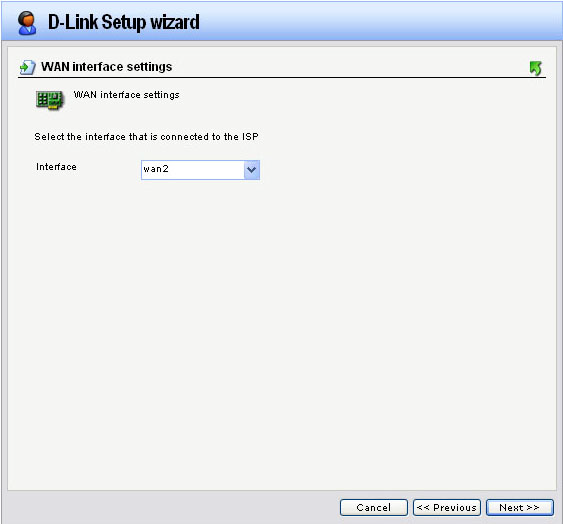
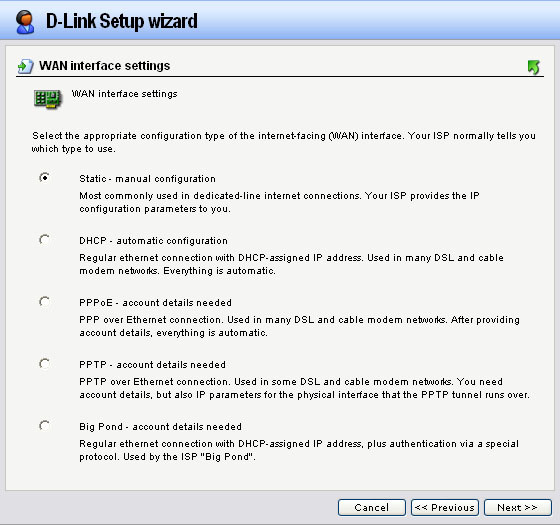
Step 6: Select WAN2 in the drop-down and click Next.

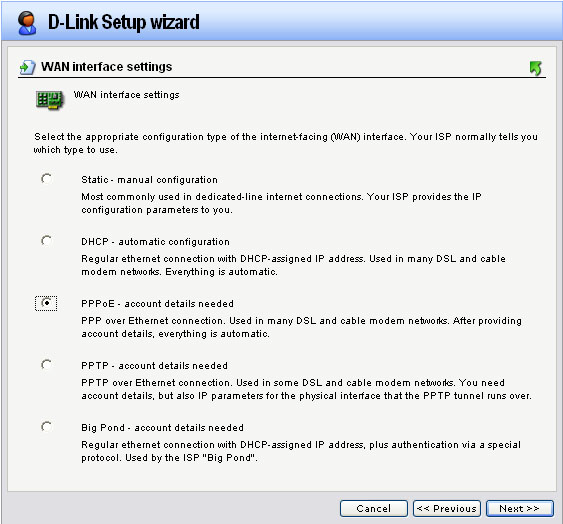
Step 7: Select DHCP-automatic configuration and click Next.
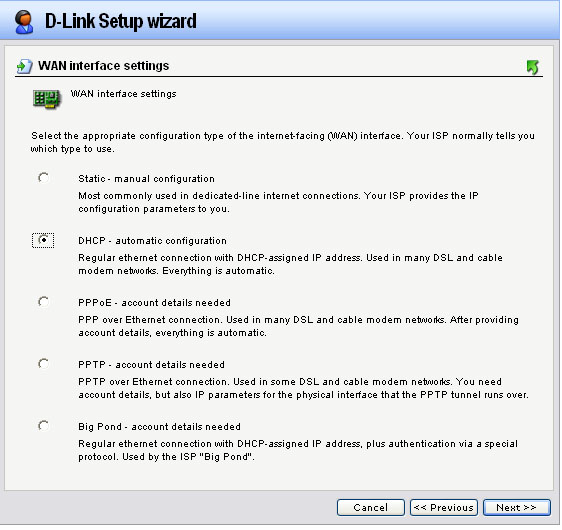
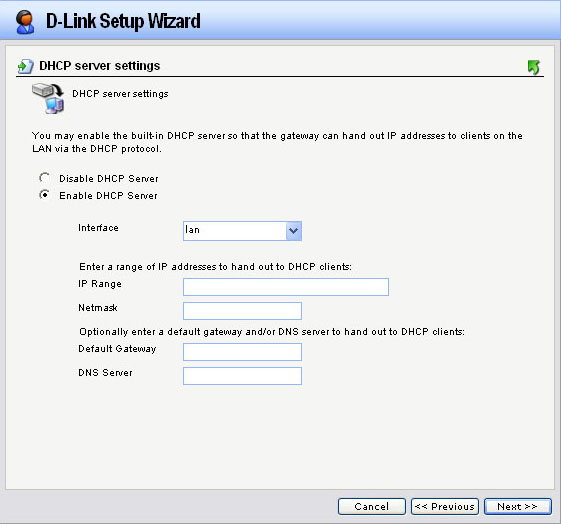
Step 8: Select Enable DHCP Servers (Opional). Configure as followed:
- IP range: Enter desired range IP for DHCP clients
- Subnet Mask: Entered corresponding subnet mask
- Default Gateway: Enter Lan IP of the firewall
- DNS Server: Enter desired DNS IP address
Click Next.

Step 9: Configure NTP Server as desired (Opional). Click Next.

Step 10: Click activate to save the configuration.
Connect using PPPoE
Step 1: Open a web browser and type the IP address of the DFL in the address bar (default is 192.168.1.1), press Enter.
Step 2: Enter username and password. Default username is admin and default password is admin.
Step 3: The web GUI will begin with the D-Link setup wizard, or select the Setup Wizard button (available in firmware 2.26 or higher). Click on Next.

Step 4: Here you can set a new password, by entering the new password and re-typing the password to confirm, click Next.
Step 5: Select the appropriate time zone and click Next.

Step 6: Select WAN2 in the drop-down and click Next.
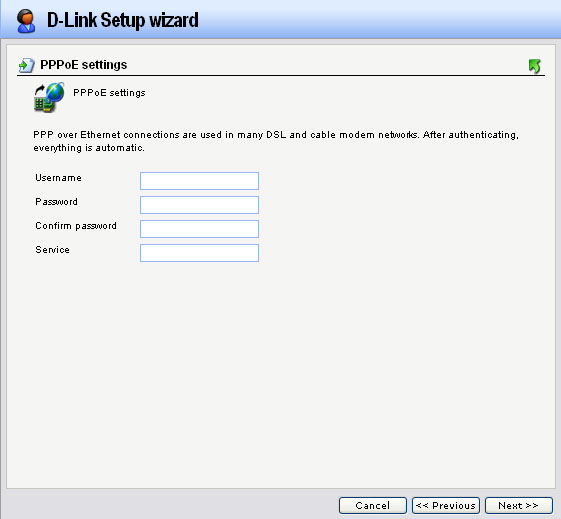
Step 7: Select the radio button labeled PPPoE-account details needed and click Next.
Step 8: Enter your DSL account details provided by your ISP, click Next.
Step 9: Select Enable DHCP Servers (Opional).
- IP range: Enter desired range IP for DHCP clients.
- Subnet Mask: Entered corresponding subnet mask.
- Default Gateway: Enter Lan IP of the firewall.
- DNS Server: Enter desired DNS IP address.
Click Next.

Step 10: Configure the NTP Server as desired (Opional). Click Next.

Step 11: Click activate to save the configuration.

Step 12: Click close after the firewall is done saving the configuration.
Connect using a Static IP
Step 1: Open a web browser and type the IP address of the DFL in the address bar (default is 192.168.1.1), press Enter.
Step 2: Enter username and password. Default username is admin and default password is admin.
Step 3: The web GUI will begin with the D-Link setup wizard, or select the Setup Wizard button (available in firmware 2.26 or higher). Click on Next.
Step 4: Here you can set a new password, by entering the new password and re-typing the password to confirm, click Next.
Step 5: Select the appropriate time zone and click Next.

Step 6: Select WAN2 in the drop-down and click Next.

Step 7: Select Static-manual configuration and click Next.
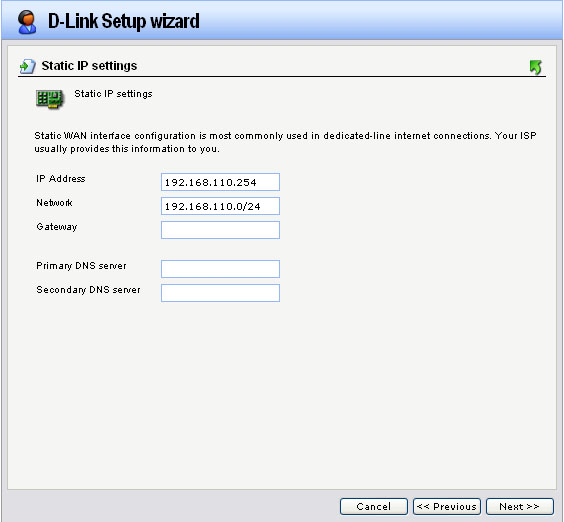
Step 8: Configure the WAN2 for static public IP address as followed:
- IP address: Enter public IP address provided by ISP
- NetMask: Enter appropriated subnet mask provided by ISP
- Gateway: Enter gateway IP address provided by ISP
- Primary DNS: Enter DNS IP address provided by ISP
- Secondary DNS: Enter DNS IP address provided by ISP
Click Next.
Step 9: Select enable DHCP Servers (Opional).
- IP range: Enter desired range IP for DHCP clients.
- Subnet Mask: Entered corresponding subnet mask.
- Default gateway: Enter Lan IP of the firewall.
- DNS Server: Enter desired DNS IP address.
Click Next.
Step 10: Configure NTP Server as desired (Opional). Click Next.

Step 11: Click Activate to save the configuration.
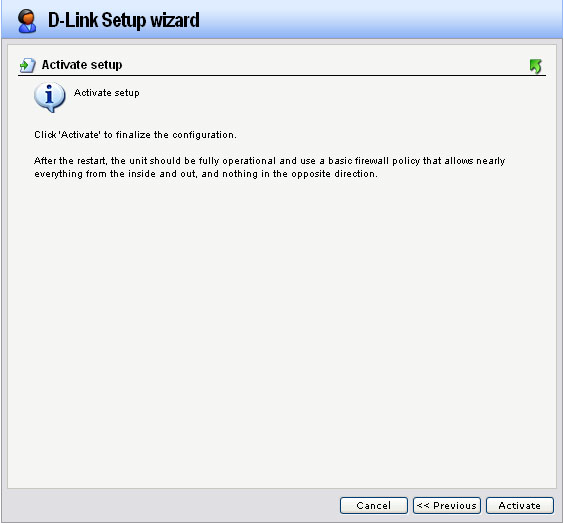
Step 12: Click close after the firewall is done saving the configuration.