In This Example the following DHCP Settings are being used:
DHCP Pool: 192.168.1.100-192.168.1.150
Subnet Mask: 255.255.255.0
Gateway: Lan IP (192.168.1.1)
DNS1/DNS2: Previous Created DNS Address
Step 1: Open the web browser and type the IP address of the firewall into the address bar (default is 192.168.1.1). Press Enter.
Step 2: Click on the plus sign next to Objects and select Address Book
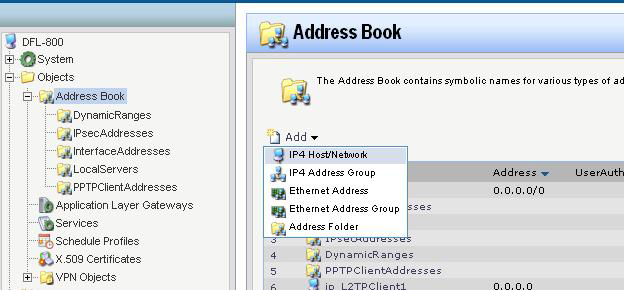
Step 3: Click Add and select IP Address or IP4 Host/Network.
Name: Name as desired (DHCP_Lan_Range in the example)
IP Address: Enter DHCP Pool (192.168.1.100-192.168.1.150 in this example).
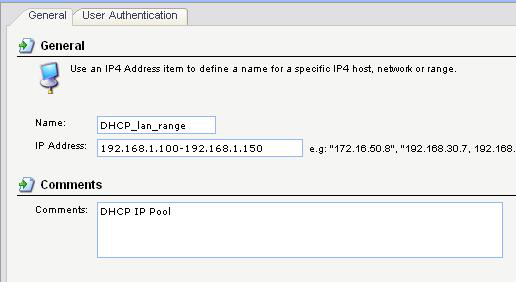
Click OK.
Step 4: Click Add and select IP Address or IP4 Host/Network.
Name: Name as desired (DHCP_Lan_Subnet in the example)
IP Address: Enter DHCP Subnet (255.255.255.0 in this example).
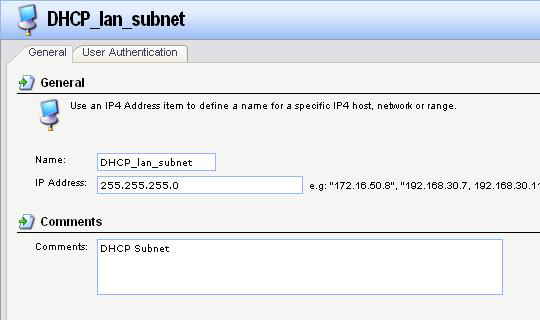
Click OK.
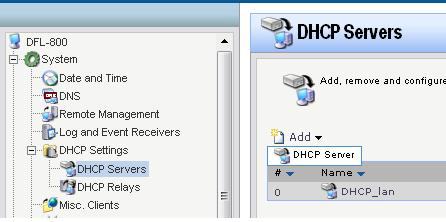
Step 6: Click on the plus sign next to System, Click the plus sign next to DHCP Settings and select DHCP Server.
Step 7: Click Add and Select DHCP Server.
Name: Name as desired (DHCP_Lan in the example)
Interface Address: Lan
IP Address Pool: Created in Step 3 (DHCP_Lan_Range in this Example)
Netmask: Created in Step 4 (DHCP_lan_Subnet in this Example).
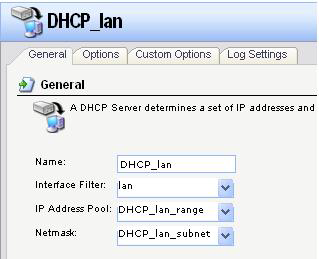
Click OK.
Step 8: Click the Options Tab.
Default GW: lan_ip
Domain: Leave Blank
DNS Primary: dnsserver1_ip (Lan IP can be used if DNS is not created)
Secondary DNS: dnsserver2_ip (None can be used if DNS address is not created)
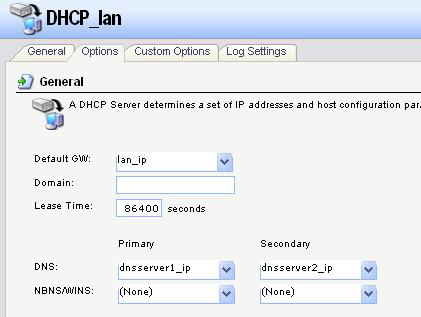
Click OK.
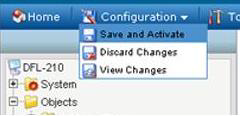
Step 9: Click on the Configuration tab and select Save and Activate from the dropdown menu. Click on OK to save and activate your changes.