Step 1 Locate the Queue name, or Port name, of your printer.
Step 2 After you locate the Queue or Port name, you will want to write it down. (You can also highlight it with your cursor, and copy the info. This will allow you to paste it in to the wizard later on.)
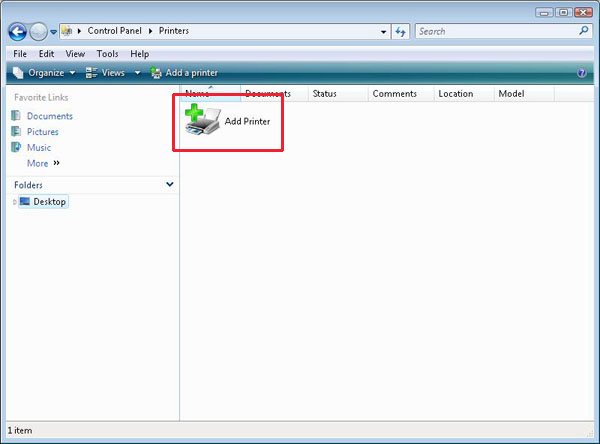
Step 3 Click Start and then Control Panel. Locate the Printers icon. Click the Add A Printer icon.
Step 4 Click Add a Local Printer. Use this option only if you don't have a USB printer. (Windows automatically installs USB printers when you plug them in).

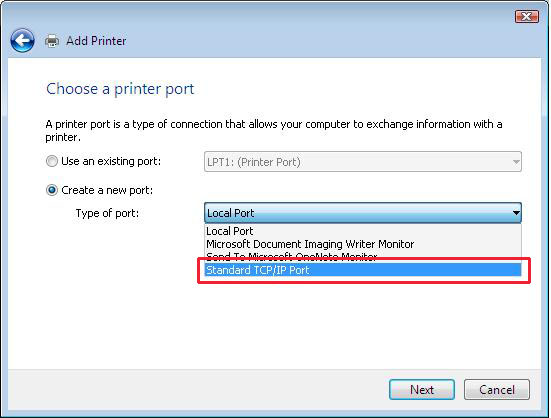
Step 5 Select Create New Port. For the port type, select standard TCP/IP Port. Click Next.
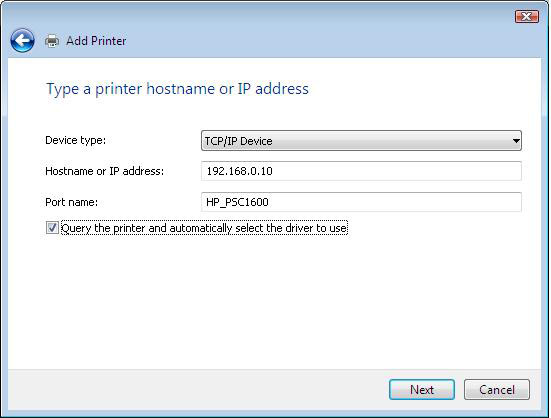
Step 6 Click the drop down menu for Device Type and choose TCP/IP Device.
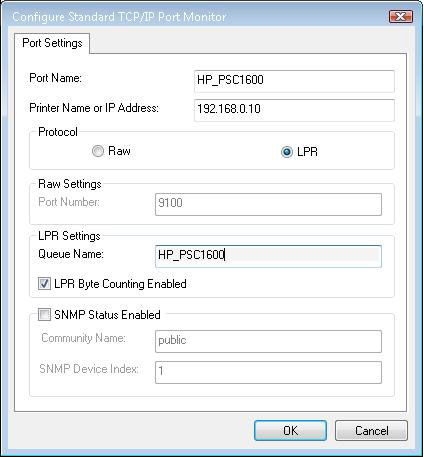
In the Hostname or IP Address field, input the ip address of your print server. (The default address for most of D-Link's print servers is 192.168.0.10).
The PORT NAME field is purely for identification purposes. This allows you to discern the port you've created later on for configuration.
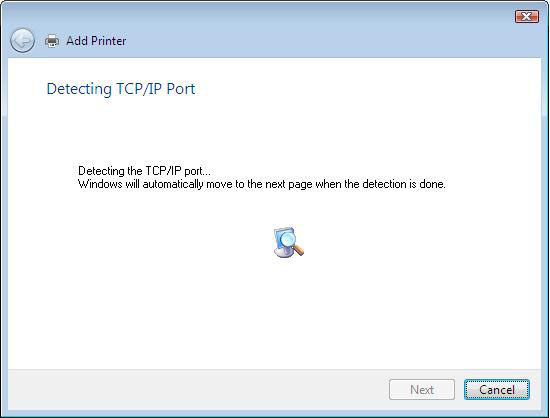
Step 7 Windows will attempt to detect the printer. Please allow a few moments for the operating system to do this.
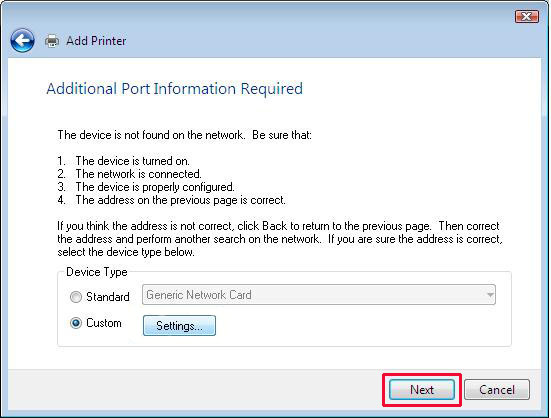
Step 8 Highlight the radio button labeled Custom and press the Settings button.
Step 9 Click the radio button labeled LPR.
The LPR Queue Name field will now become available. Here you will need to enter the Queue or Port name that you acquired in Step 1.
Check the box labeled LPR Byte Counting Enabled. Click OK.
Step 10 At this point, you'll be brought back to the previous window. Click Next.

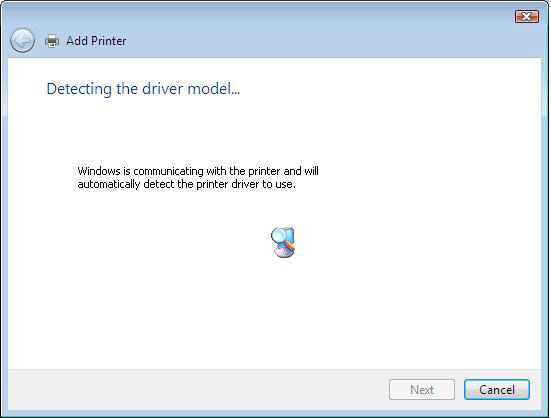
Step 11 Windows will now attempt to detect and install the printer driver. If Windows is unable to detect the printer and find a matching driver, you will be given the option of selecting a printer from a list of available printer drivers.
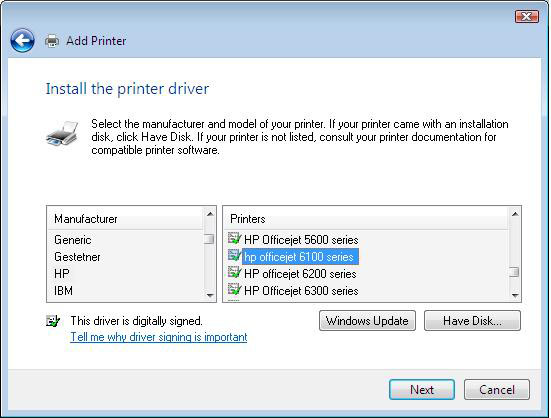
Step 12 In the left window you have a list of manufacturers, and on the right side you have the various models. Select the model that pertains to your printer. Click Next.
Step 13 Next you will be prompted to give the printer a name. You can leave the default Windows name, or you can create your own if you wish. Click Next.

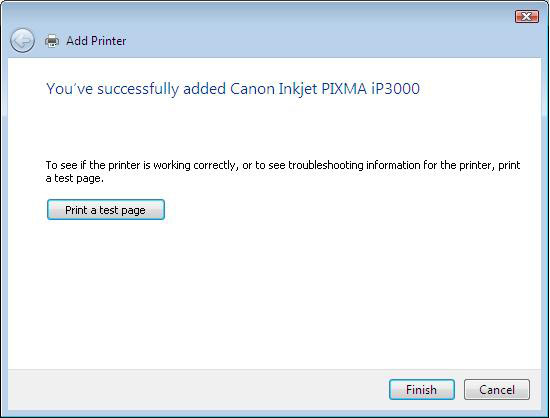
Step 14 Once the printer successfully installs you will be given the option to print a test page. If the test prints then the print server is configured properly. Click Finish.