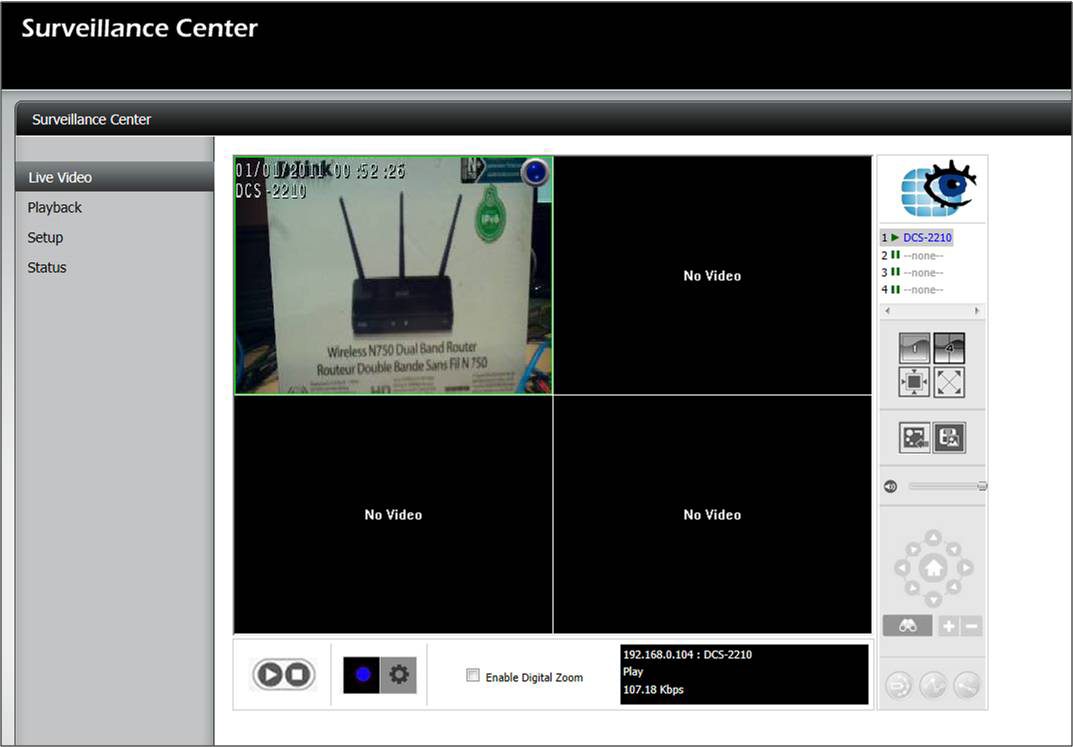
The D-Link Surveillance Add on Package provides:
- Embedded NVR (network video recorder)
- Supports real-time monitoring, recording and playback of surveillance video using select D-Link Network Cameras
- Supports up to 4 D-Link network cameras
- Supports DCS-930,DCS-930L,DCS-932,DCS-932L,DCS-1100,DCS-1100L,DCS-1130,DCS-1130L,DCS-5222L,DCS-5211L,DCS-5230,DCS-5230L,DCS-942L, DCS-2103,DCS-2210,DCS-2230 (using package v.2.00)
Step 1: Download the Surveillance center app from www.dlink.com
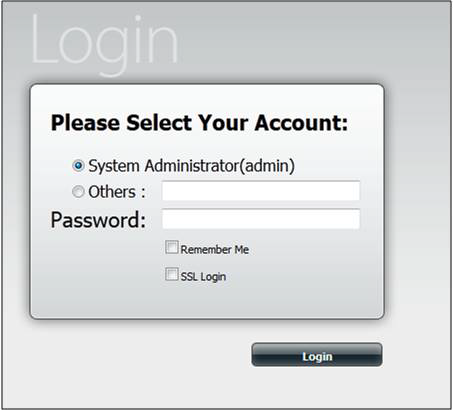
Step 2: Log into your DNS-325 / DNS-345
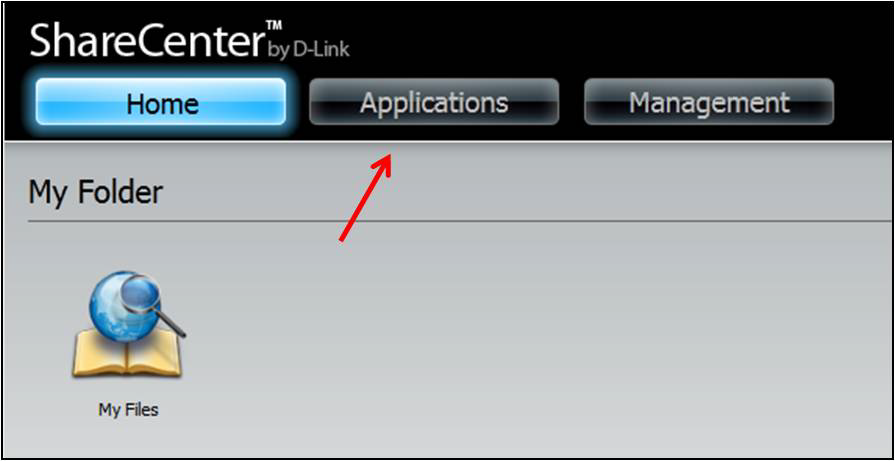
Step 3: Click on the Applications tab and then click Add-On Management
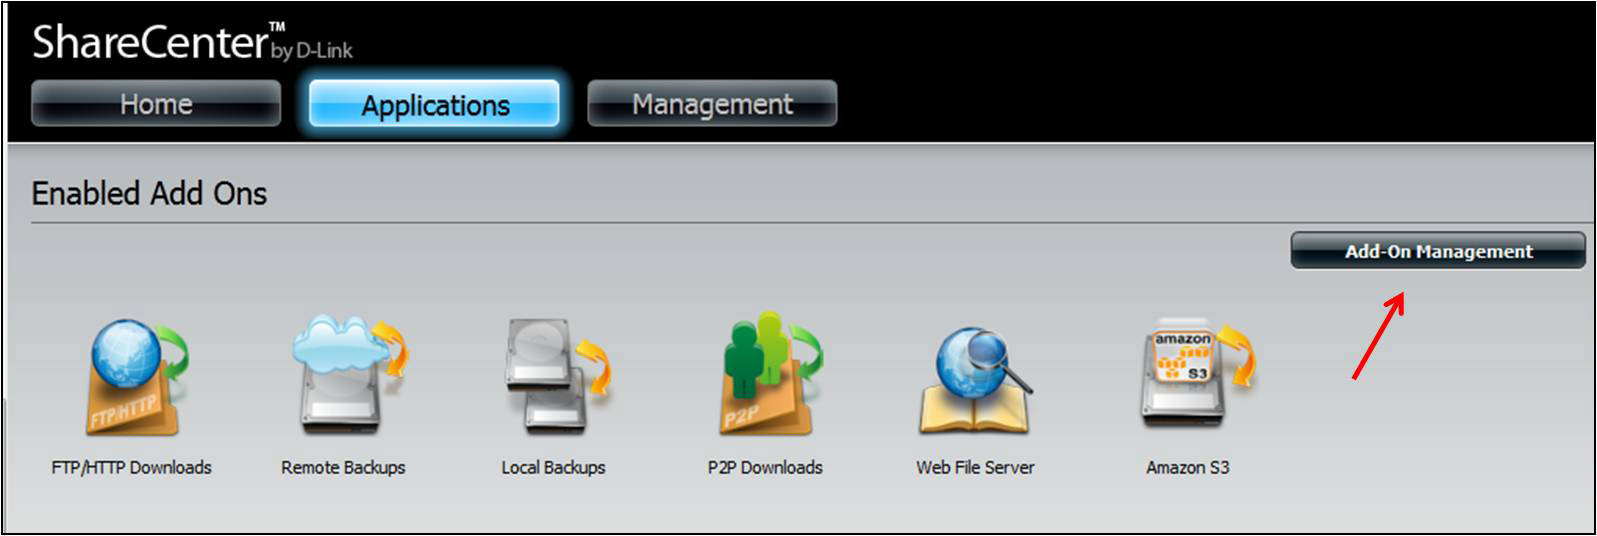
Step 4: Browse to the Surveillance Center Package and click Apply
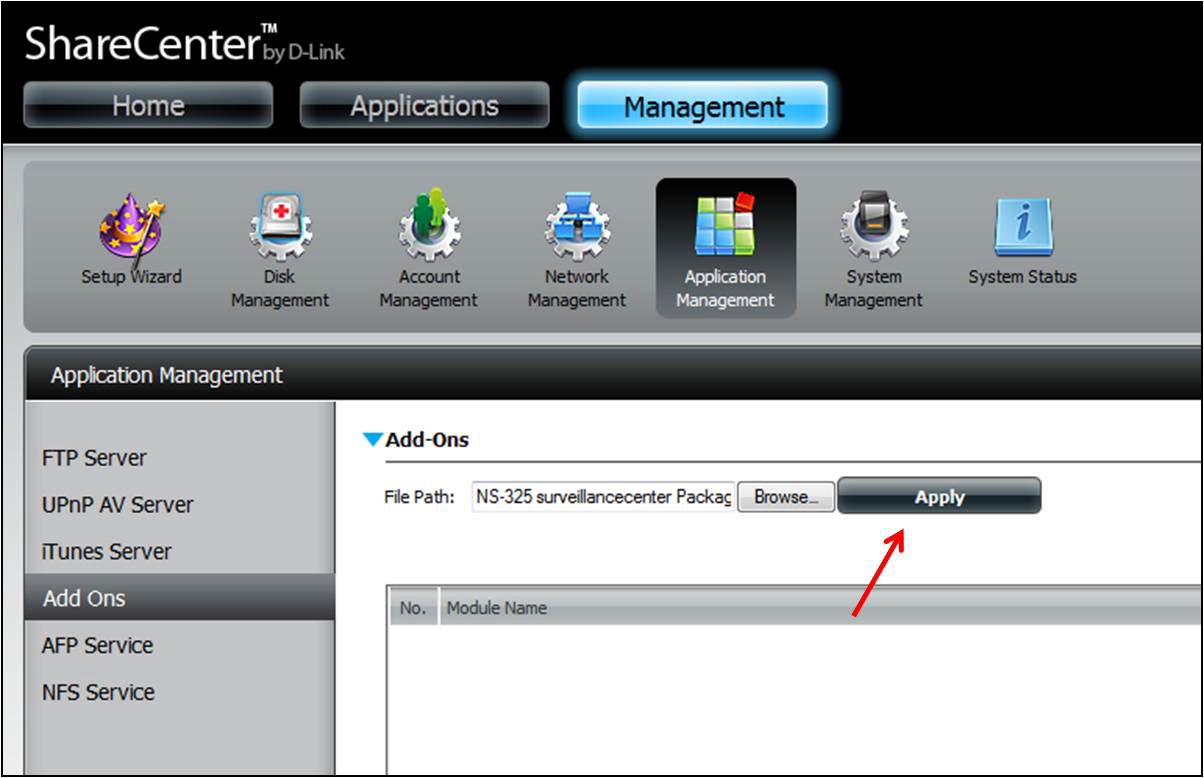
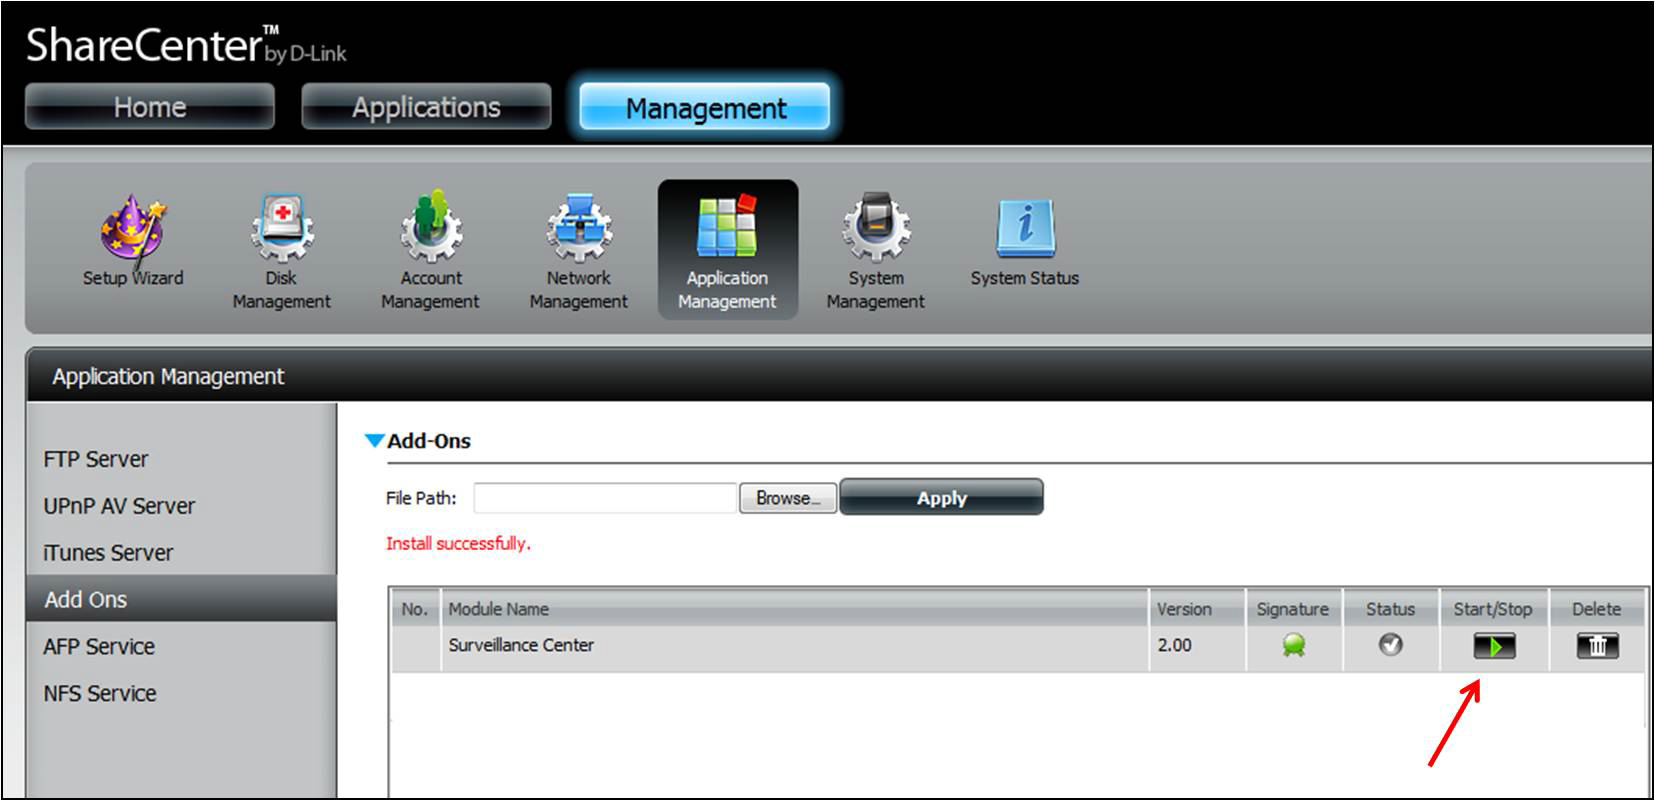
Step 5: The Surveillance center app should now be visible, click on the Play button to Start the app.
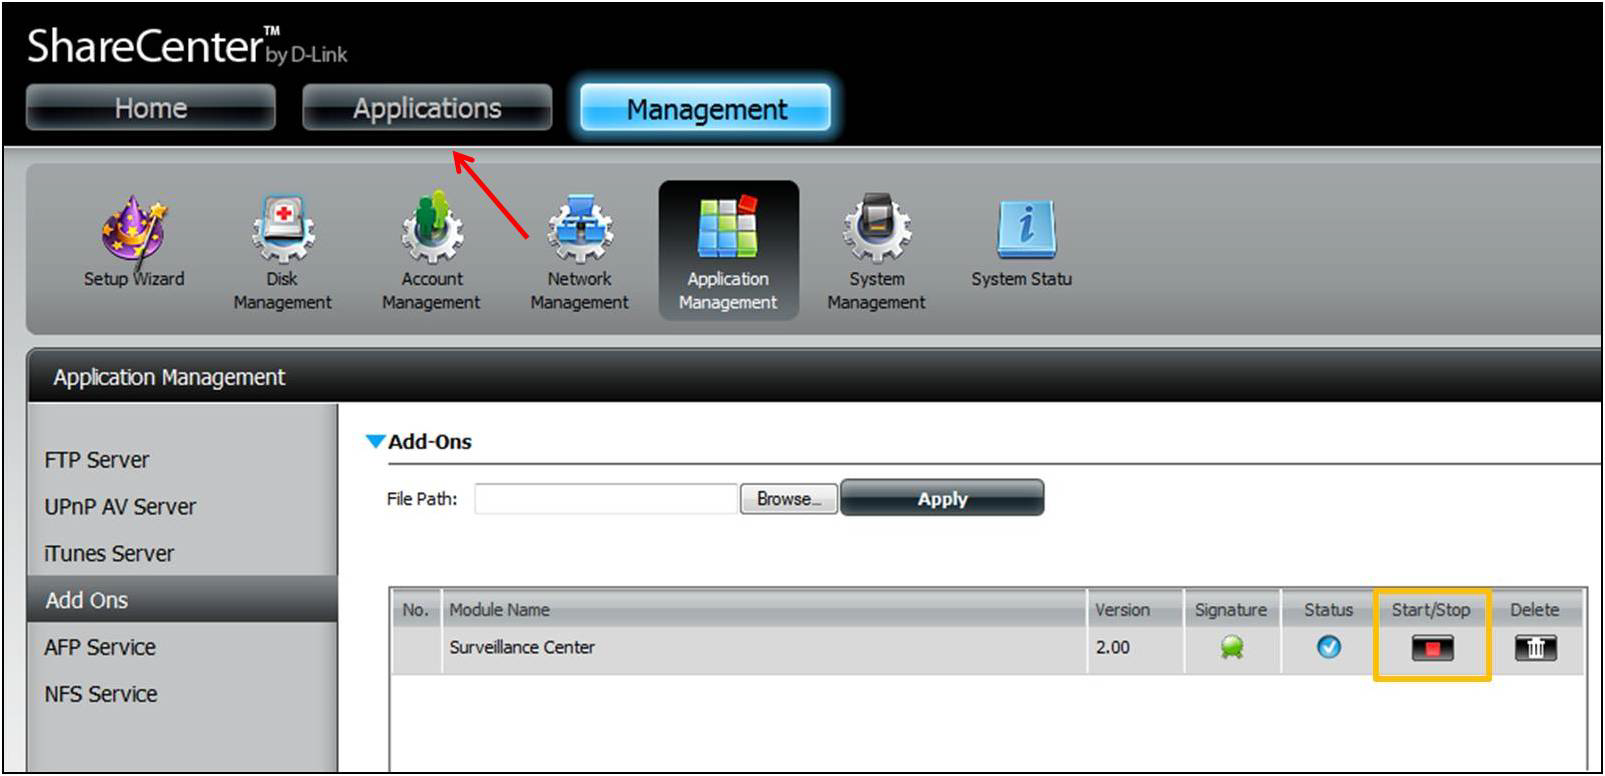
Step 6: Click on the Applications tab
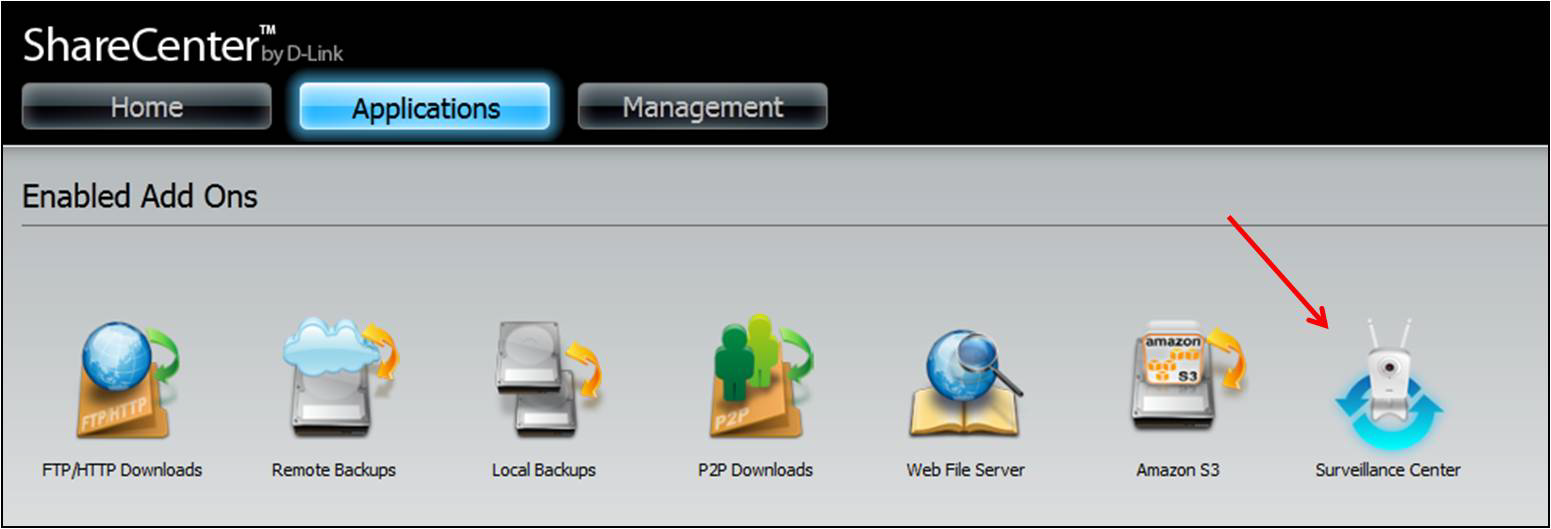
Step 7: Click on the Surveillance Center App icon and click Launch Interface
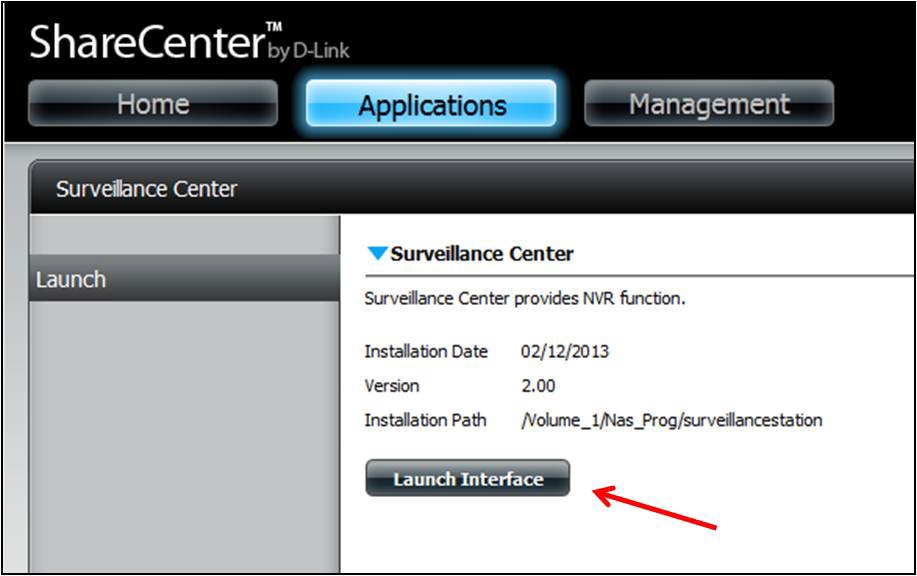
Note: Depending on your cameras configuration, the cameras may automatically be added to the Surveillance Center.
If not:
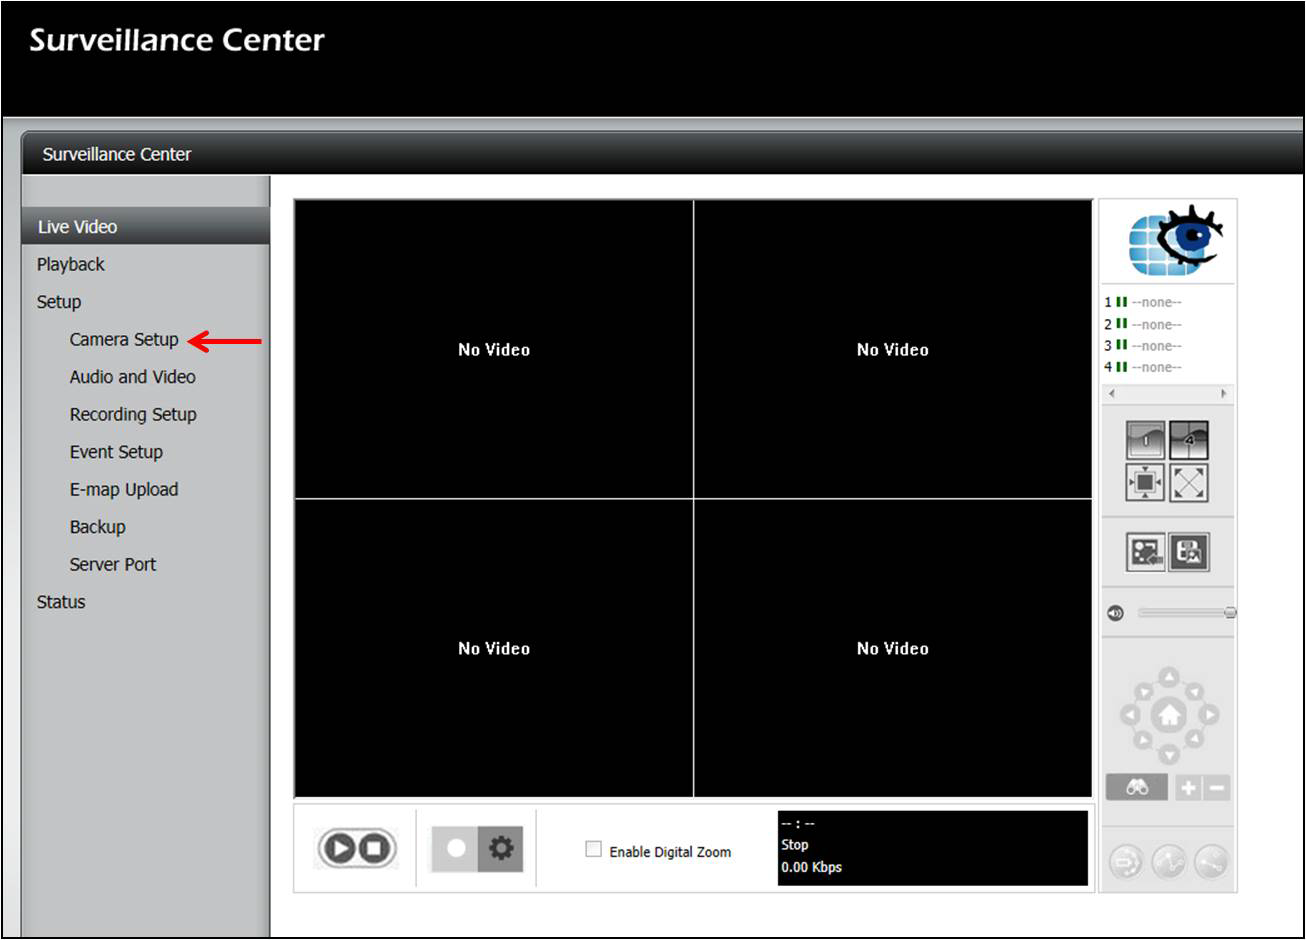
Step 8: Click Setup on the left side and click Camera Setup
Step 9: Click Run Wizard
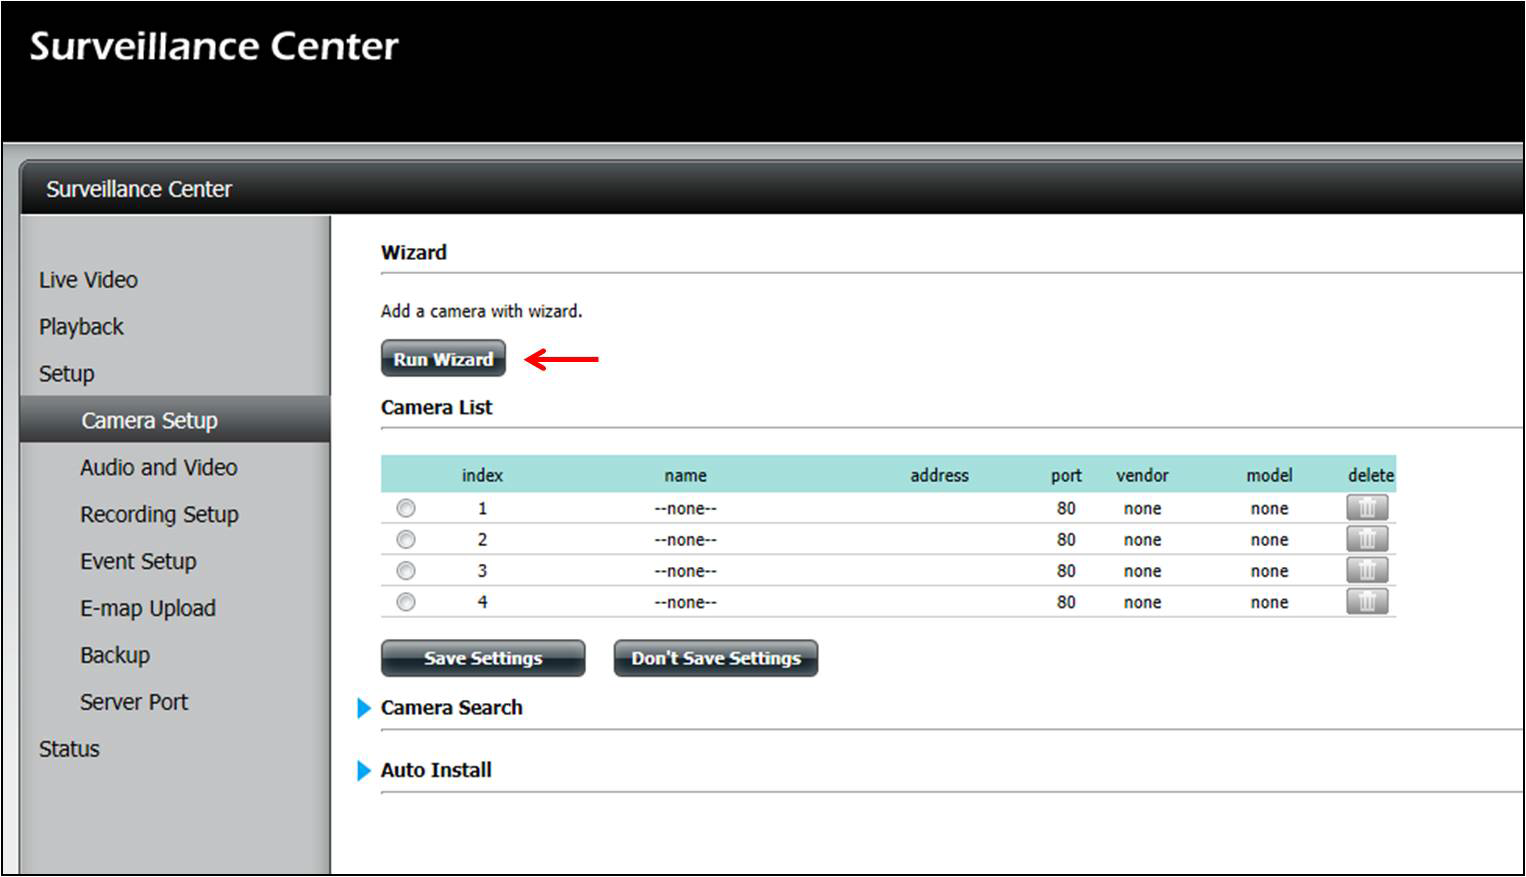
The Camera Setup Wizard Appears
Click Next
Select your camera(s) and click next
Enter the settings for your camera(s)
- Username
- Password
- Video Format
Click Test camera to confirm settings are correct. You should be able to see a camera still.
Setup desired recording schedule (optional)
Setup Quota for each camera (optional)
Click Finish
Your Cameras are now added, click on Live Video on the left side
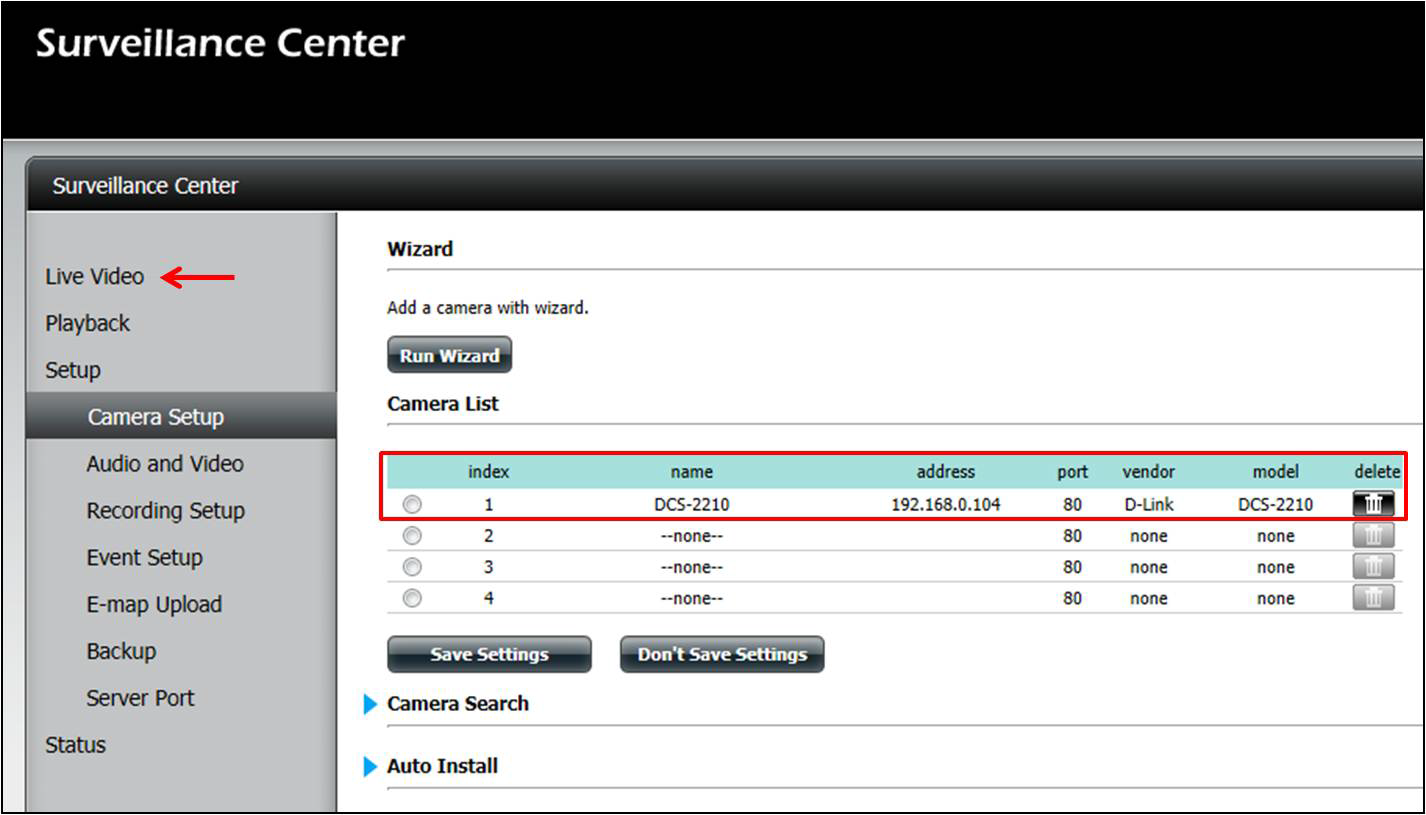
Your camera(s) should now be visible
