1. Introduction
The objective of this document is to provide a guide describing how to configure the
devices to achieve the same environment as show at the network topology.
Users of this document are expected to already possess basic knowledge of D-Link
devices and TheGreenBow VPN program, and are familiar with how to perform basic
configurations. Only important configurations, such as those pertaining to interfacing and
integrating, will be described in this document.
2. Product used
TheGreenBow_VPN_Client 4.61.003 and DFL-800 are used in the FAQ. The same applies to all other DFL products with Netdefend OS.
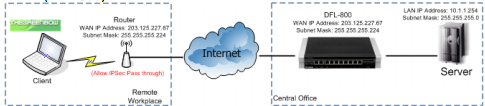
3. Network Diagram
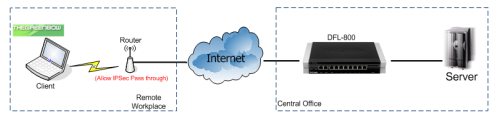
Note: Router is set to allow IPSec pass through.
4. Configurations
In this document, we will only describe the main configurations for this Scenario. The
configurations setting for all the D-Link products will not be described here and for more
detail about the product you can download their user guide.
4.1 TheGreenBow VPN client and DFL-800
In this scenario the user can connect back to the headquarter database by using
TheGreenBow VPN client tunneling to DFL-800.
All configurations are based on DFL-800 and TheGreenBow
VPN Client (F/W: 4.61.003)
The steps in this configuration are:
Setup DFL-800 for VPN tunneling
Setup Pre-shared Key
Phase 1 and Phase 2 algorithms setup
Setting up IPSec-Tunnel
Setup IP Rules
Setup TheGreenBow VPN client
Setup Phase 1
Setup Phase 2
4.1.1) Setup DFL-800 for VPN tunneling
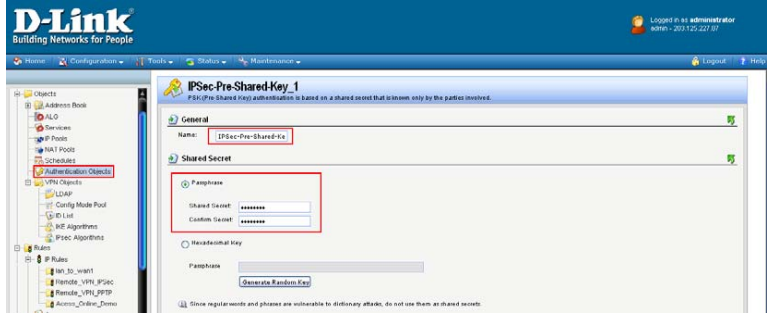
4.1.1.1) Setup Pre-Shared Key
1) Login to the DFL-800 and click Authenticate Objects and add
new Pre-shared Key and fill in the passphrase and name
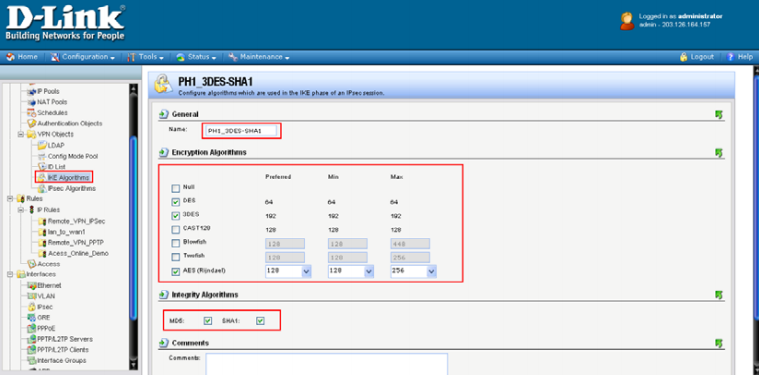
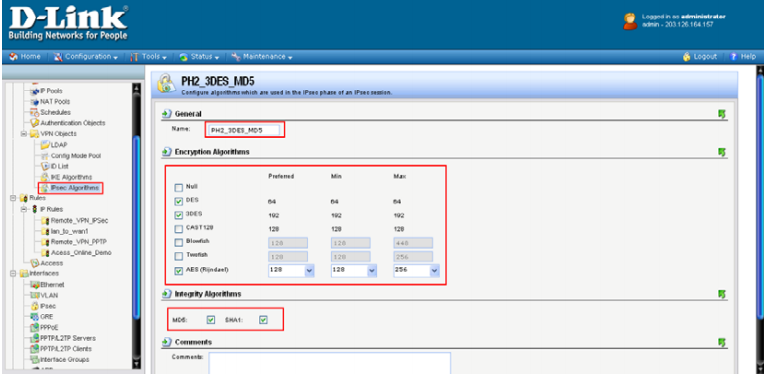
4.1.1.2) Phase 1 and Phase 2 algorithms setup
1) At the IKE Algorithms, select the Encryption and Integrity
algorithms for your phase 1 authenticate.
2) Next is the IPSec Algorithms, select the Encryption and
Integrity algorithms for the phase 2.
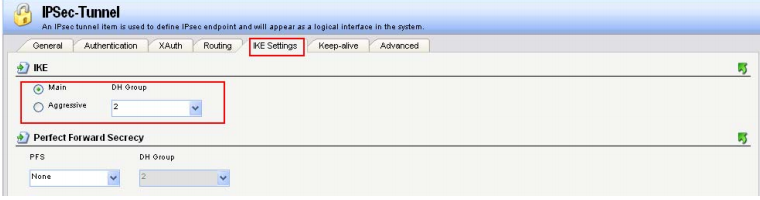
4.1.1.3) Setting up IPSec-Tunnel
1) After we finish setting up the algorithms, next we will need to
create the IPSec-Tunnel as show below.
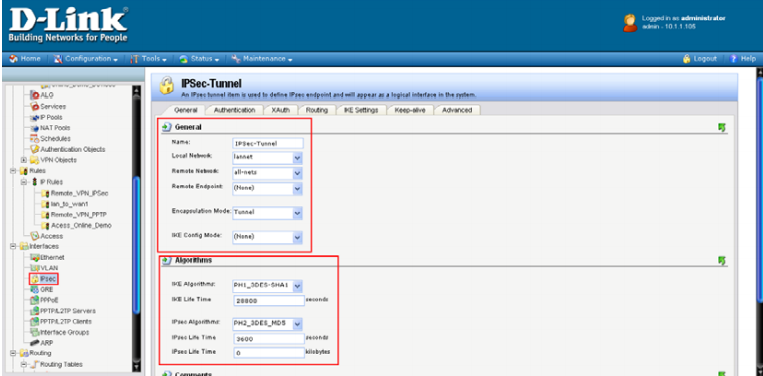
2) Next, click on the Authentication tab and select the PreShared Key you have setup at the steps 1.
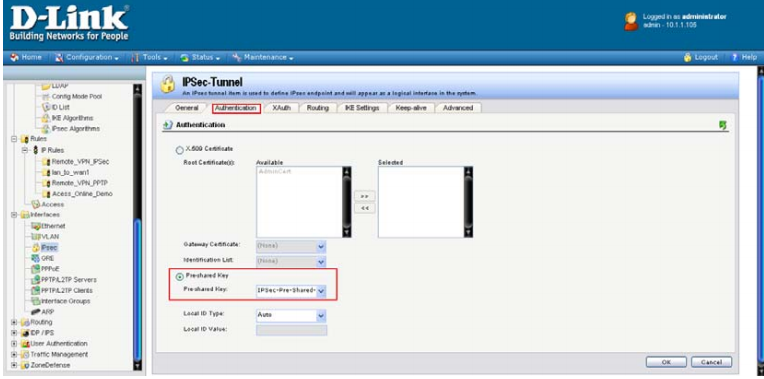
3) After selecting the Pre-Shared Key, next is to enable the
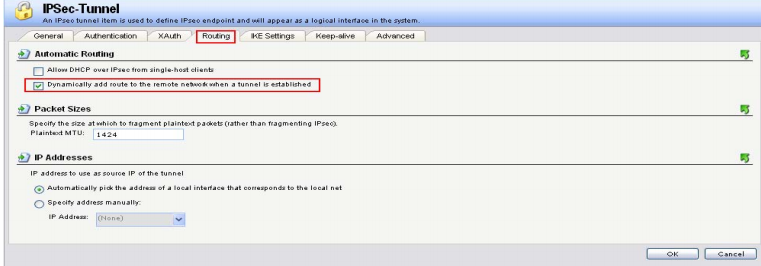
Dynamically add route at the routing tab.
4) Last step is to make sure the DH Group at the IKE setting is the
same setting for the TheGreenBow Client.
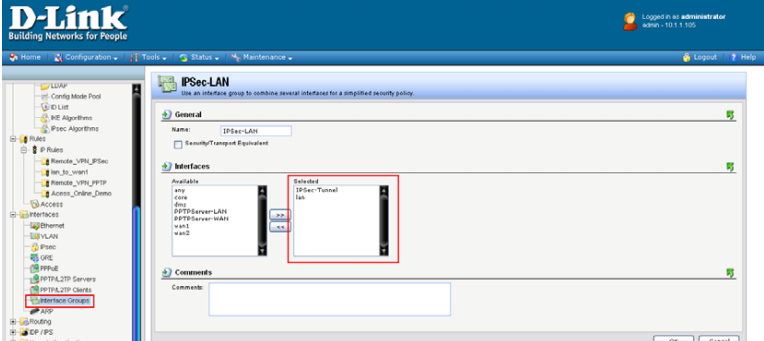
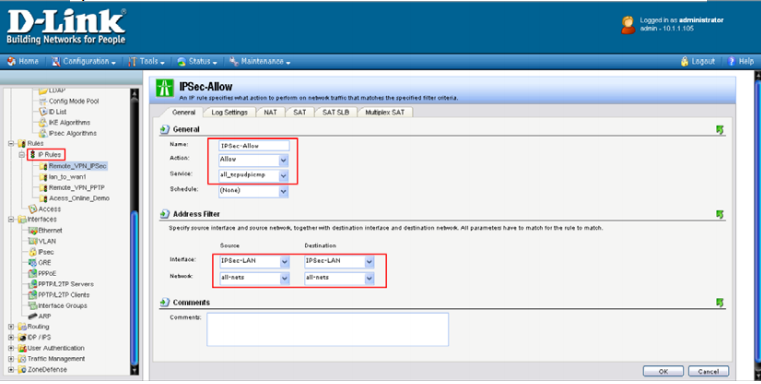
4.1.1.4) Setup IP Rules
Now is to setup the IP Rules so there the DFL-800 knows where
to direct all the traffic to.
1) First add a new interface group name IPSec-LAN by grouping
up IPSec-Tunnel and LAN.
2) Next, click IP Rules and add a new IP rule as show below.
4.1.2) Setup TheGreenBow VPN Client
4.1.2.1)Setup Phase 1
1) Right click on the Root to add a new Phase, next fill in the IP
address for this VPN client and Remote gateway IP follow by
Preshared Key and IKE setting.
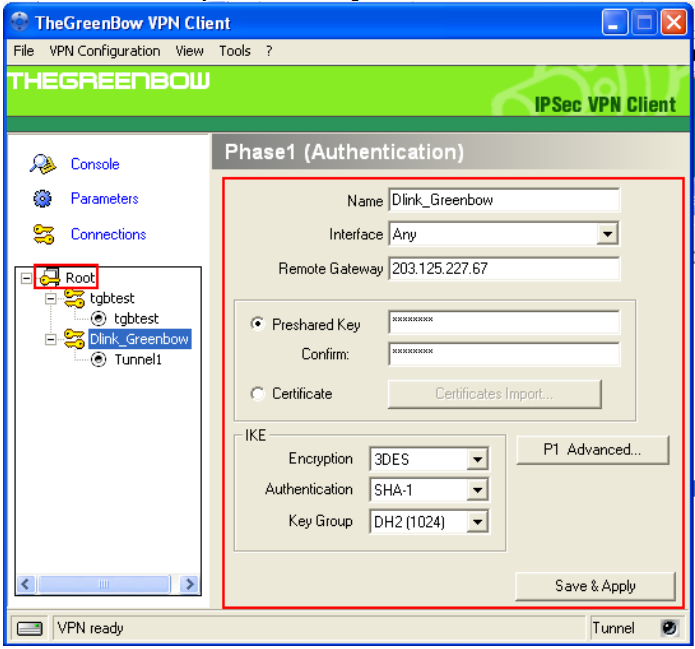
Note: the Preshared Key and IKE must be the same setting set in the DFL-800
4.1.2.2) Setup Phase 2
1) Right click on the Phase1 to add a new Phase2, next fill in the
VPN Client address for this VPN client and Remote gateway IP
follow by ESP setting.
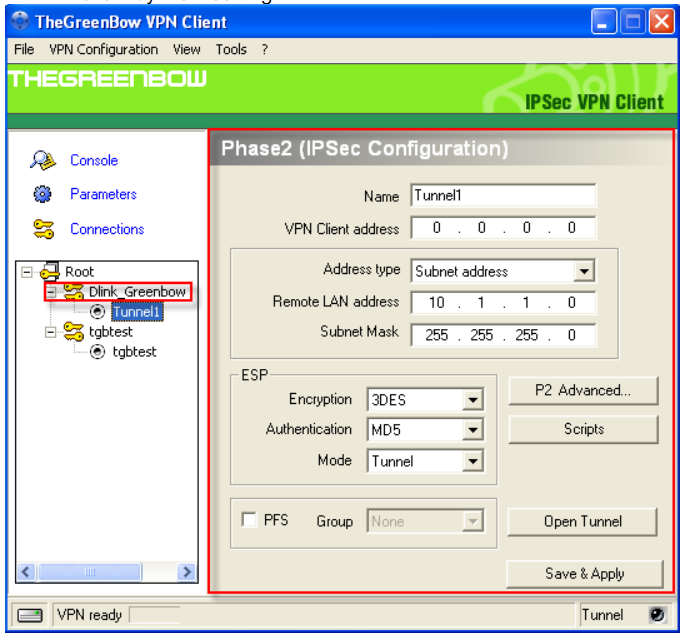
Note: the ESP Encryption and Authentication setting must be the same in the
DFL-800 IPSec-Tunnel.
5.1) Test Result
a. The VPN tunnel will be open at any negotiation