To setup motion detection recording, you have to setup motion detection on each of your camera(s) that you want to record on motion. Then configure the DNR-202L to record on motion within the web interface of the DNR-202L.
First: Setup Motion Detection on your camera
To setup motion detection on the camera, configuration can be performed within the mydlink web portal, the Web Interface of the camera, or the Web Interface of the DNR-202L.
[SECTION 1]
If your camera has been registered to mydlink:
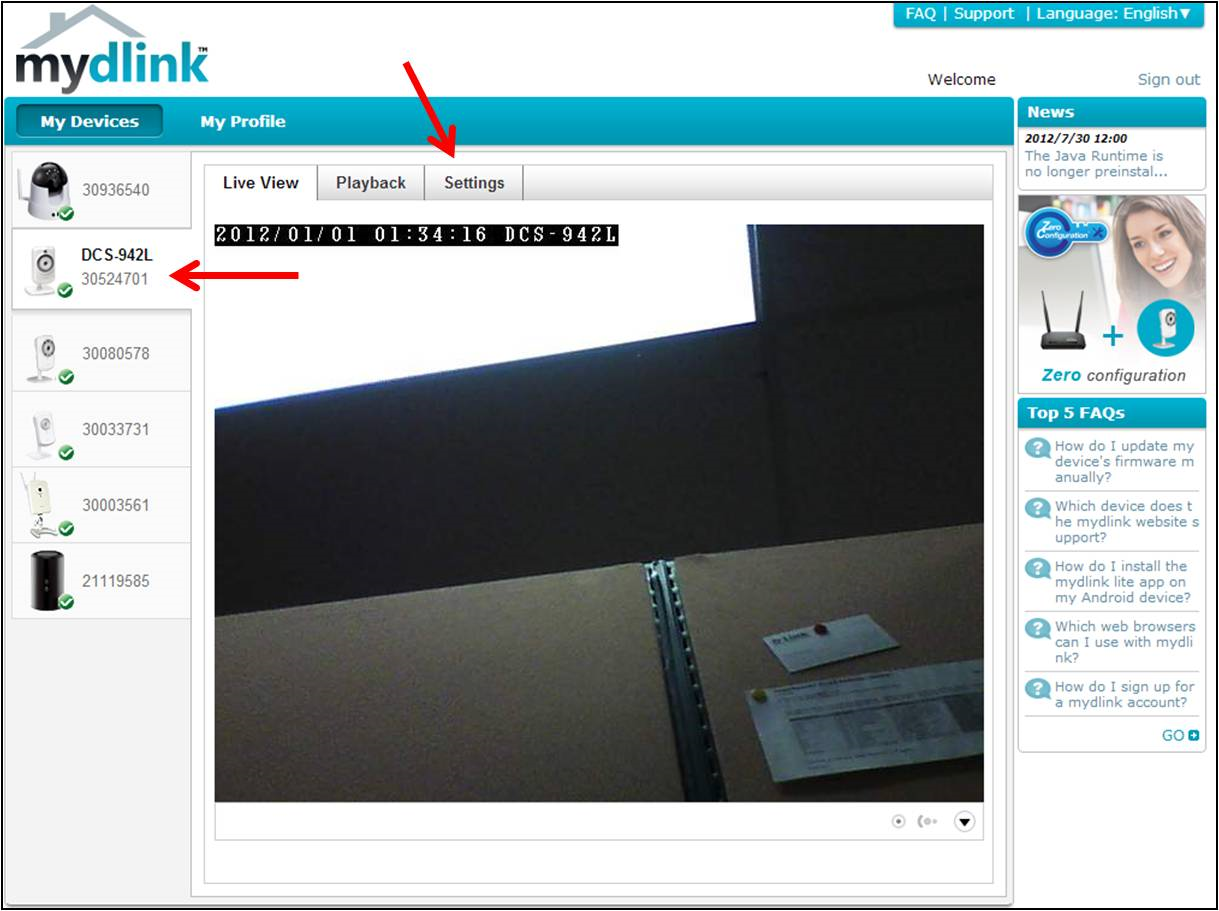
Step 1: Go to www.mydlink.com and log into your account.
Step 2: Select your camera and click on the Settings Tab.
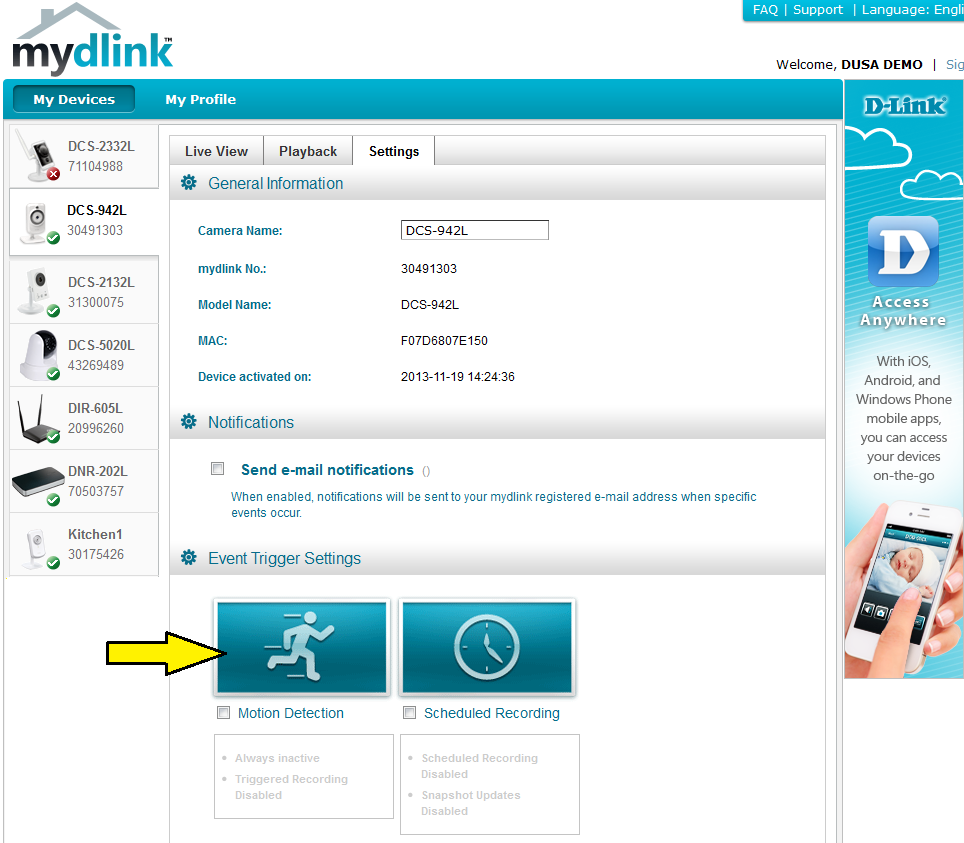
Step 3: Click the Motion Detection icon.
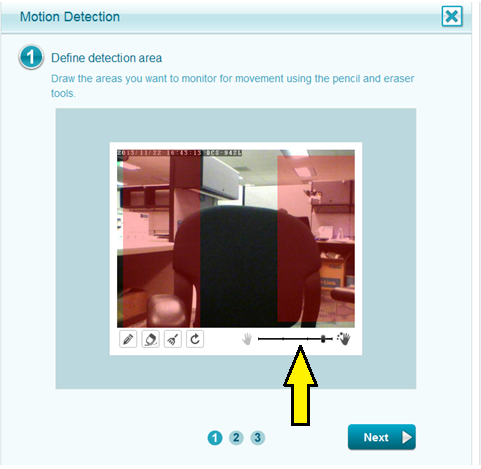
Step 4: Draw a box around the area of the frame you want to monitor for motion (Click, hold and drag the mouse around the specific area) and specify your sensitivity (Higher sensitivity allows motion to be easily detected. You may need to adjust this setting to calibrate it for the area you are monitoring). Click Next.
Note: Multiple areas can be selected
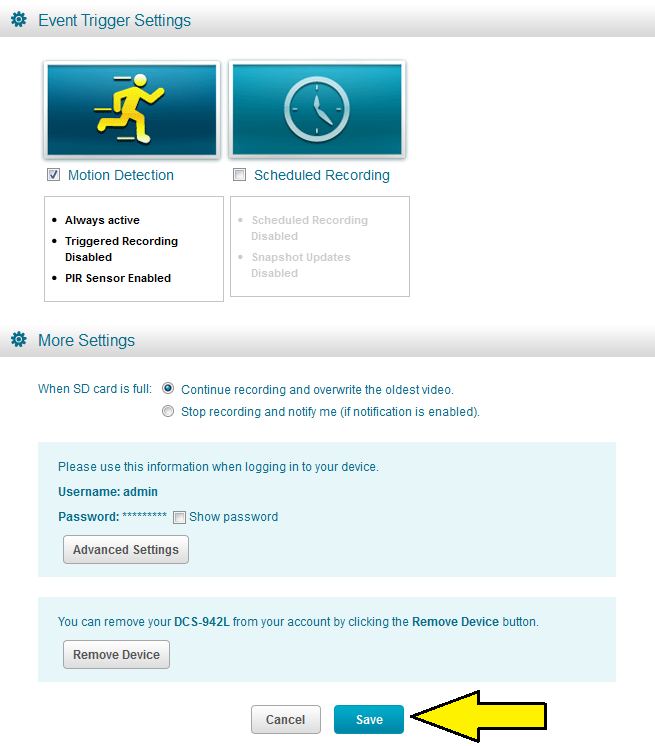
Step 5: Verify the options selected and click Activate. Click Finish to complete the setup.

Step 6. Click Save to save the settings.
Note: If you don’t see “motion detection” under the event trigger settings for your camera. Click on Advanced Settings and follow the steps in the next section.
[SECTION 2]
If your camera has NOT been registered to mydlink™:
Step 1: Open your internet browser and type the IP address of your camera into the address bar.
Step 2: When prompted, enter your username and password for the camera. (The default username is admin and there is no password)
Step 3: Click on the Setup Tab and then click Motion Detection on the left side.
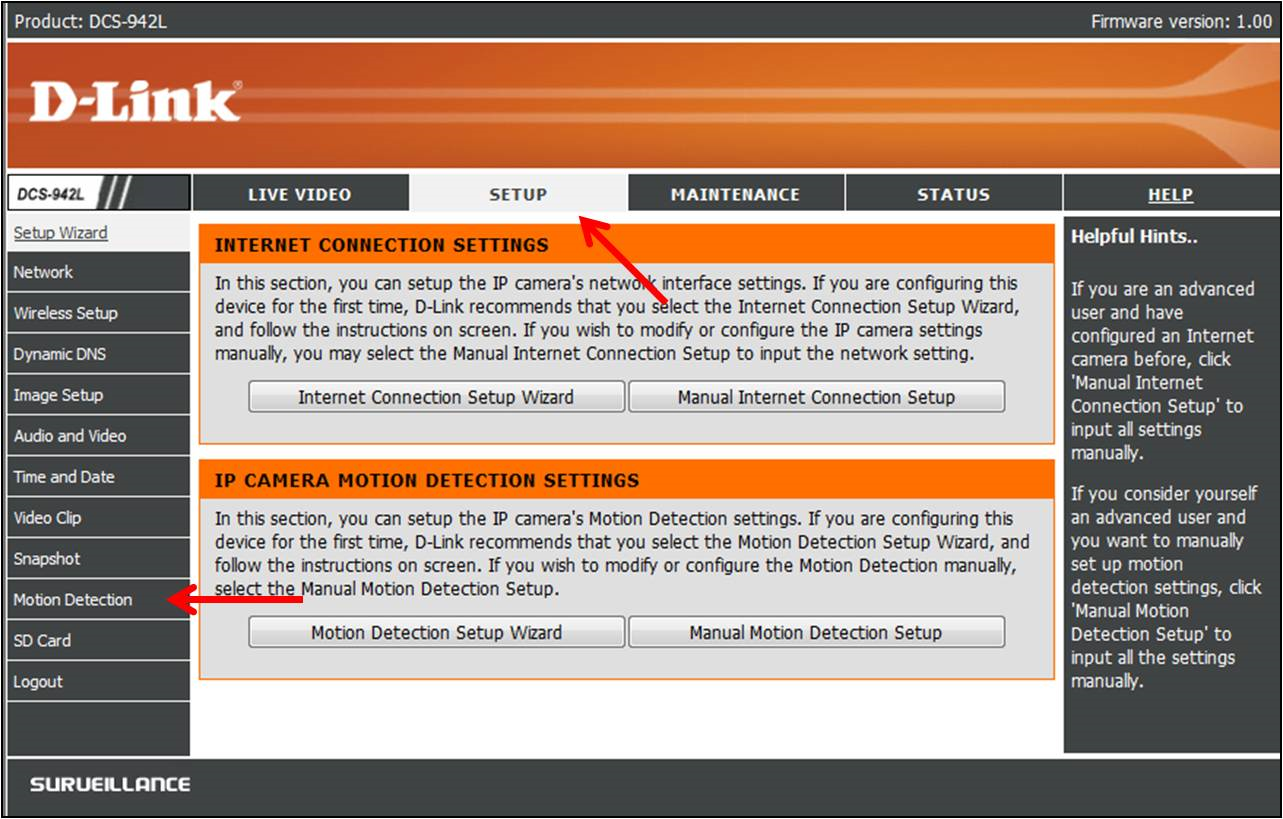
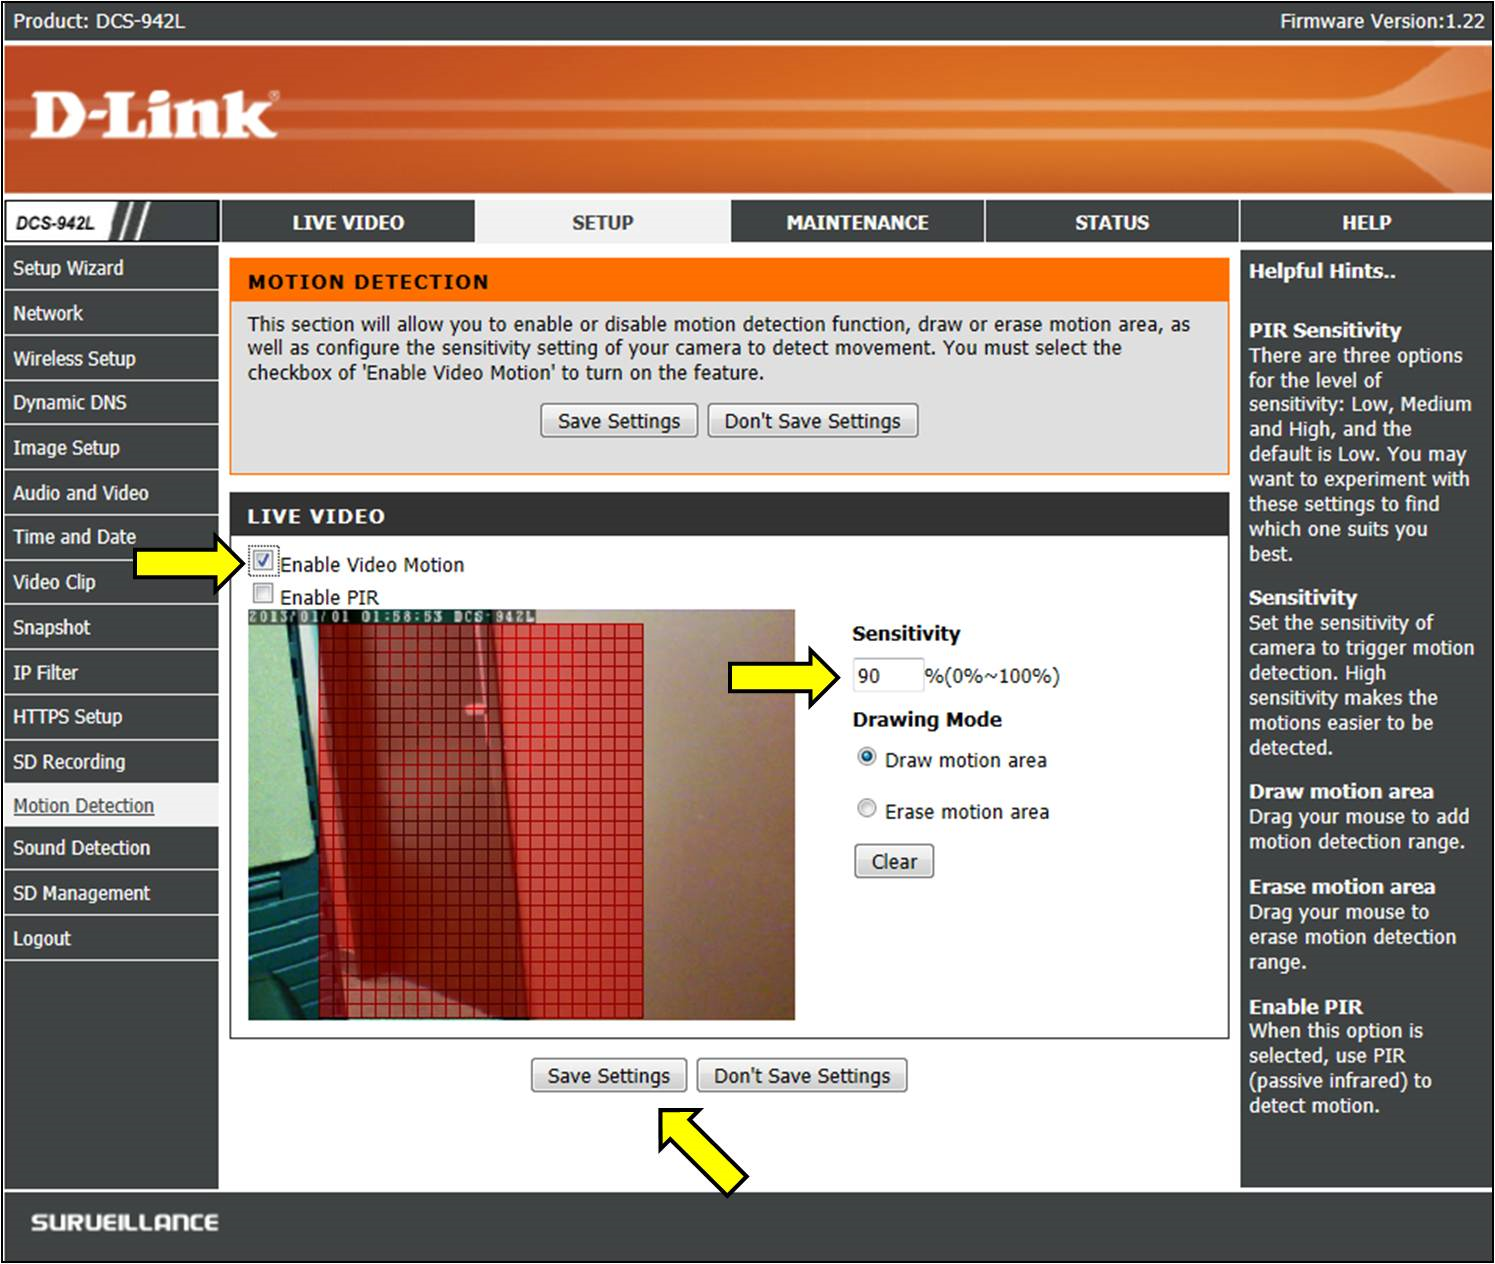
Step 4: Click Enable Motion
-
Draw a box around the area of the frame you want to monitor for motion. (Click, hold and drag the mouse around the specific area)
Note: Multiple areas can be selected
- Specify your sensitivity (Higher sensitivity allows motion to be easily detected. You may need to adjust this setting to calibrate it for the area you are monitoring).
Click Save Settings.
Note: If you do not see the "Motion Detection" settings, please use Internet Explorer to allow the ActiveX plugin needed to configure motion detection. If you are having issues with the ActiveX plugin, ensure the "Compatibility Mode" in Internet Explorer is set.
[SECTION 3]
Step 1: Open your internet browser and type the IP address of your DNR-202L into the address bar or go into the Advanced Settings section through the mydlink web portal (see [SECTION 1] of “Second: Configure the DNR-202L to record on motion” on how to get to the Advanced Settings).
Step 2: When prompted, enter your username and password for the DNR-202L. (The default username is admin and there is no password)
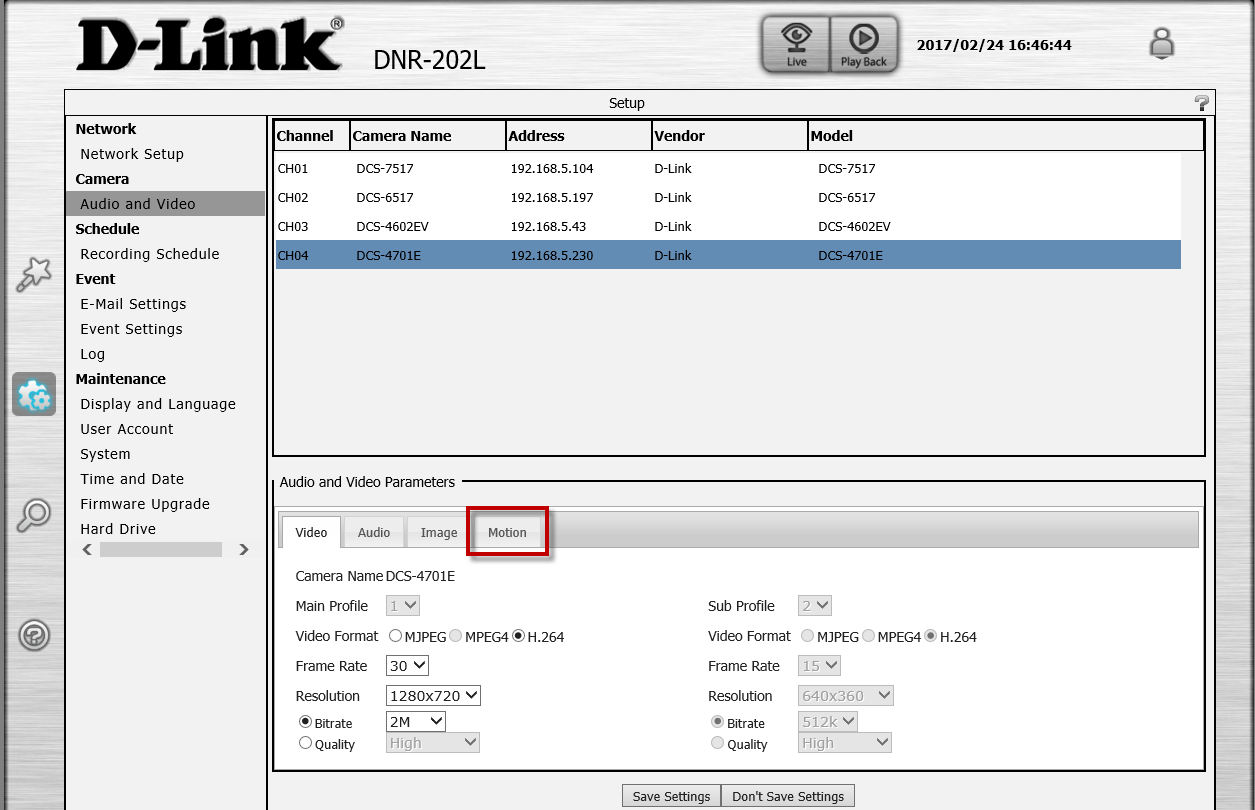
Step 3: Click the SETUP icon then click Audio and Video

Step 4: Click the camera we wish to enable motion detection
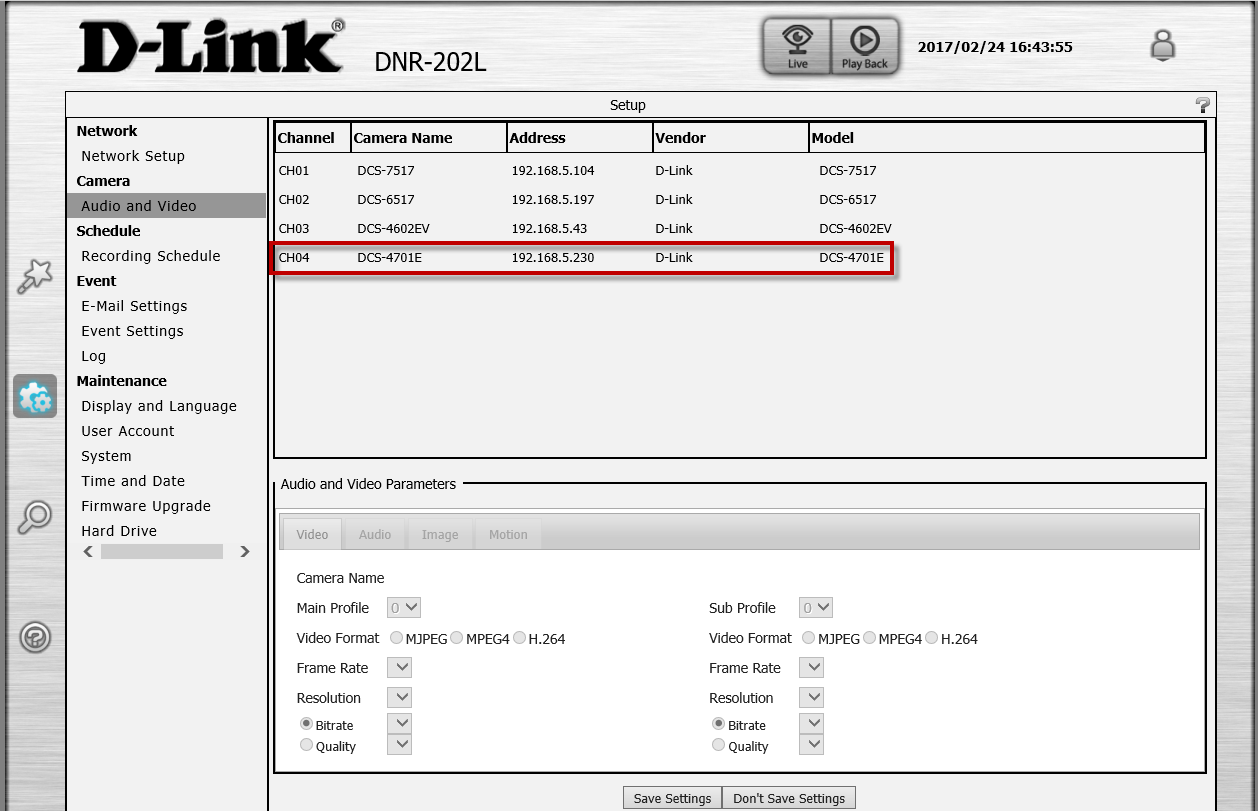
Step 5: In the Audio and Video Parameters, click the Motion tab
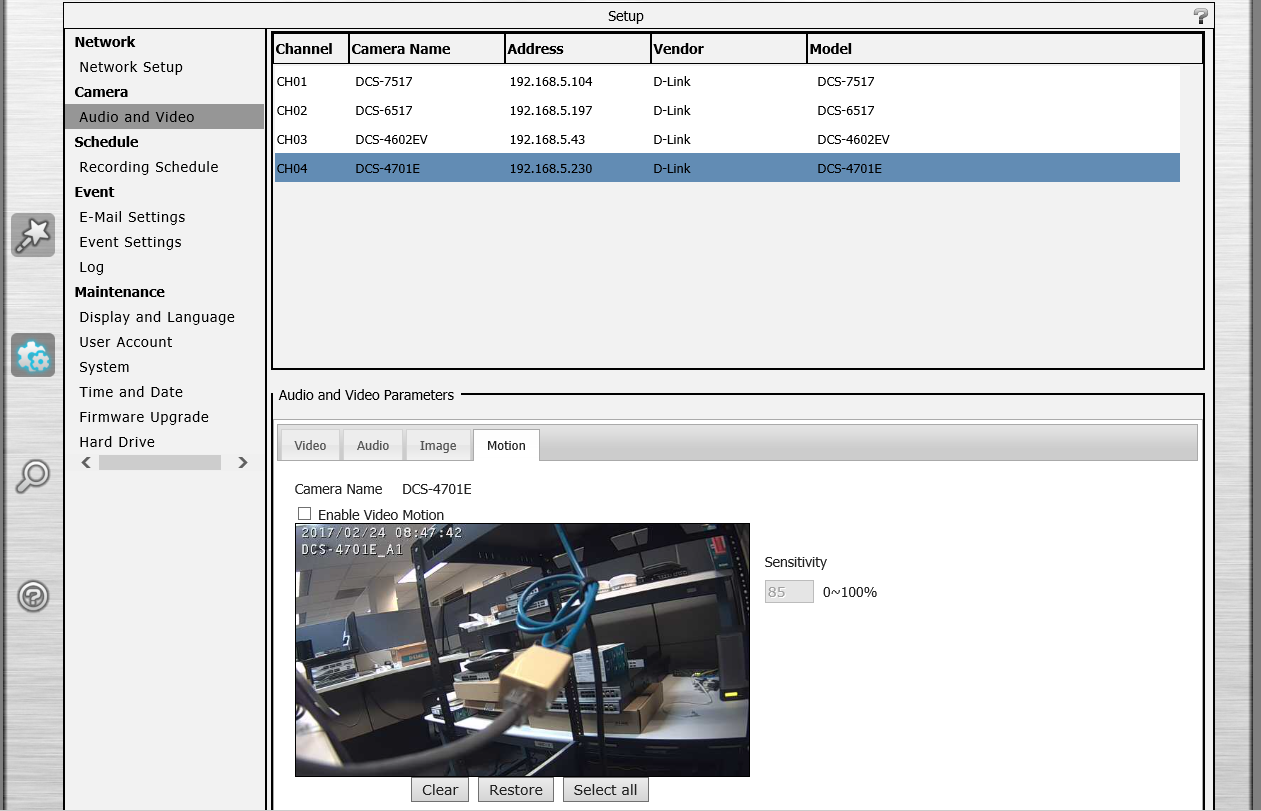
Step 6: Click Enable Video Motion and select the area we wish to detect motion on.

Note: If need be you can also adjust the Sensitivity.
Second: Configure the DNR-202L to record on motion
[SECTION 1]
If your DNR-202L has been registered to mydlink™:
Step 1: Go to www.mydlink.com and log into your account
Step 2: Select your DNR-202L and click Connect.
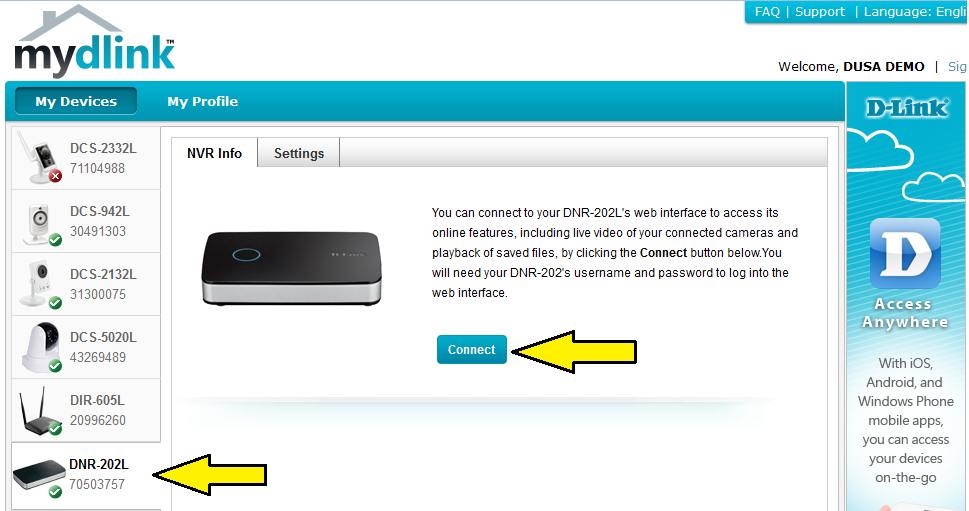
When prompted, enter your username (The default username is admin) and password for the DNR-202L. Then click on the NVR Info tab and click Advanced Setting. Go to Step 3 in the next section.

[SECTION 2]
If your DNR-202L has NOT been registered to mydlink™:
Step 1: Open your internet browser and type the IP address of your camera into the address bar.
Step 2: When prompted, enter your username and password for the DNR-202L (The default username is admin and there is no password)
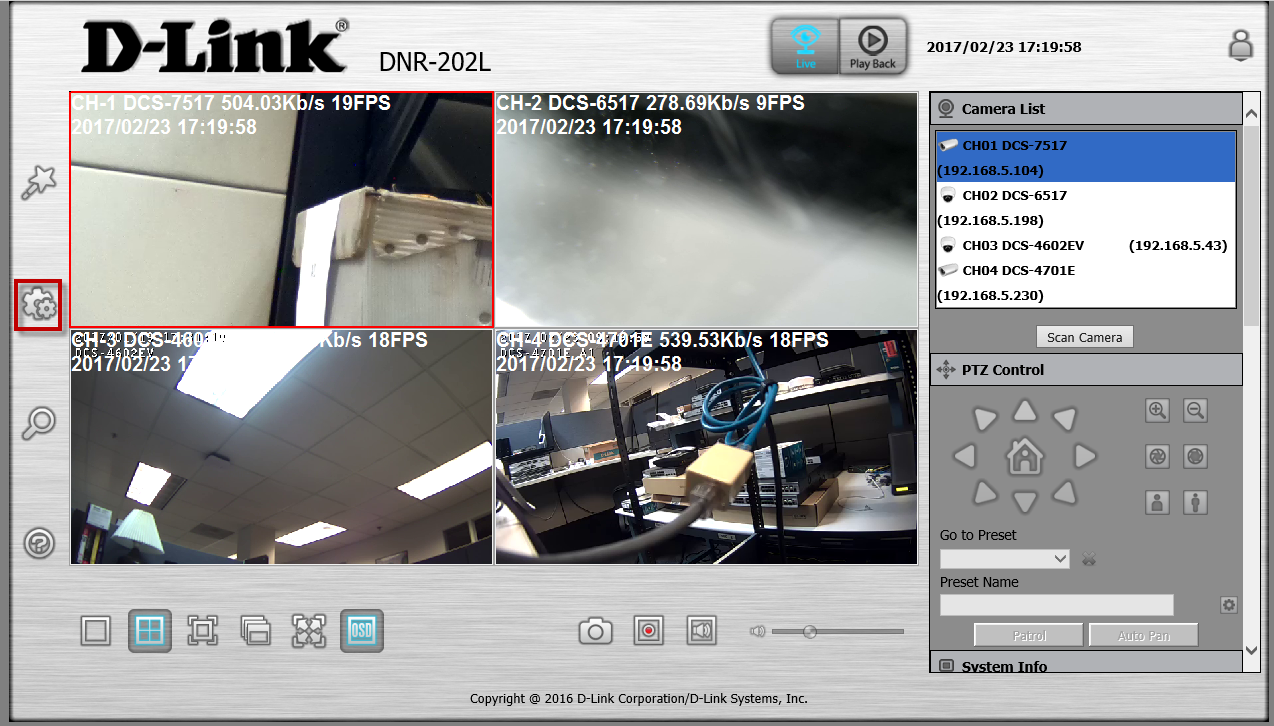
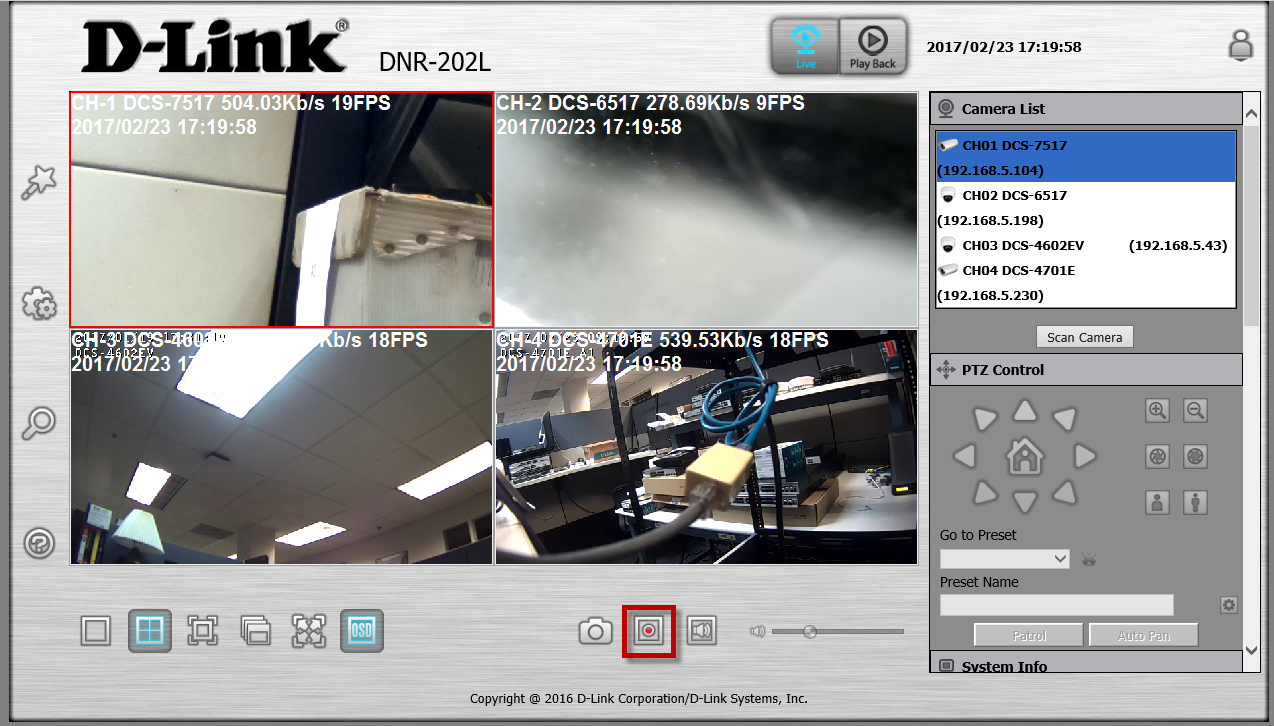
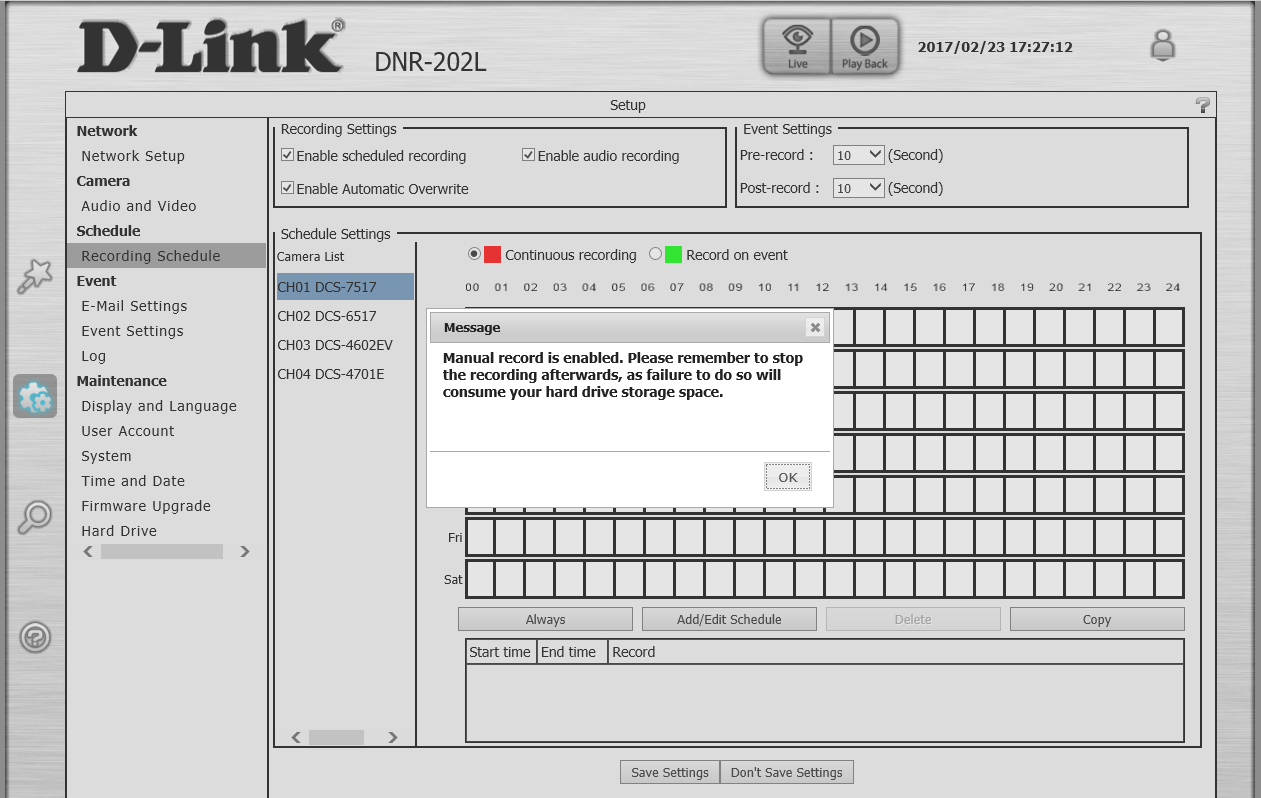
Step 3: Click the Record button on the live view page to disable manual recording.
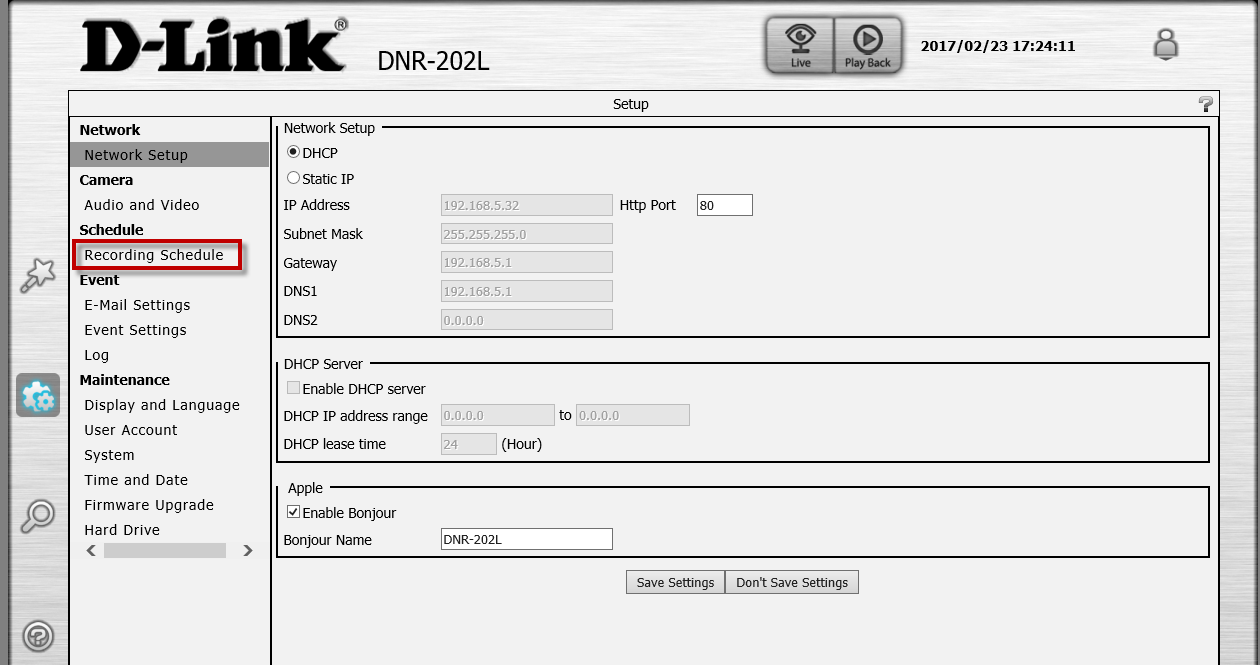
Step 4: Click on the Setup icon on the left side.
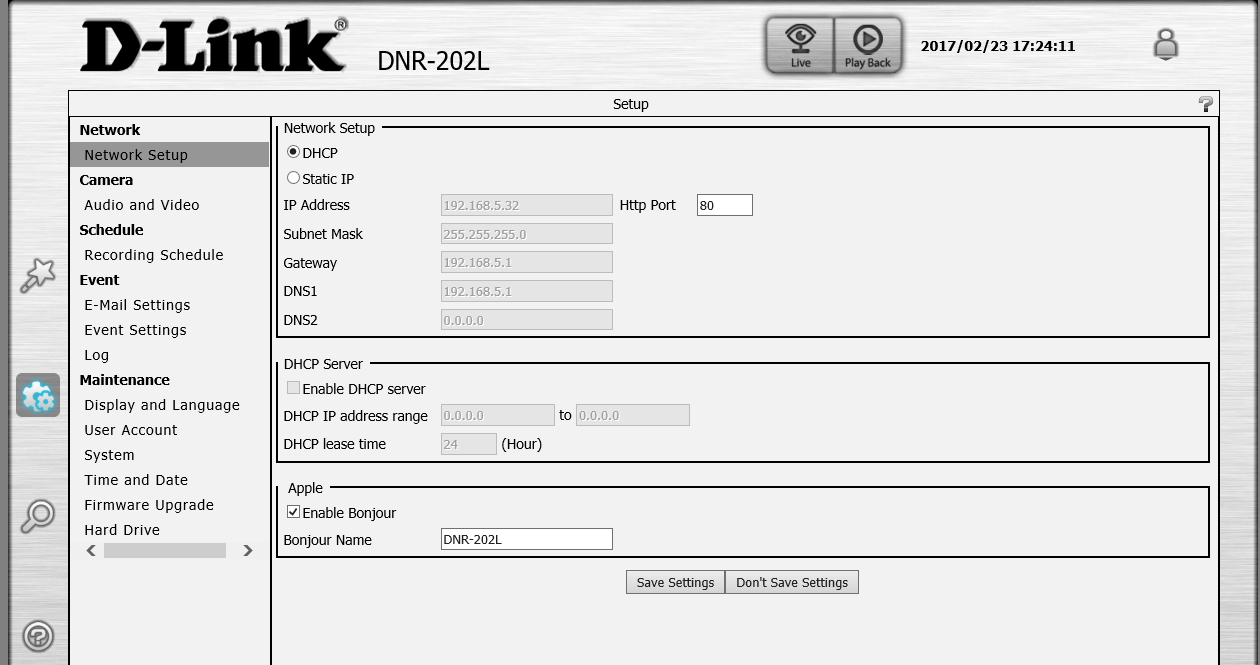
Then click on Recording Schedule.
Step 5: If prompted "Manual record is enabled..." go back to Step 3 to disbable manual record. Otherwise, continue to Step 6.
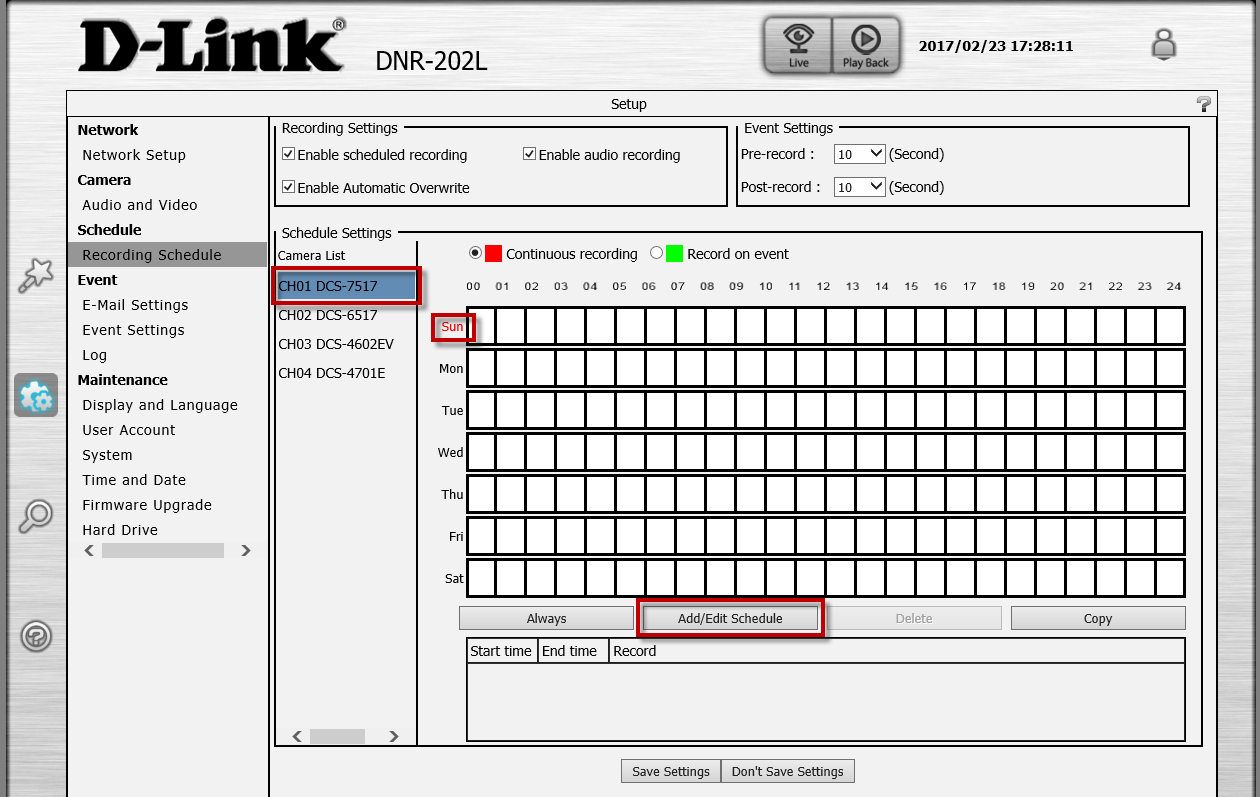
Step 6: Select the camera you want to record on motion and select the day you wish to setup the event on. Then click Add/Edit Schedule
Step 7: Select Record on event, to trigger a motion detected event.
Note: If need be you can set to record on event on a certain time of day.

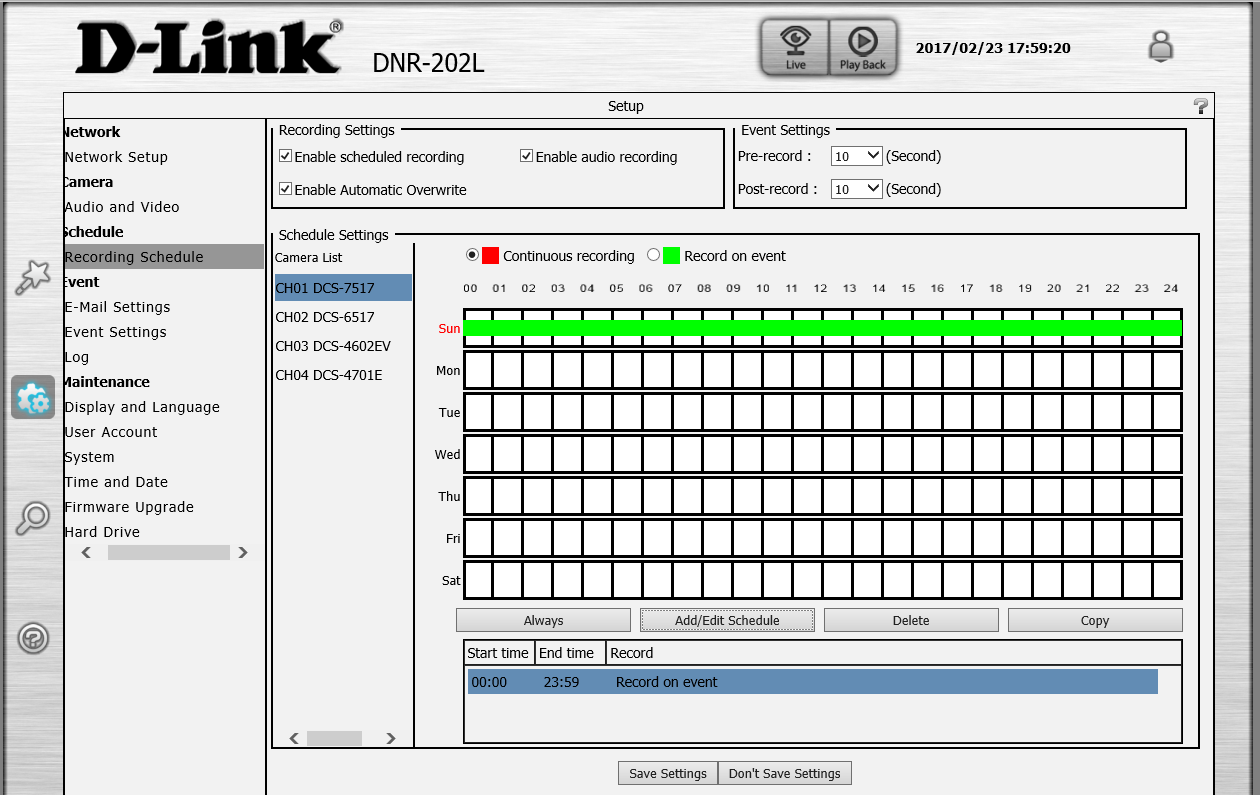
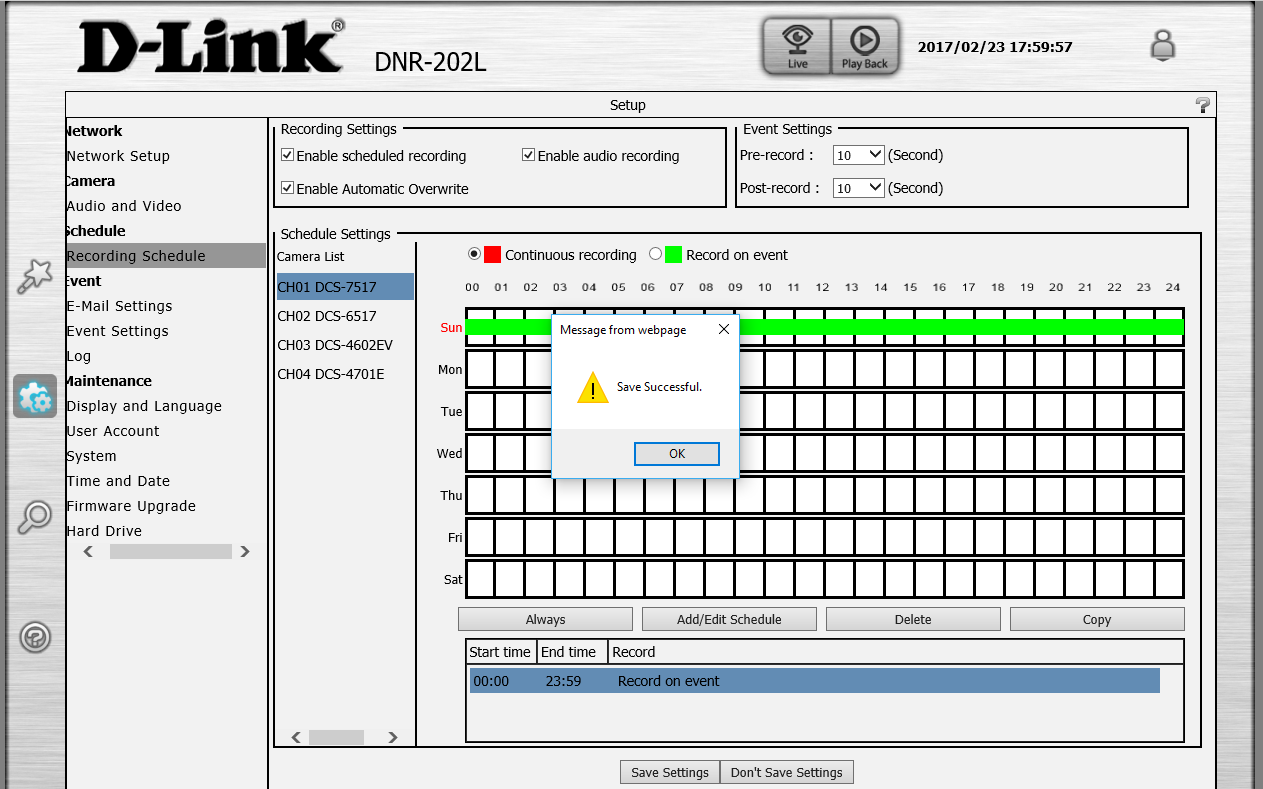
Click Save Settings when finished.
Repeat Steps 6 & 7 to finish off the week.
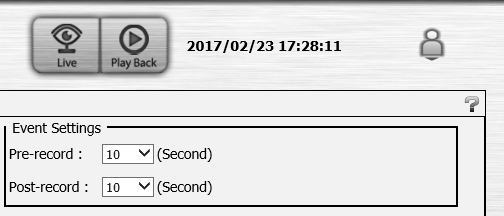
Note: In the Event Settings box, the Pre-record allows how many seconds to record before the motion is detected. The Post-record, allows how many seconds to record after the motion is detected.
Then verify that motion is being detected and recorded through the Live Video.