Step 1: Log into your router - How do I log into my router?
Step 2: Click Features > Quick VPN.
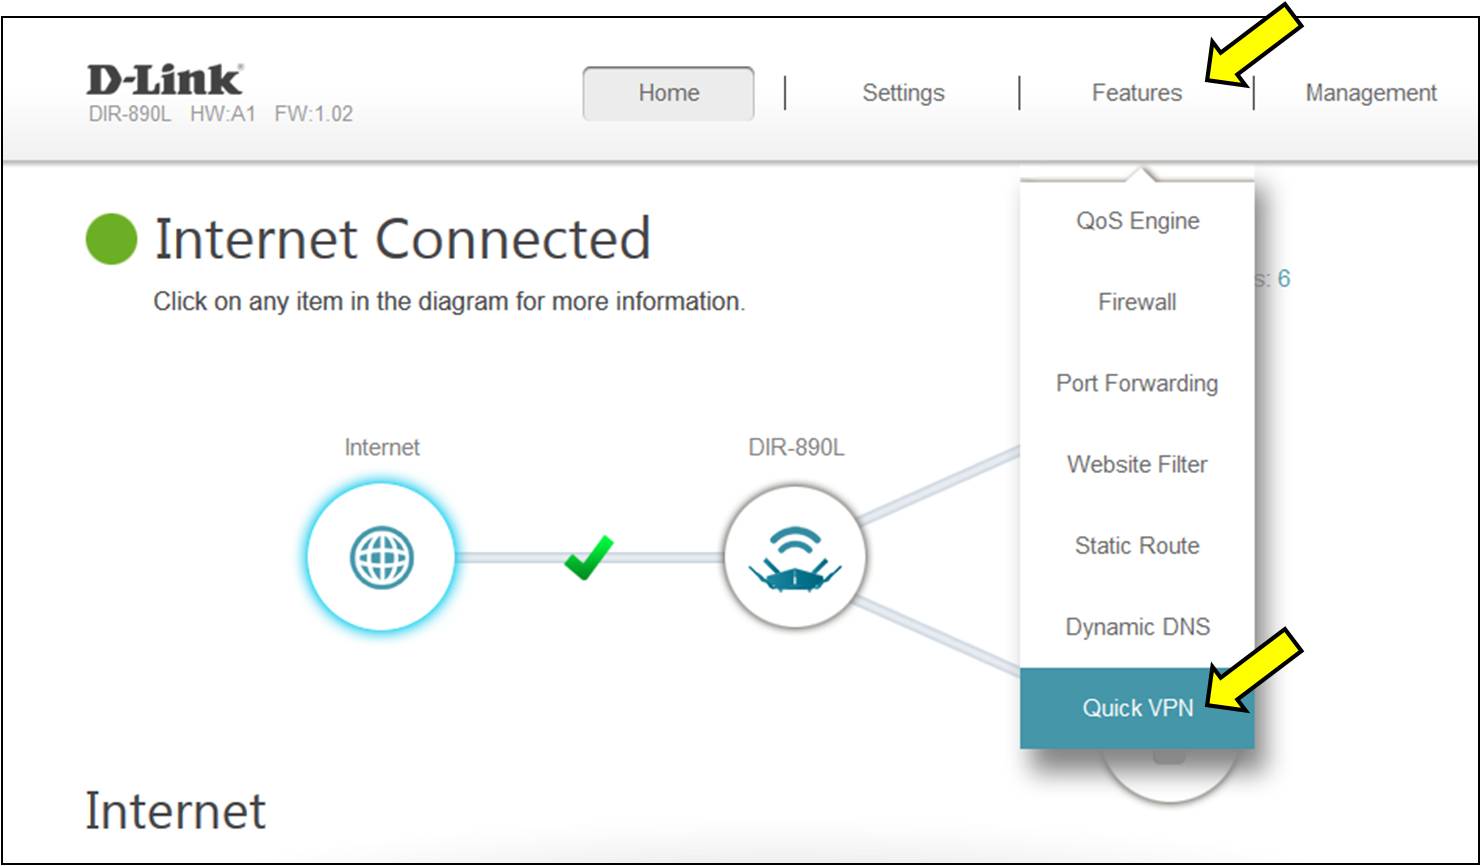
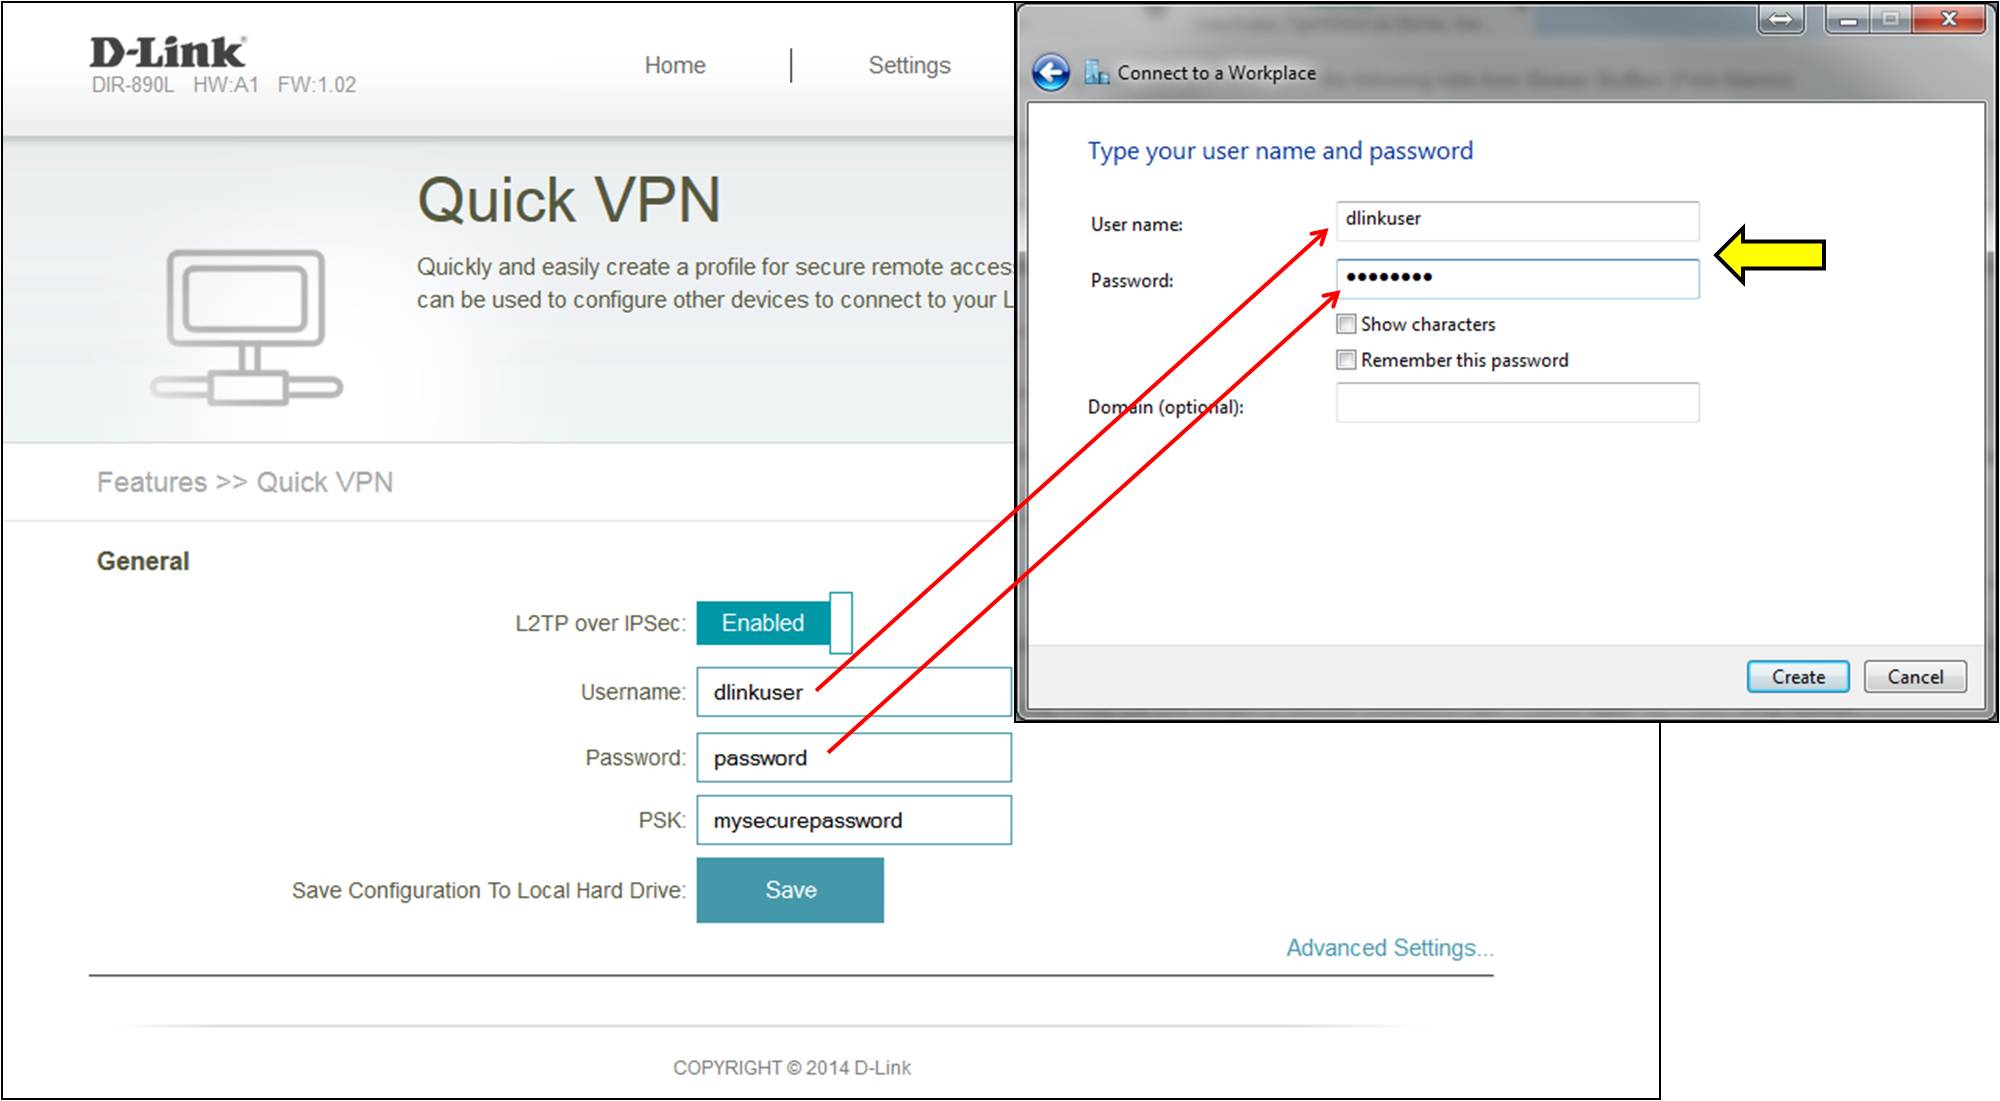
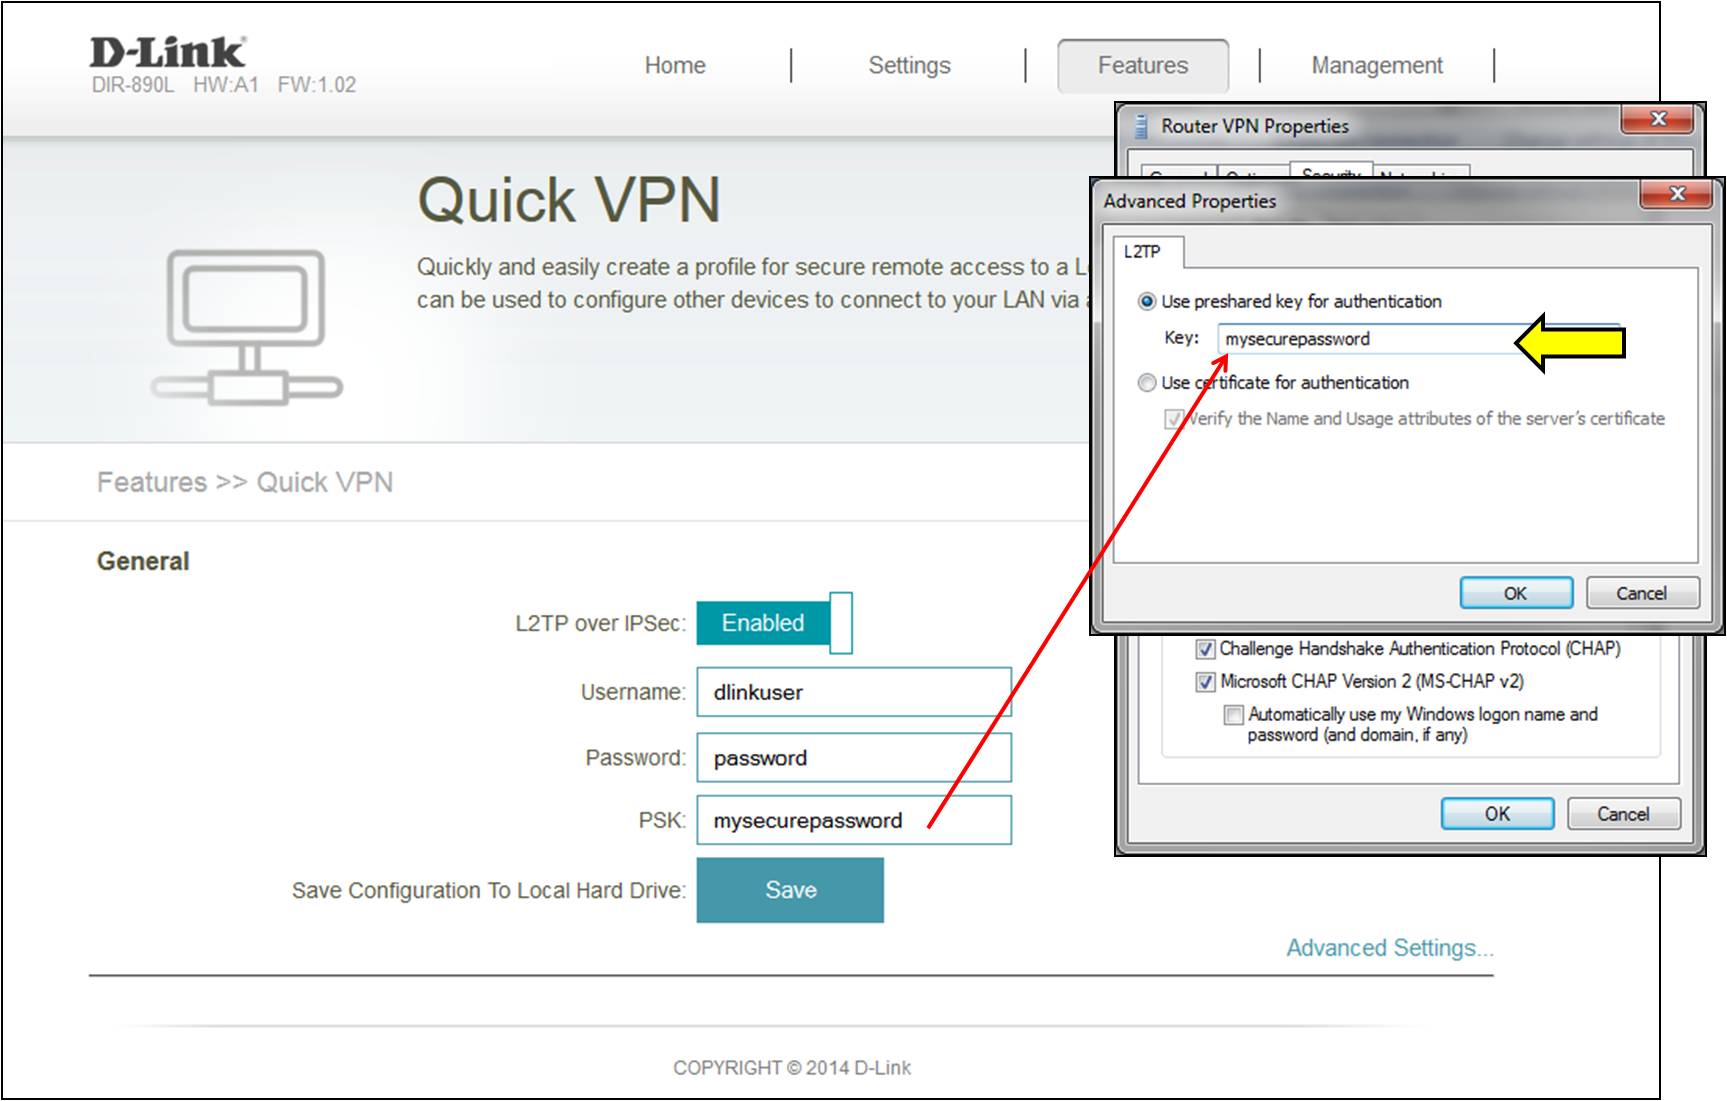
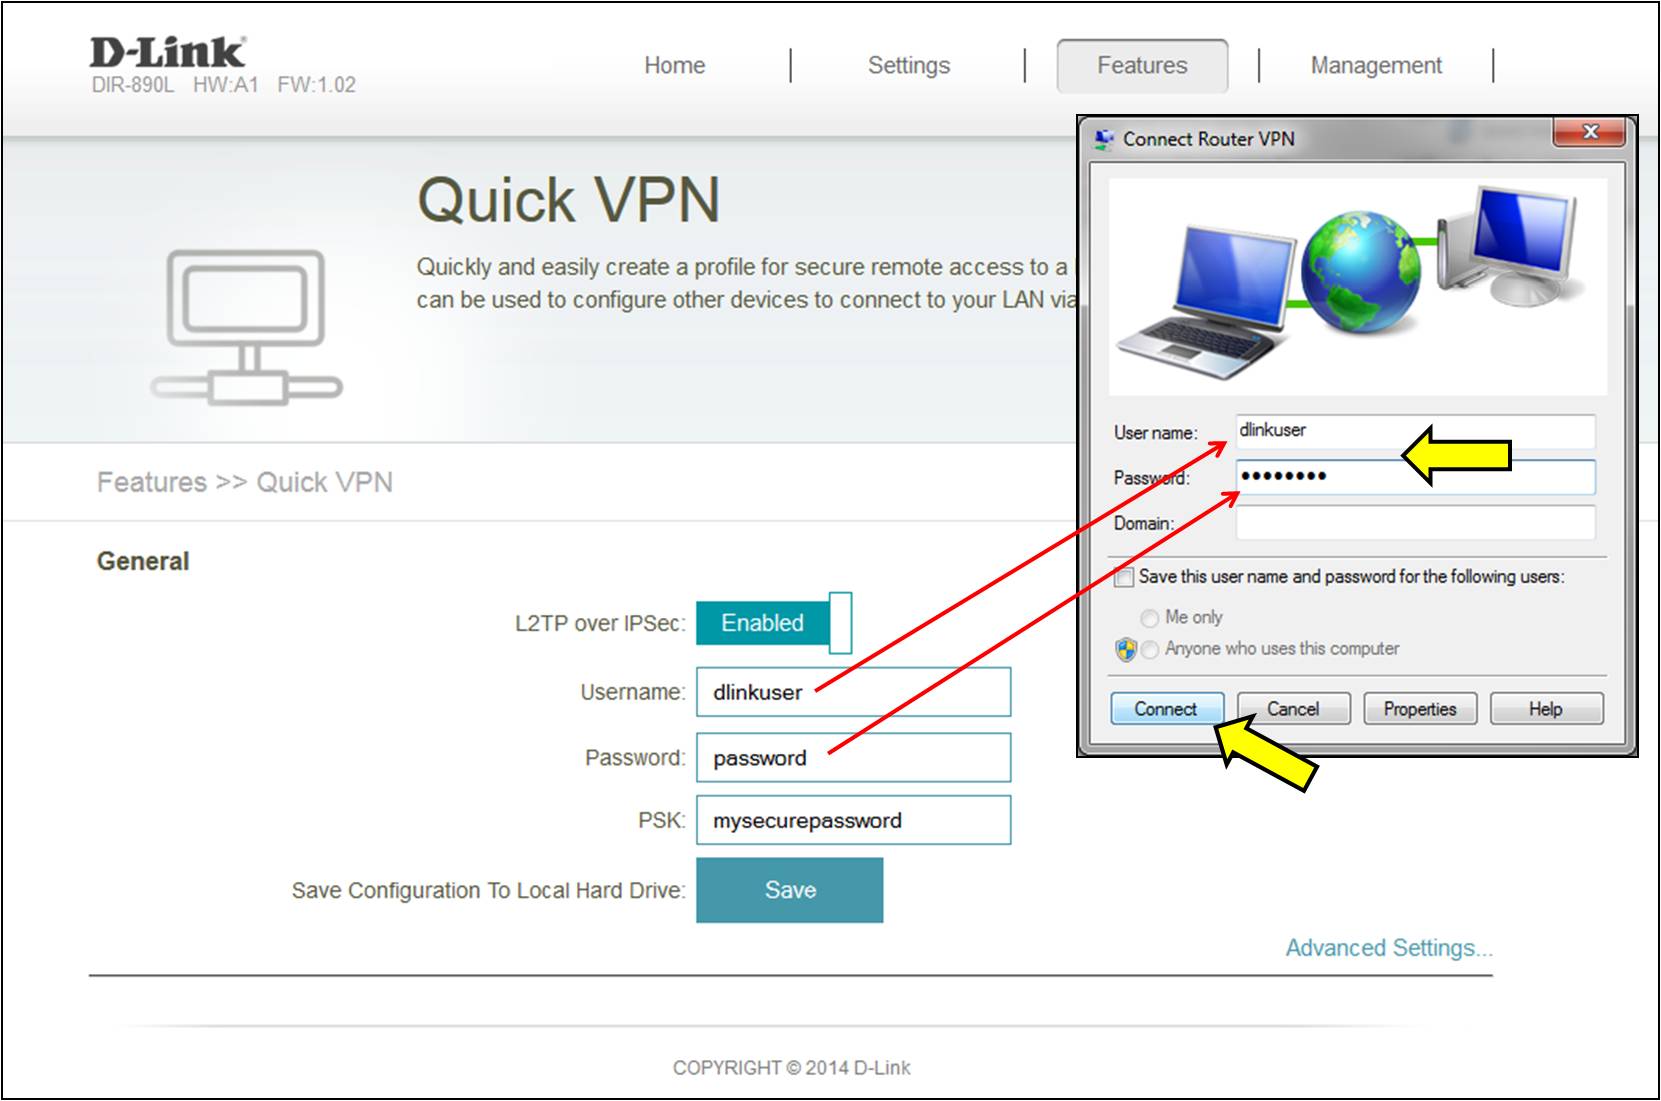
Step 3: Configure the VPN service:
- L2TP over IPsec - ENABLED
- Username - <Enter a username for the VPN> (You will need this later to connect)
- Password - <Enter a password for the VPN> (You will need this later to connect)
- PSK - <Enter a Preshared Key for the VPN> (You will need this later to connect)
Click Save.
Router Setup is complete.

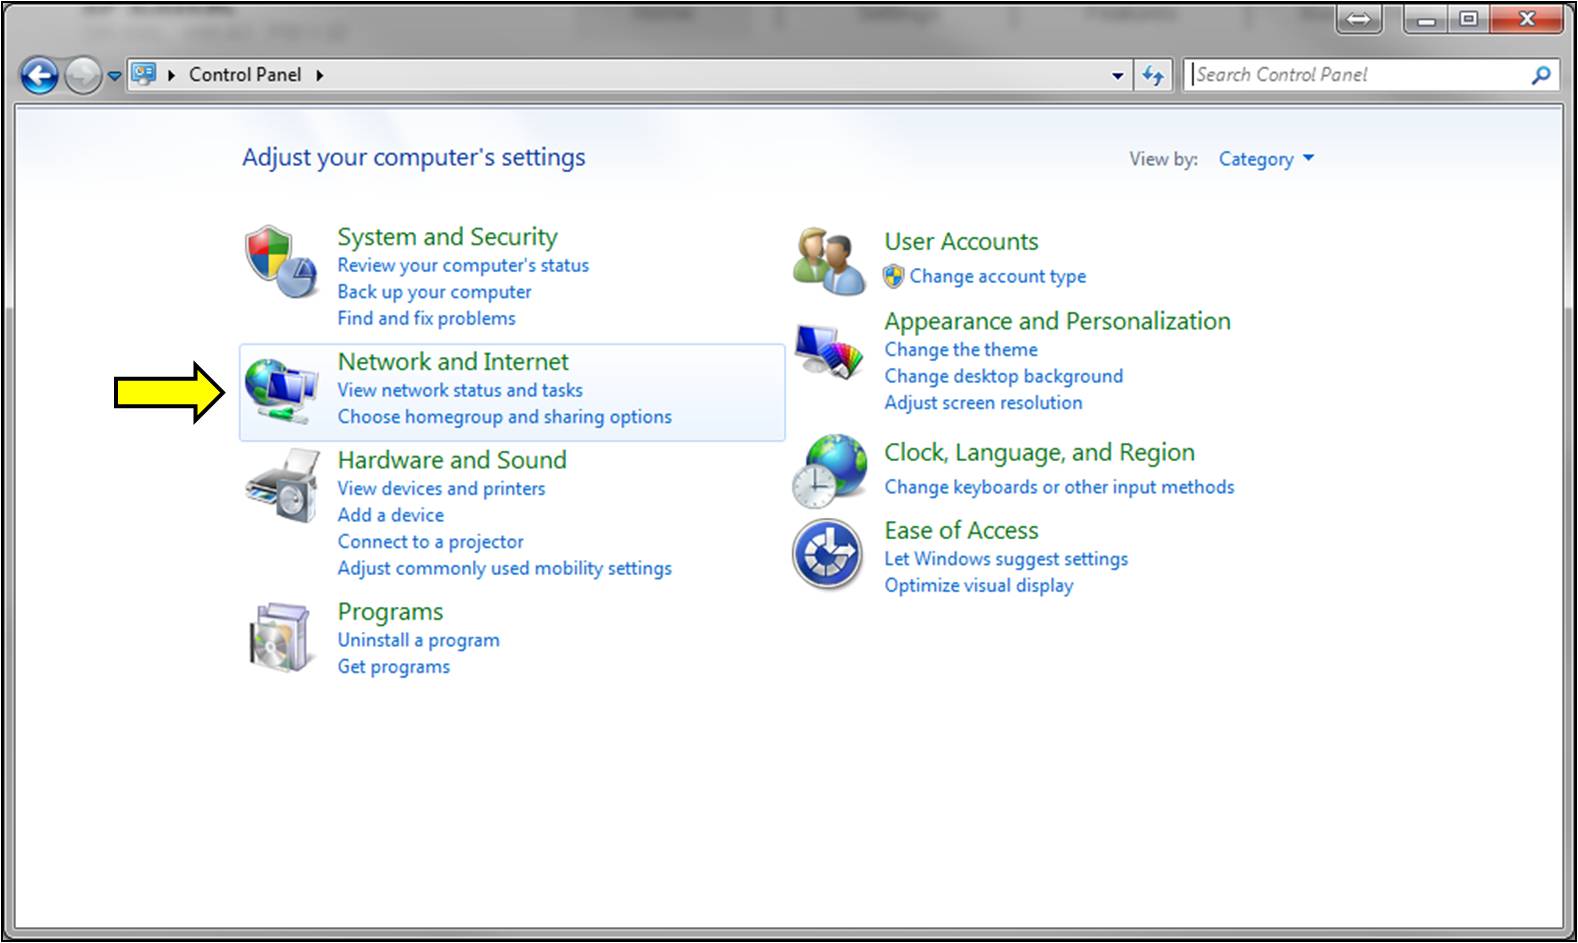
Step 4: From the control panel, click Network and Internet.
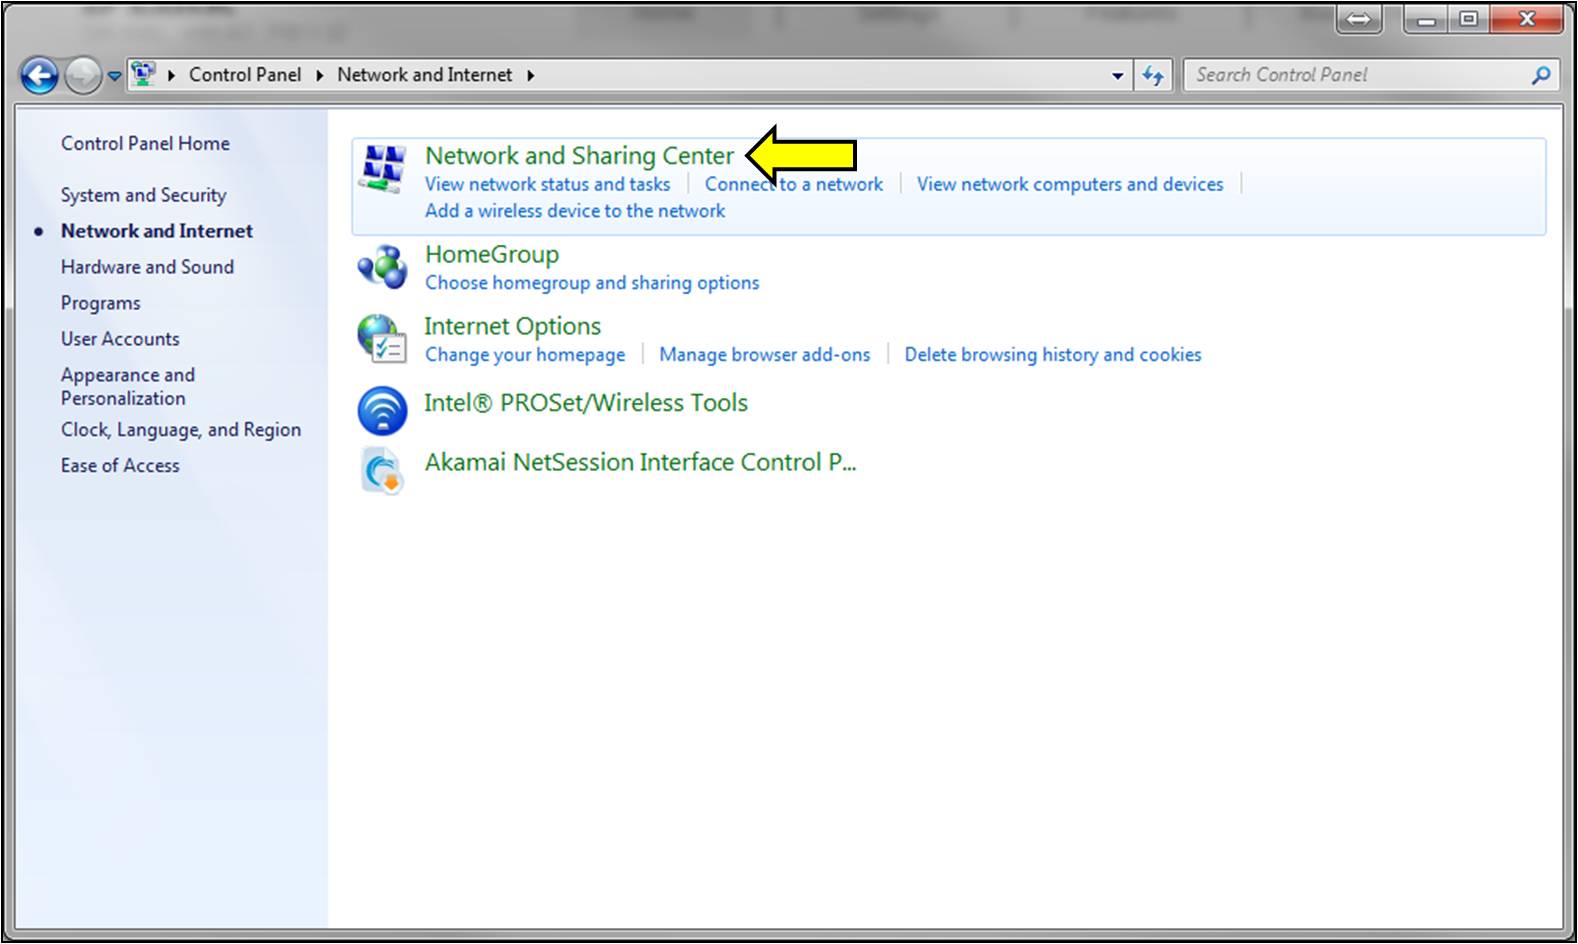
Step 5: Click Network and Sharing Center.
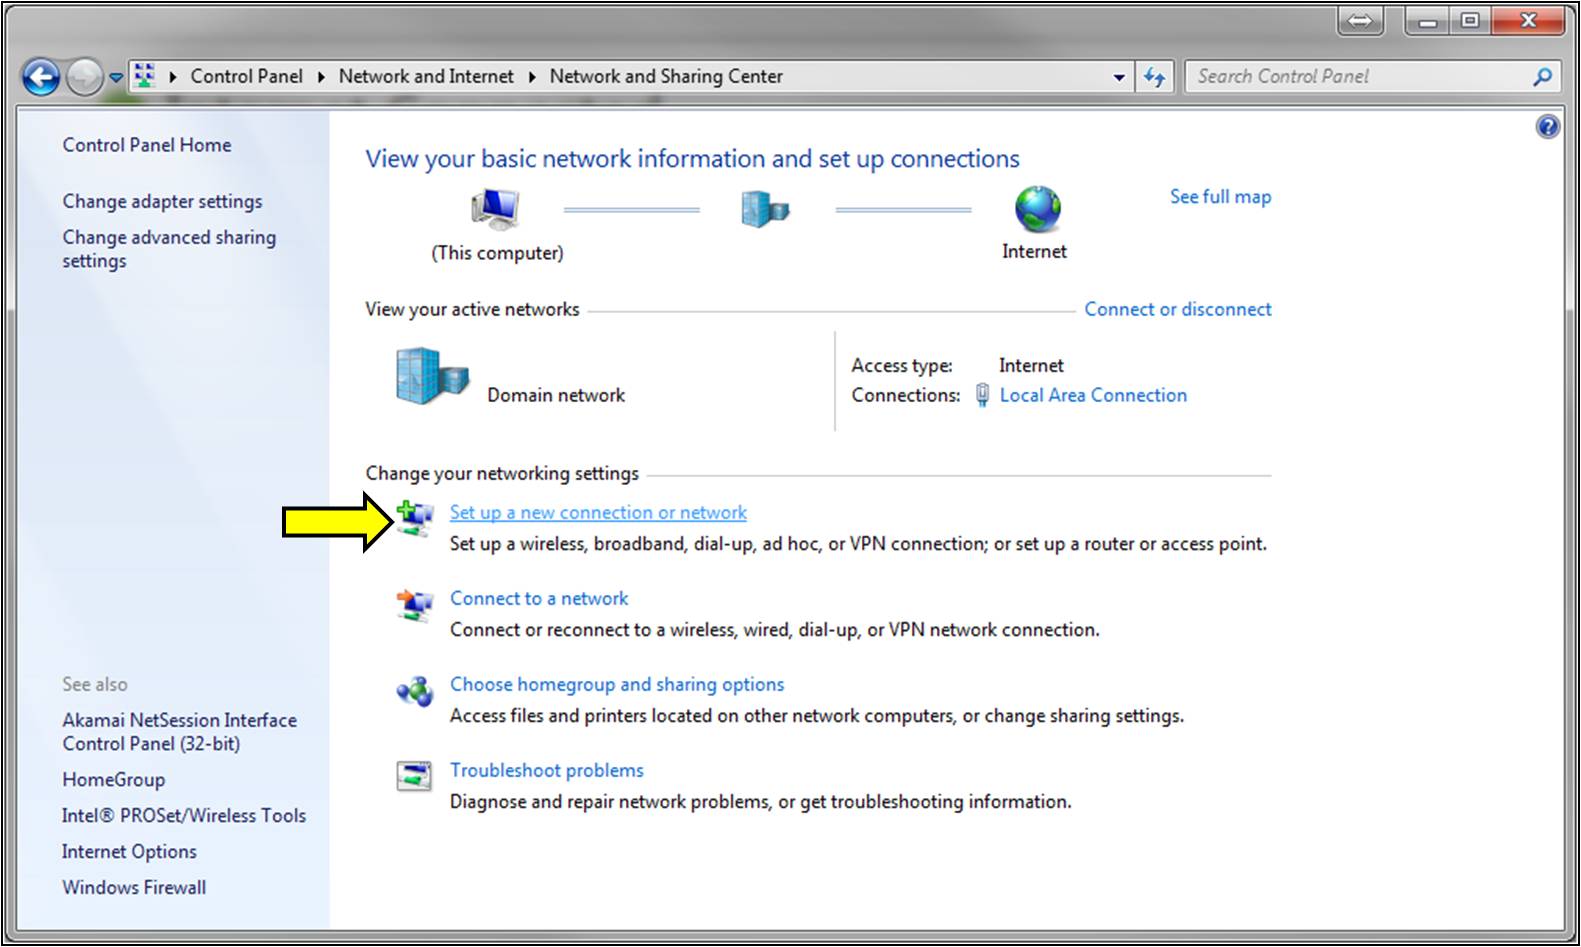
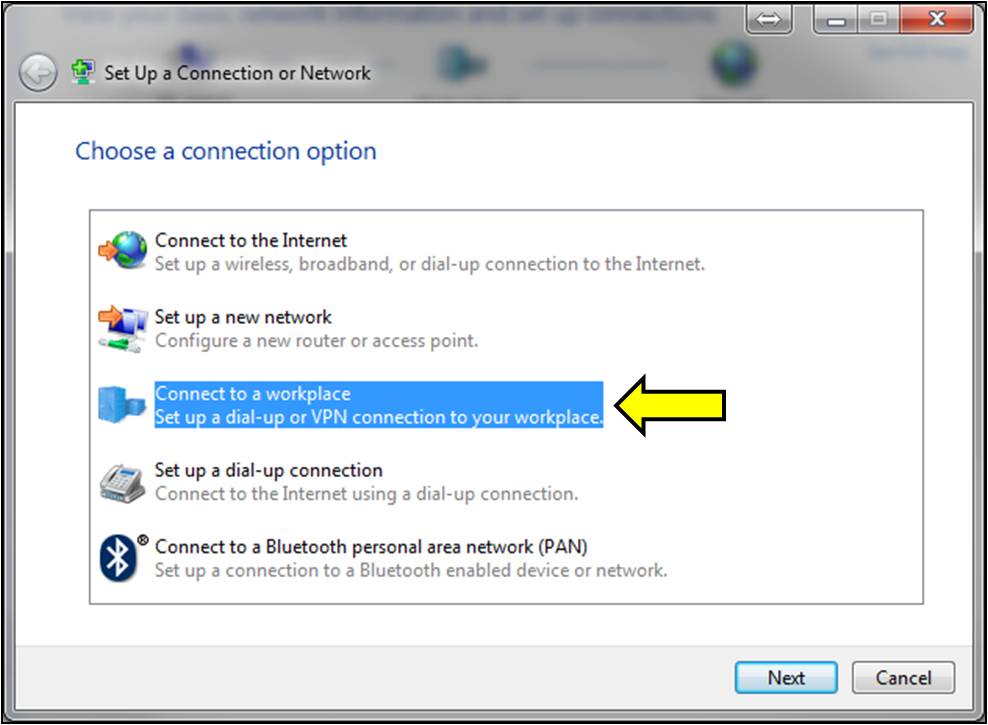
Step 6: Click Set up a new connection or network.
Step 7: Click Connect to a workplace.
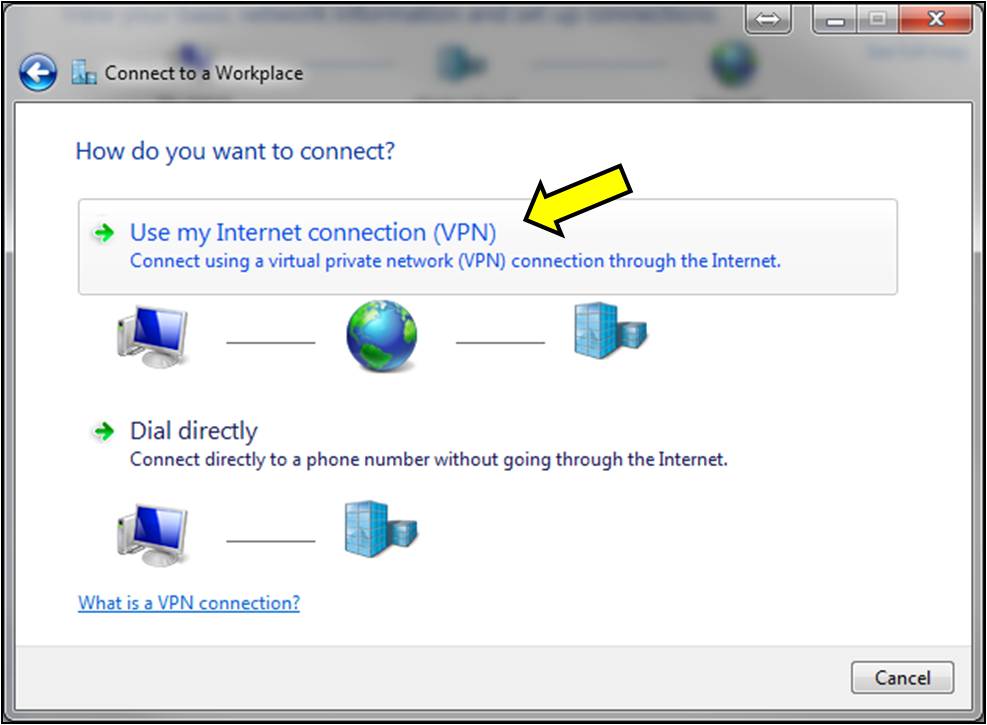
Step 8: Click Use my Internet connection (VPN).
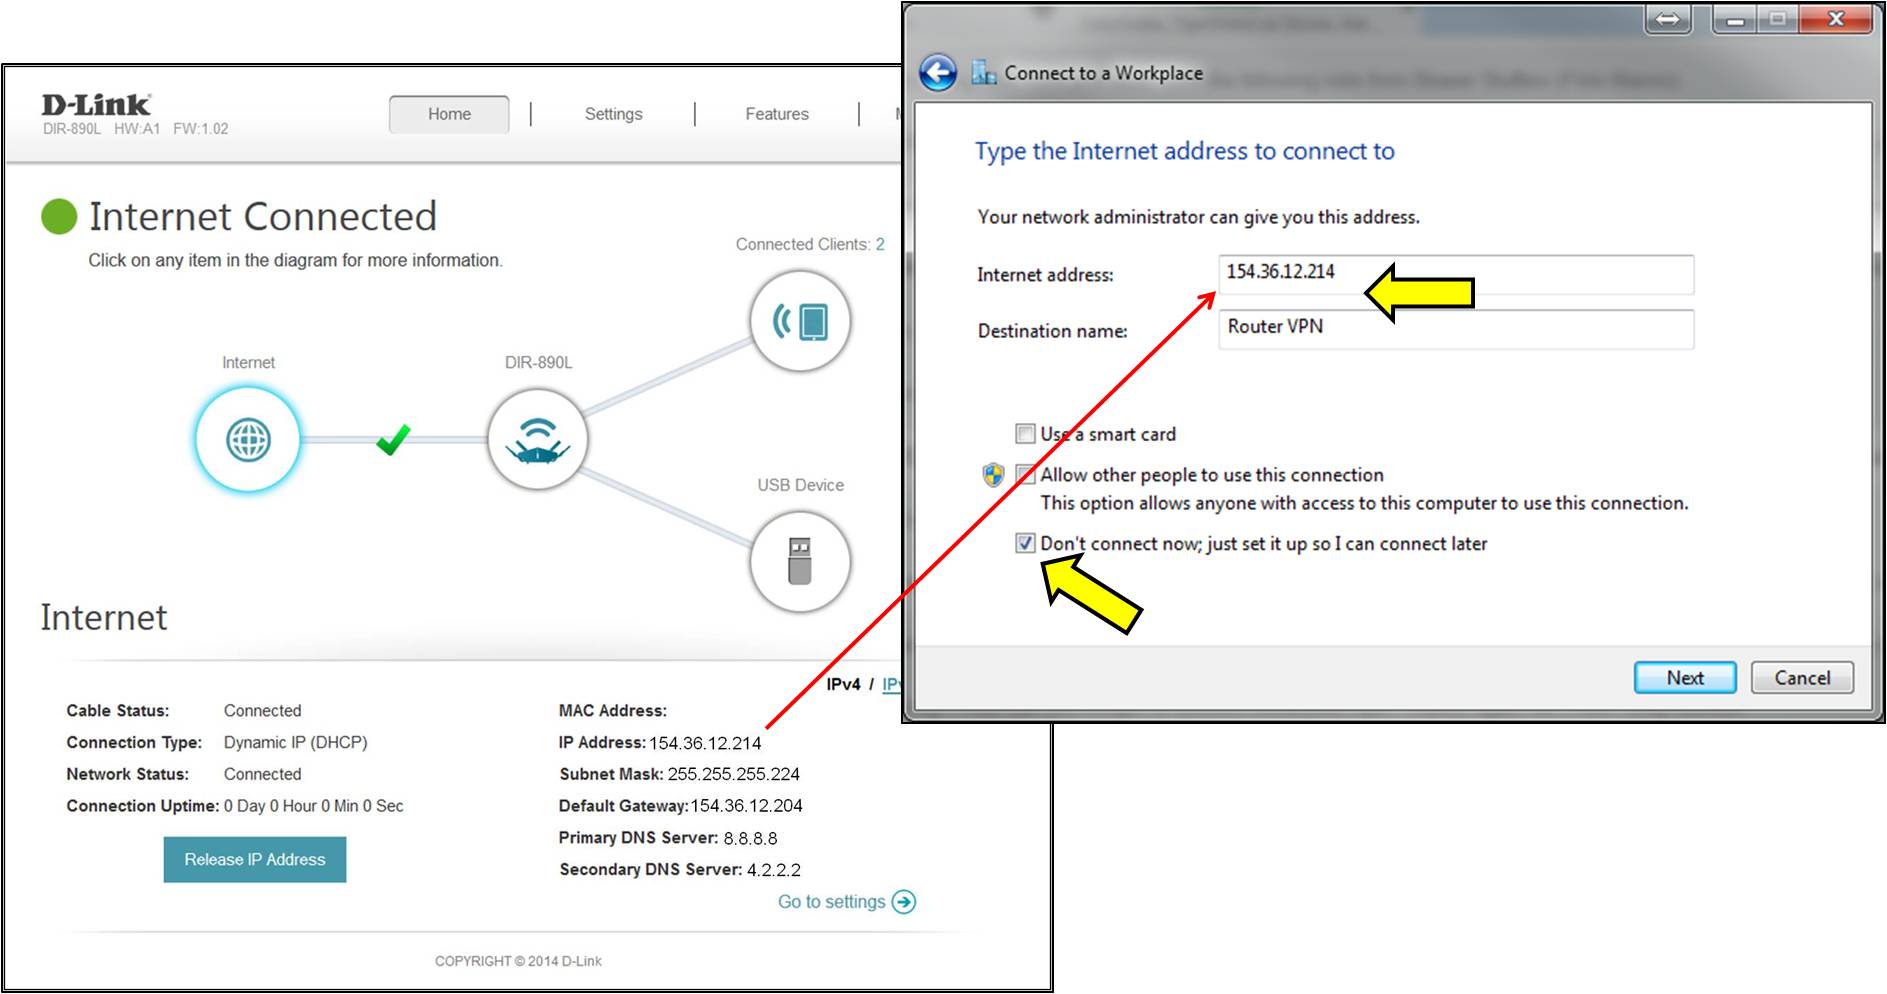
Step 9: Configure the VPN IP address and Name:
- Internet Address - Enter in the Public IP address of your router. This can be found on the home page of your router configuration.
- Destination Name - Enter a name for the VPN Connection
Put a check next to Don't connect now, just set it up so I can connect later.
Step 10: Enter your username and password for the VPN (created earlier). Click Create.
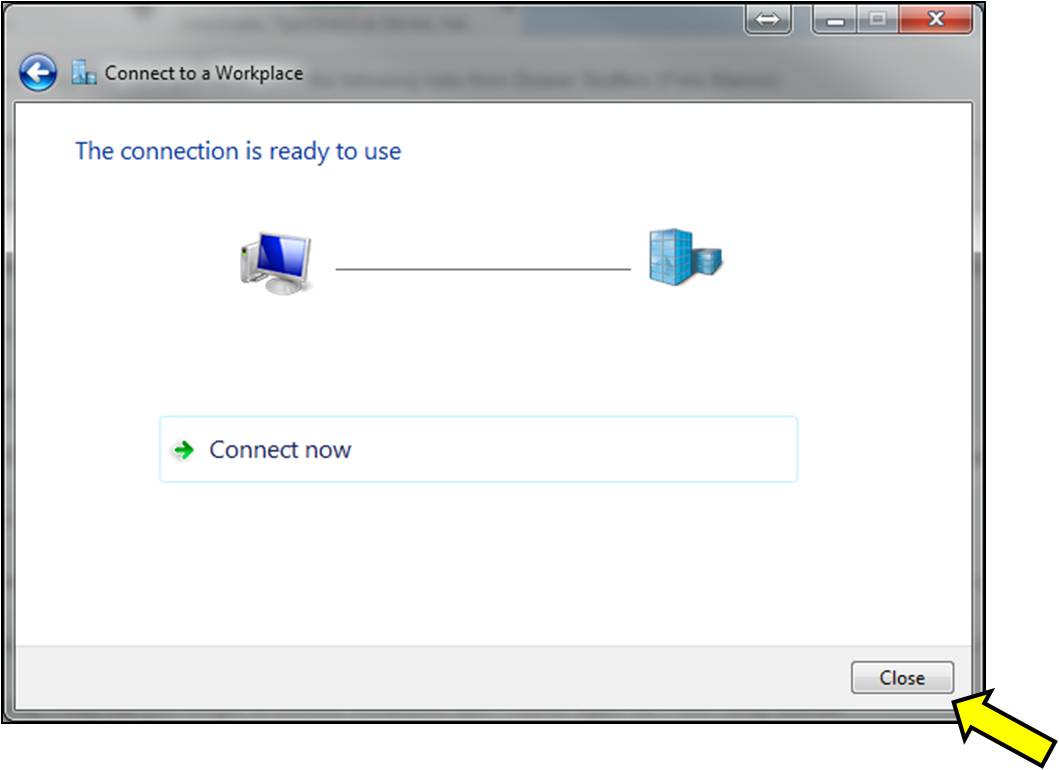
Step 11: Click Close.
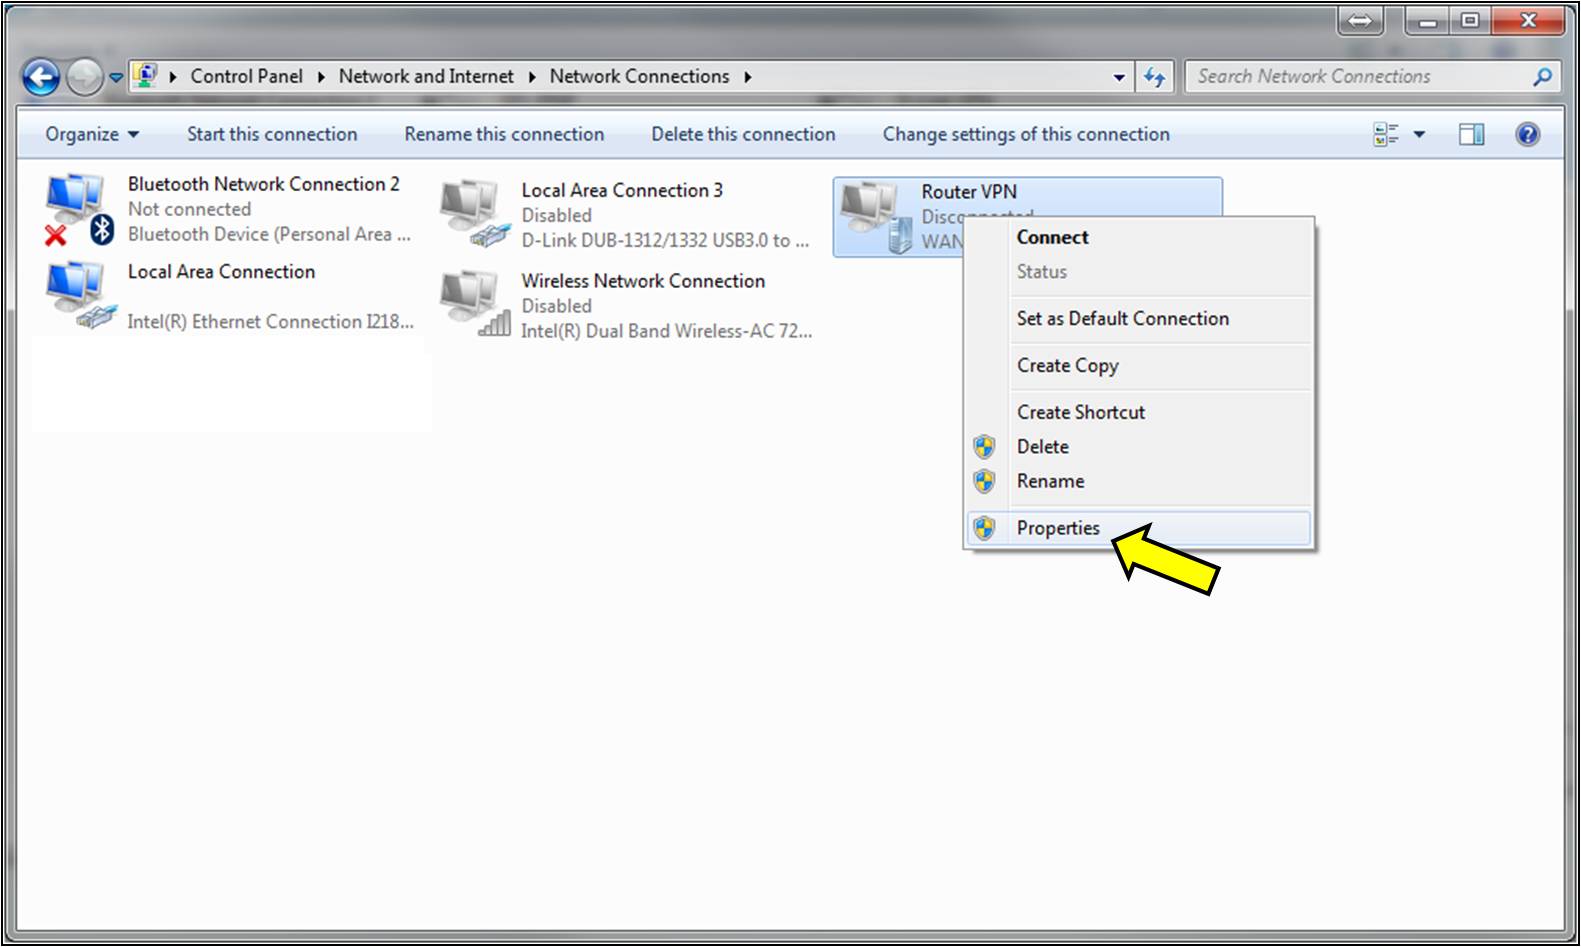
Step 12: From the Network and Sharing Center, select Change Adapter Settings from the left panel.

Step 13: Right-click on your new VPN connection and select Properties.
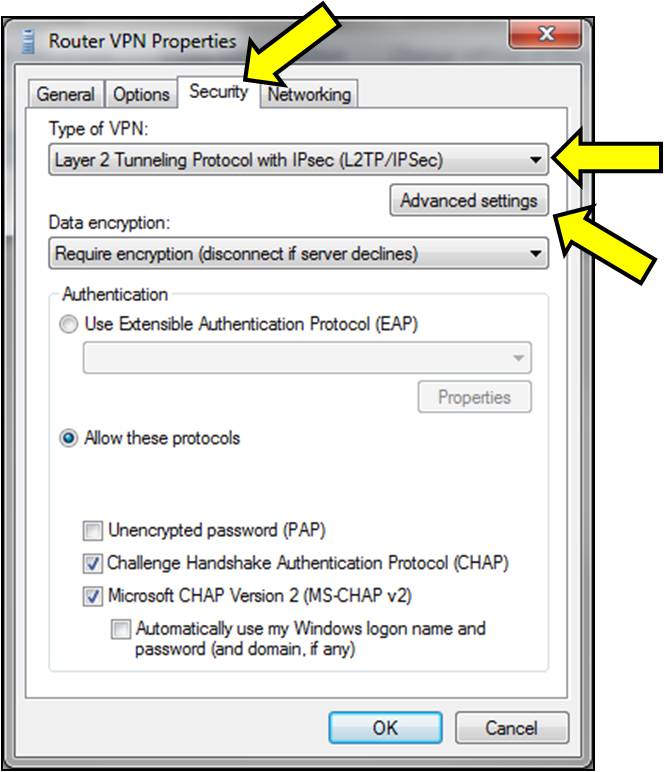
Step 14: Click on the Security Tab, select Layer 2 Tunneling Protocol with IPsec (L2TP/IPSec) and click Advanced Settings.
Step 15: Select Use preshared key for authentication and enter your security key (created earlier). Click OK to apply all settings.
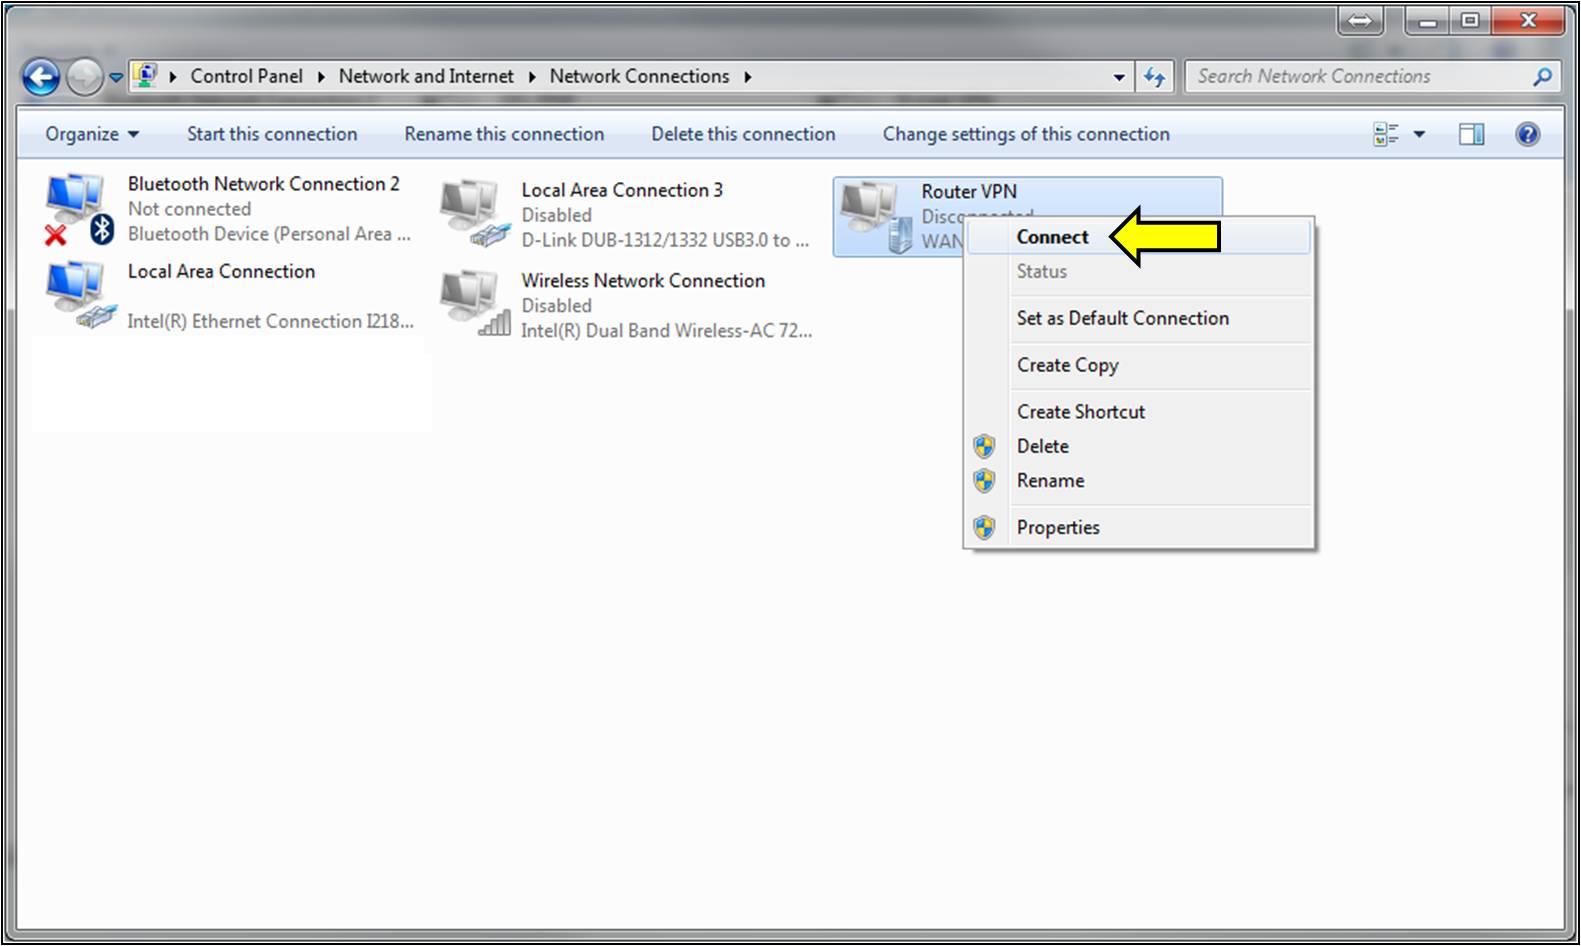
Step 16: Right-click on your new VPN Connection and click Connect.
Step 17: If required, enter your VPN username and password (created earlier). Click Connect.
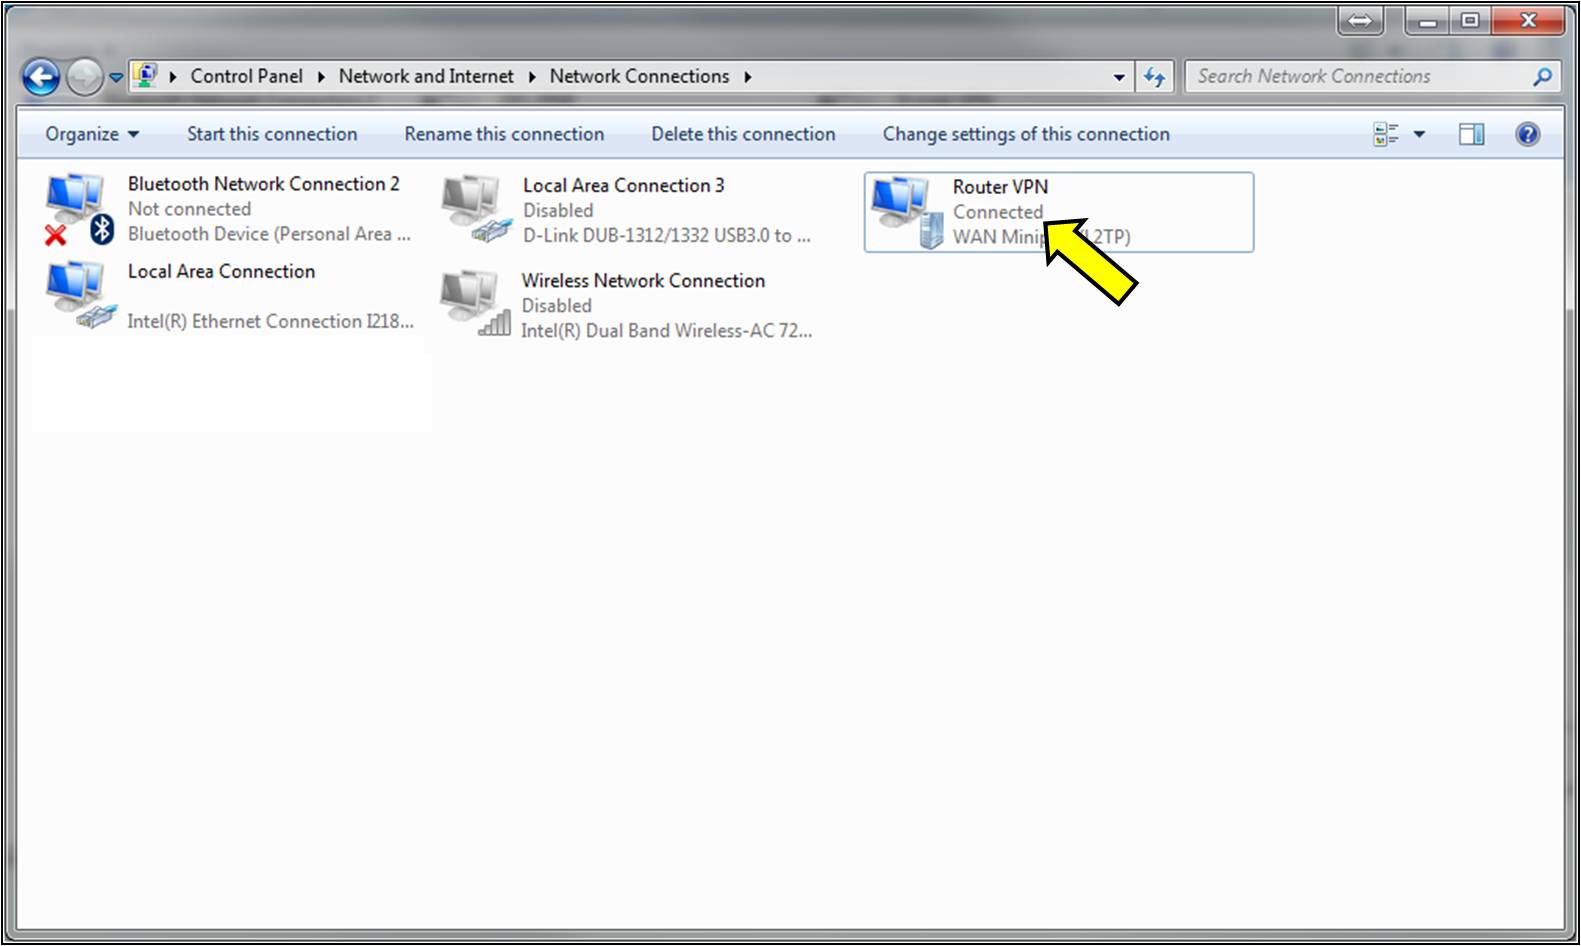
You should now be connected to your router's VPN.
Setup is Complete.