Step 1: Launch the mydlink app.
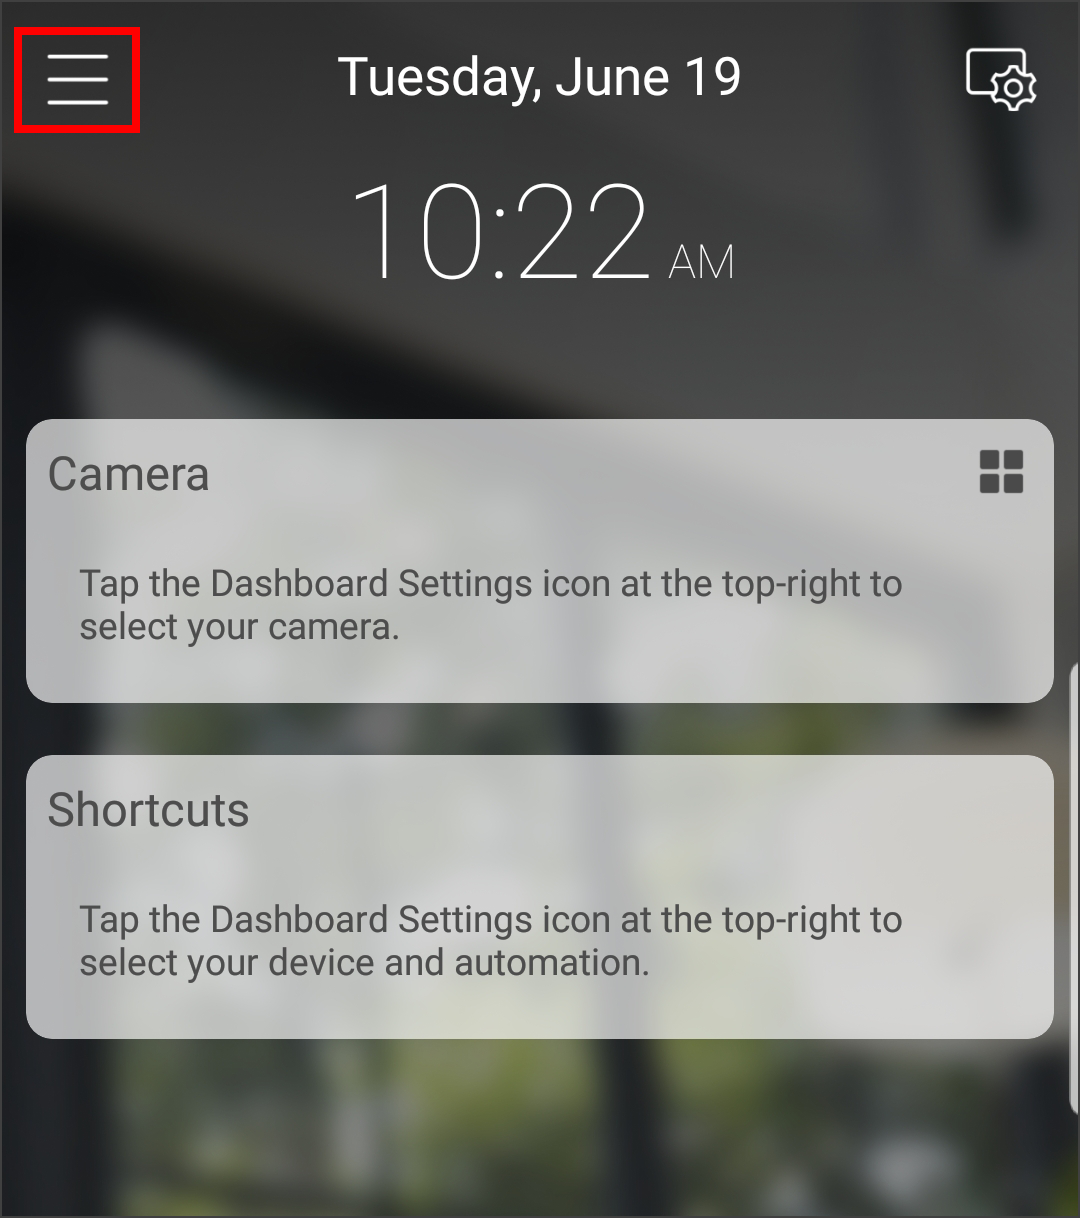
Step 2: Click the menu icon in the upper left corner.
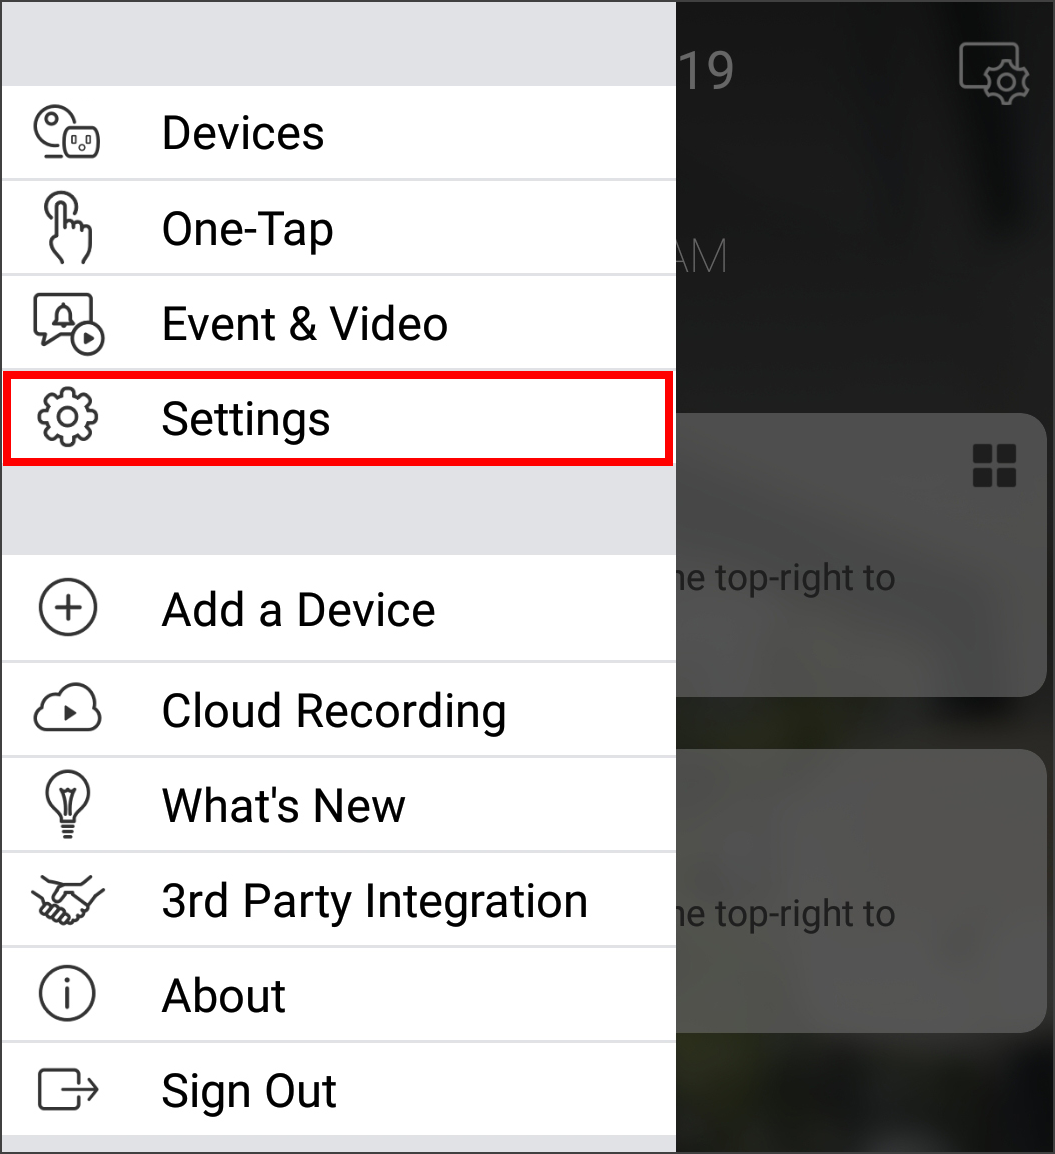
Step 3: Tap Settings.
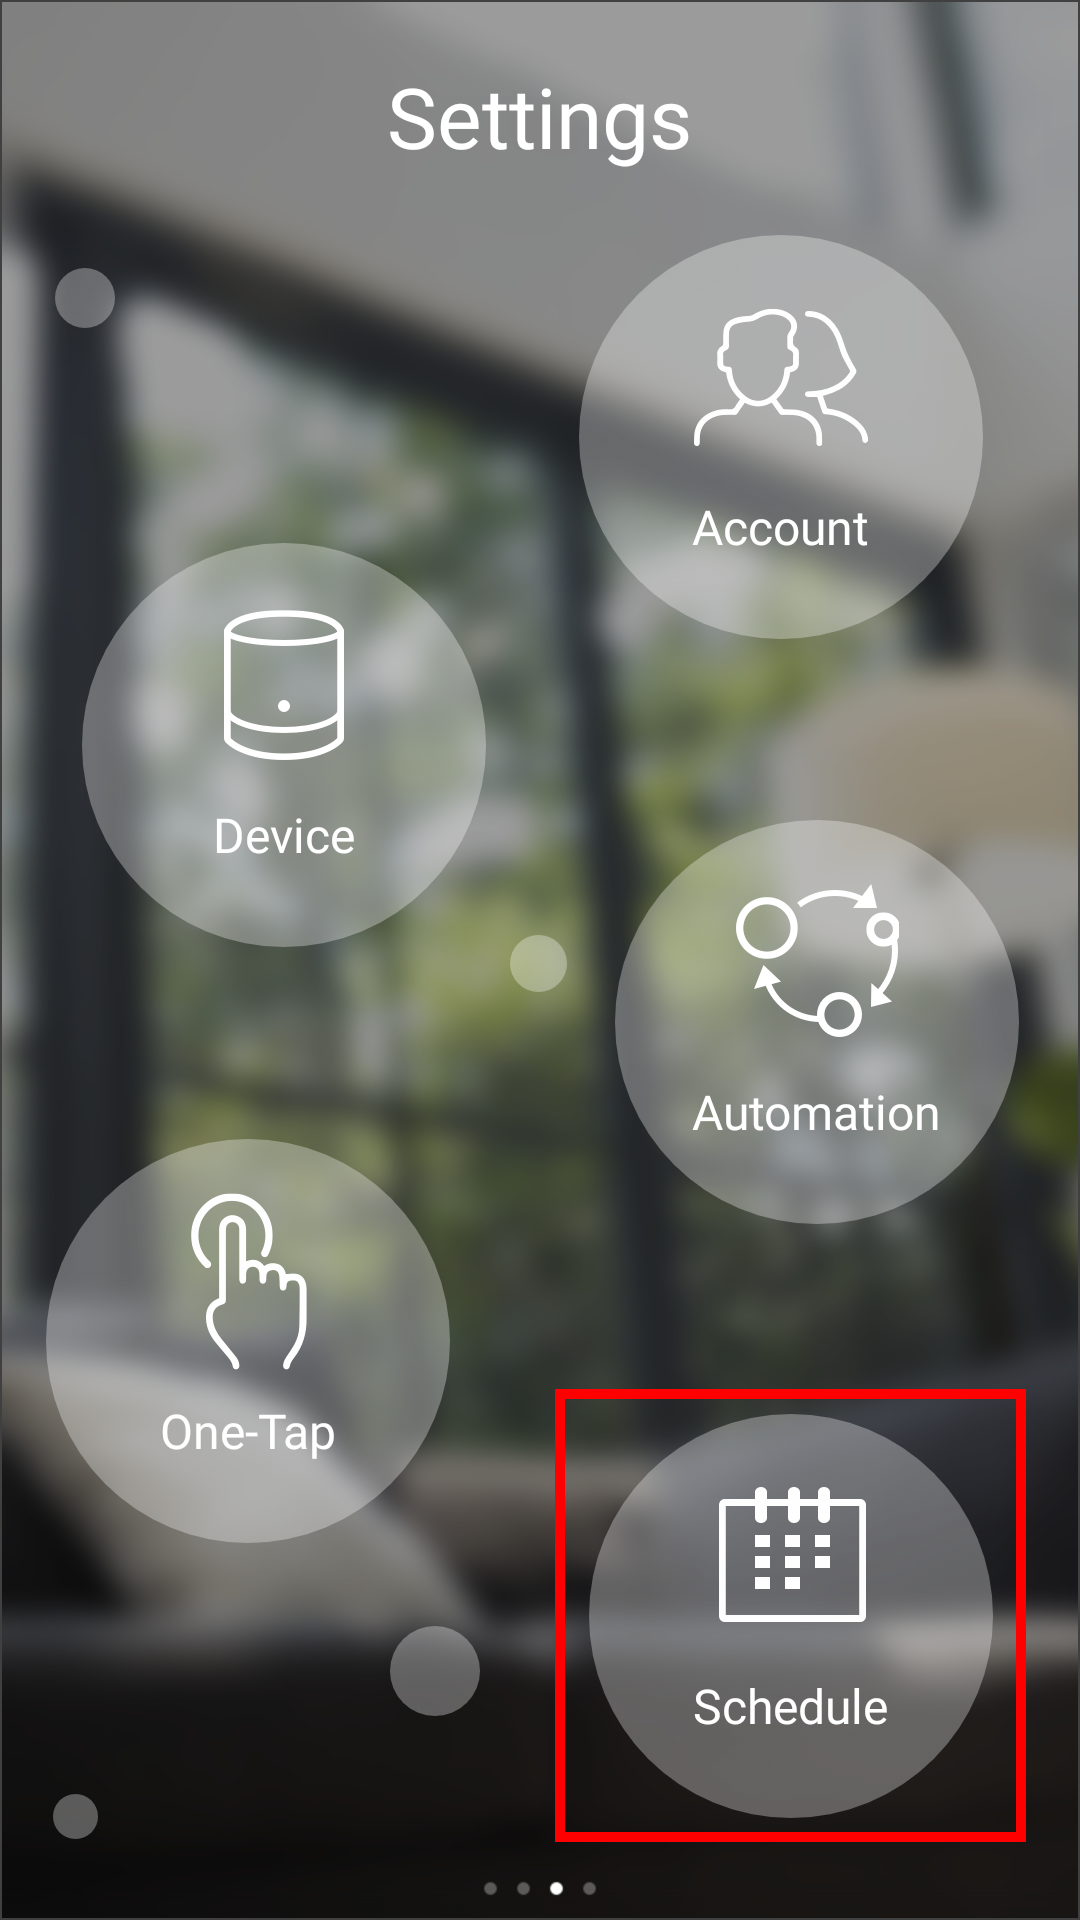
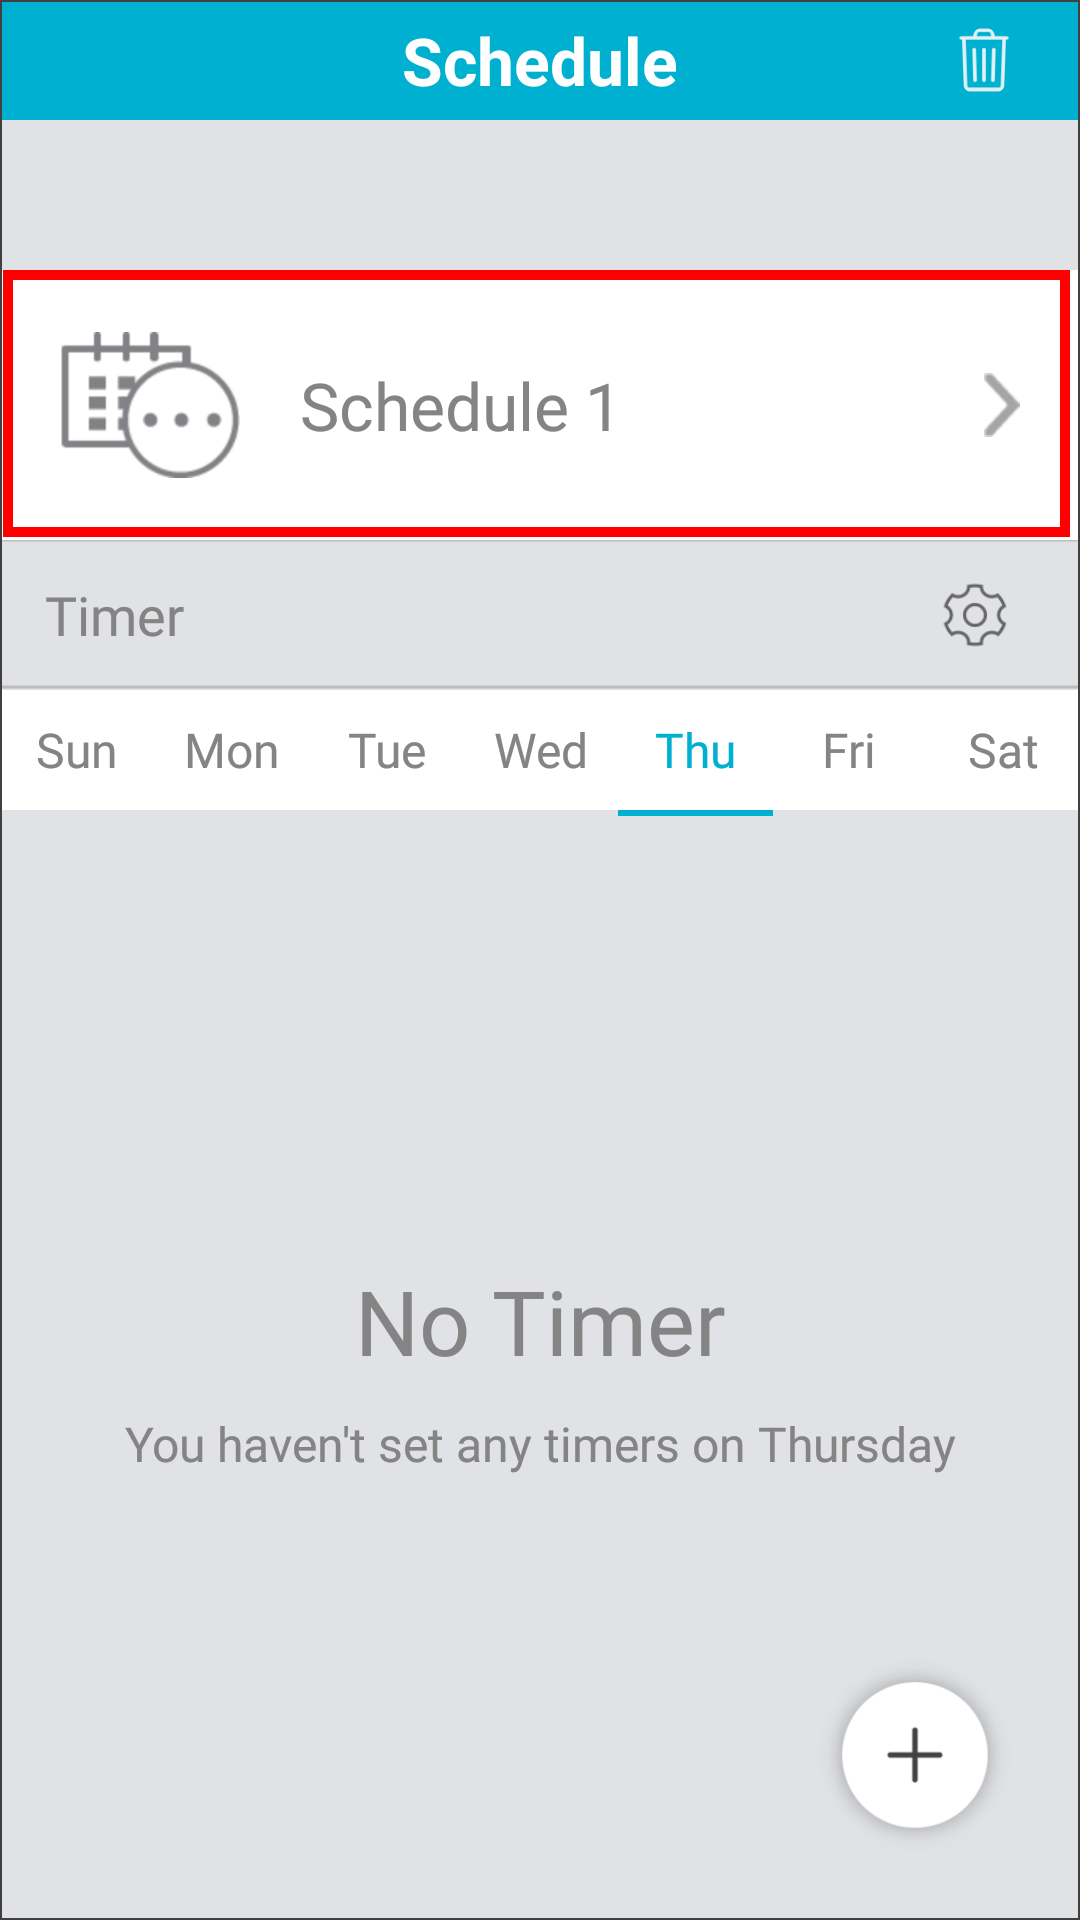
Step 4: Tap Schedule.
Step 5: To create a new schedule, tap the + in the upper right corner.

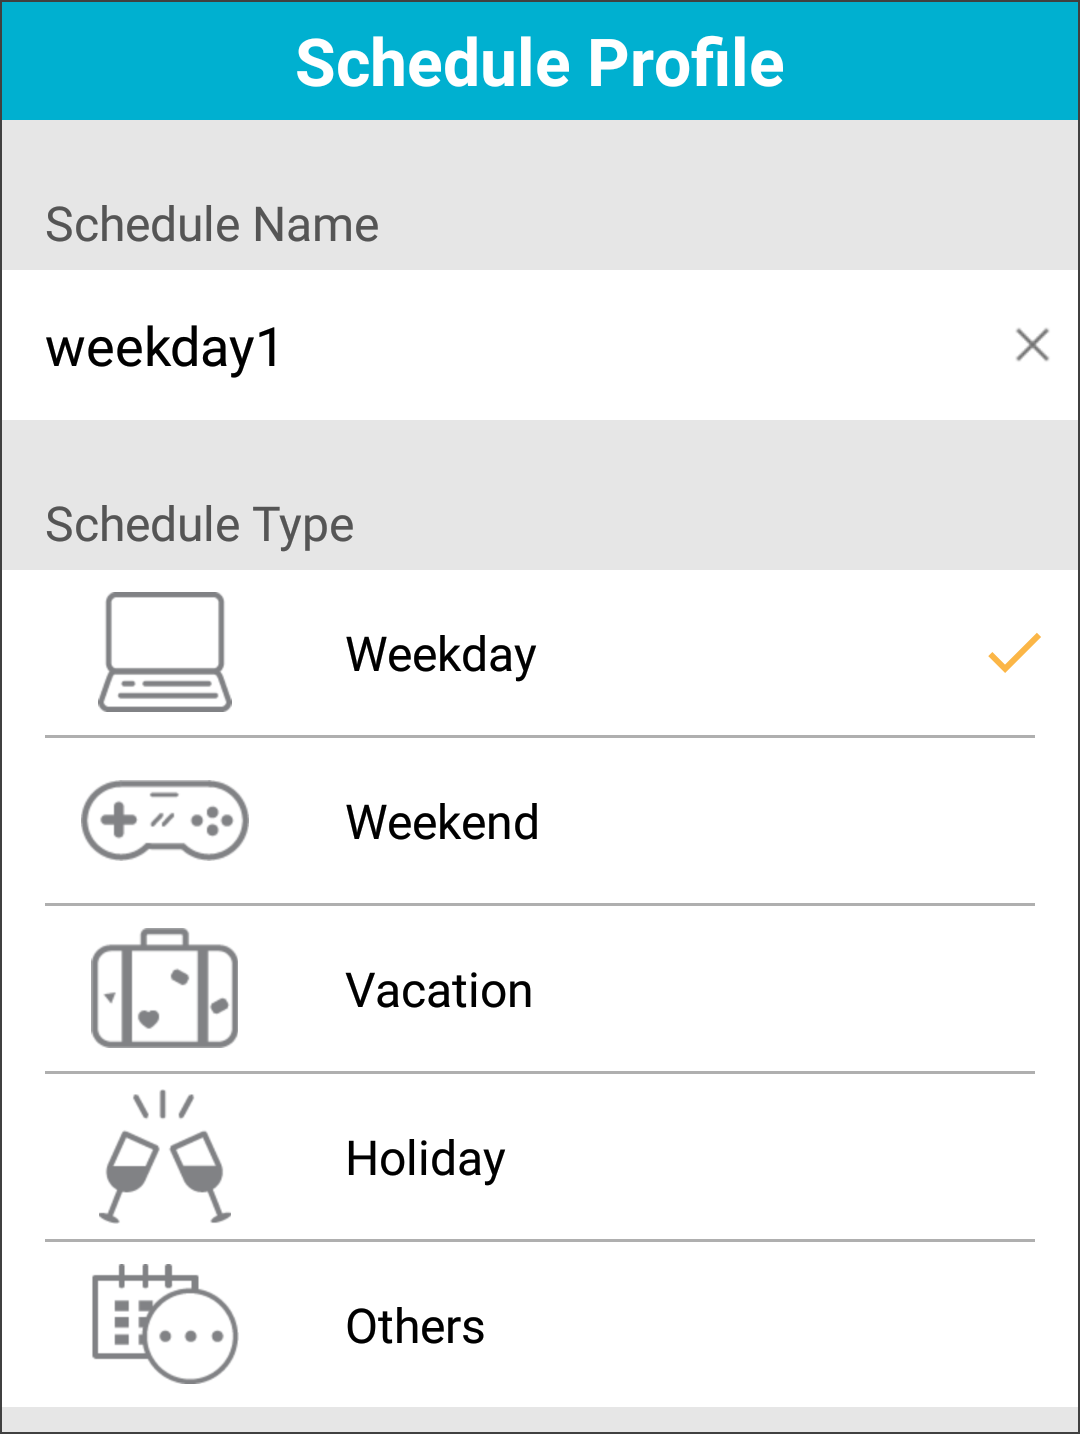
Step 6: Tap on schedule to rename it.
Step 7: Here you can select a schedule type. In this example, the schedule name is weekday1 and schedule type is weekday. Tap back.
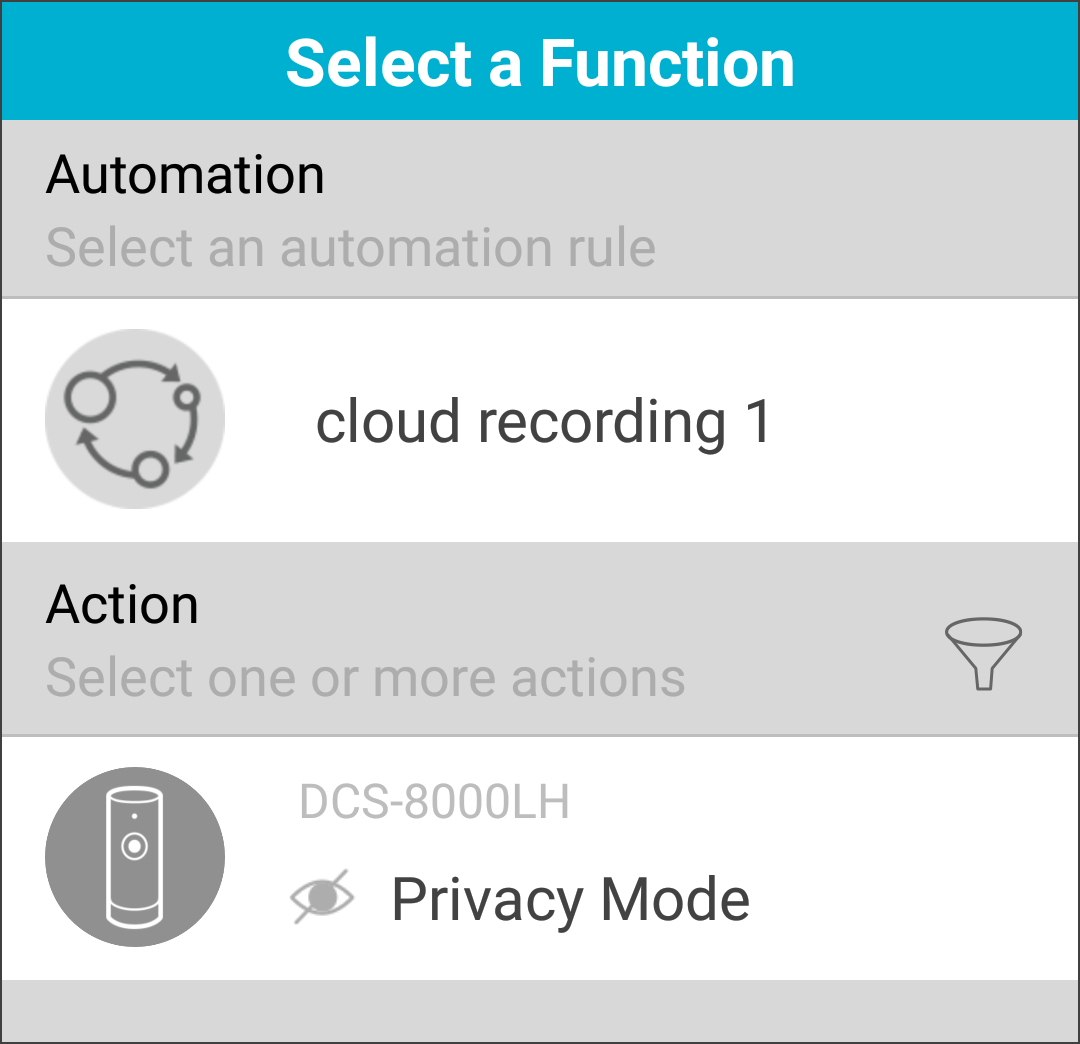
Step 8: Tap the + in the lower right corner (as seen on screen shot on step 6). Tap on a previously created function and/or action to create the schedule which will apply to that function and/or action. In this example cloud recording and privacy mode are available.
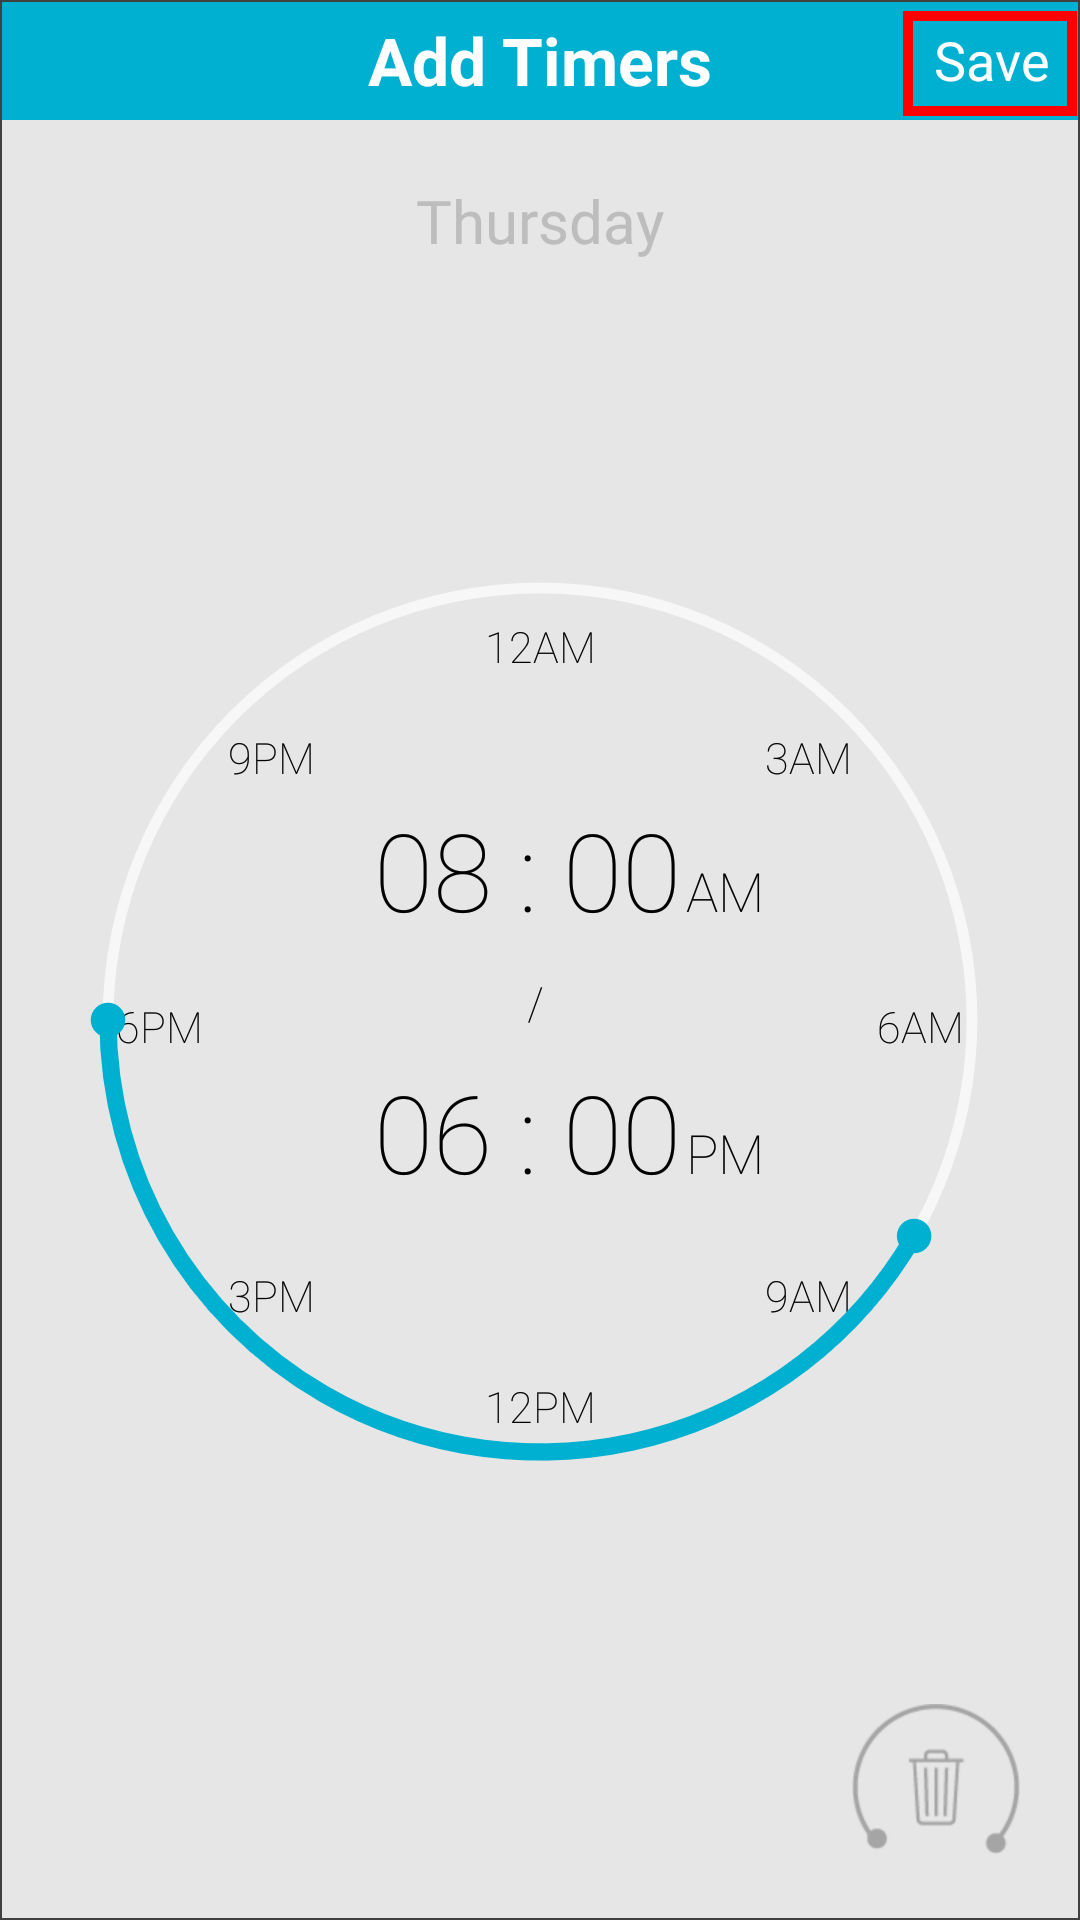
Step 9: In this example, we will set cloud recording to 8am to 6pm. Tap Save.
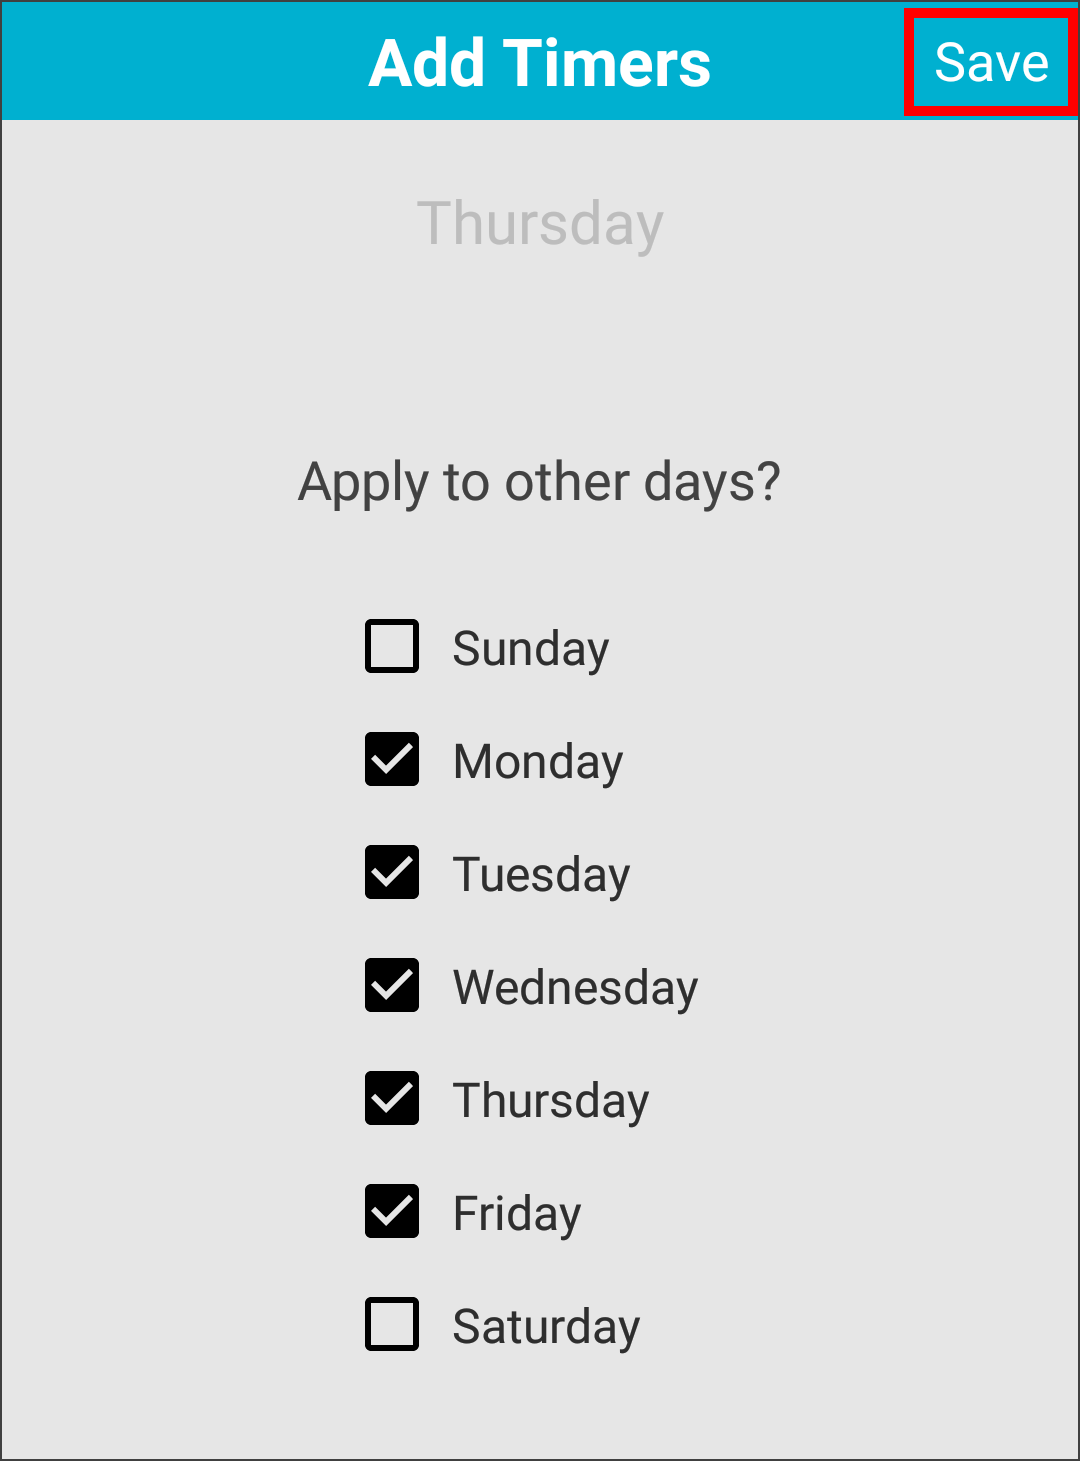
Step 10: Select which days you want this to apply to. In this example, Monday through Friday are selected. Tap Save.
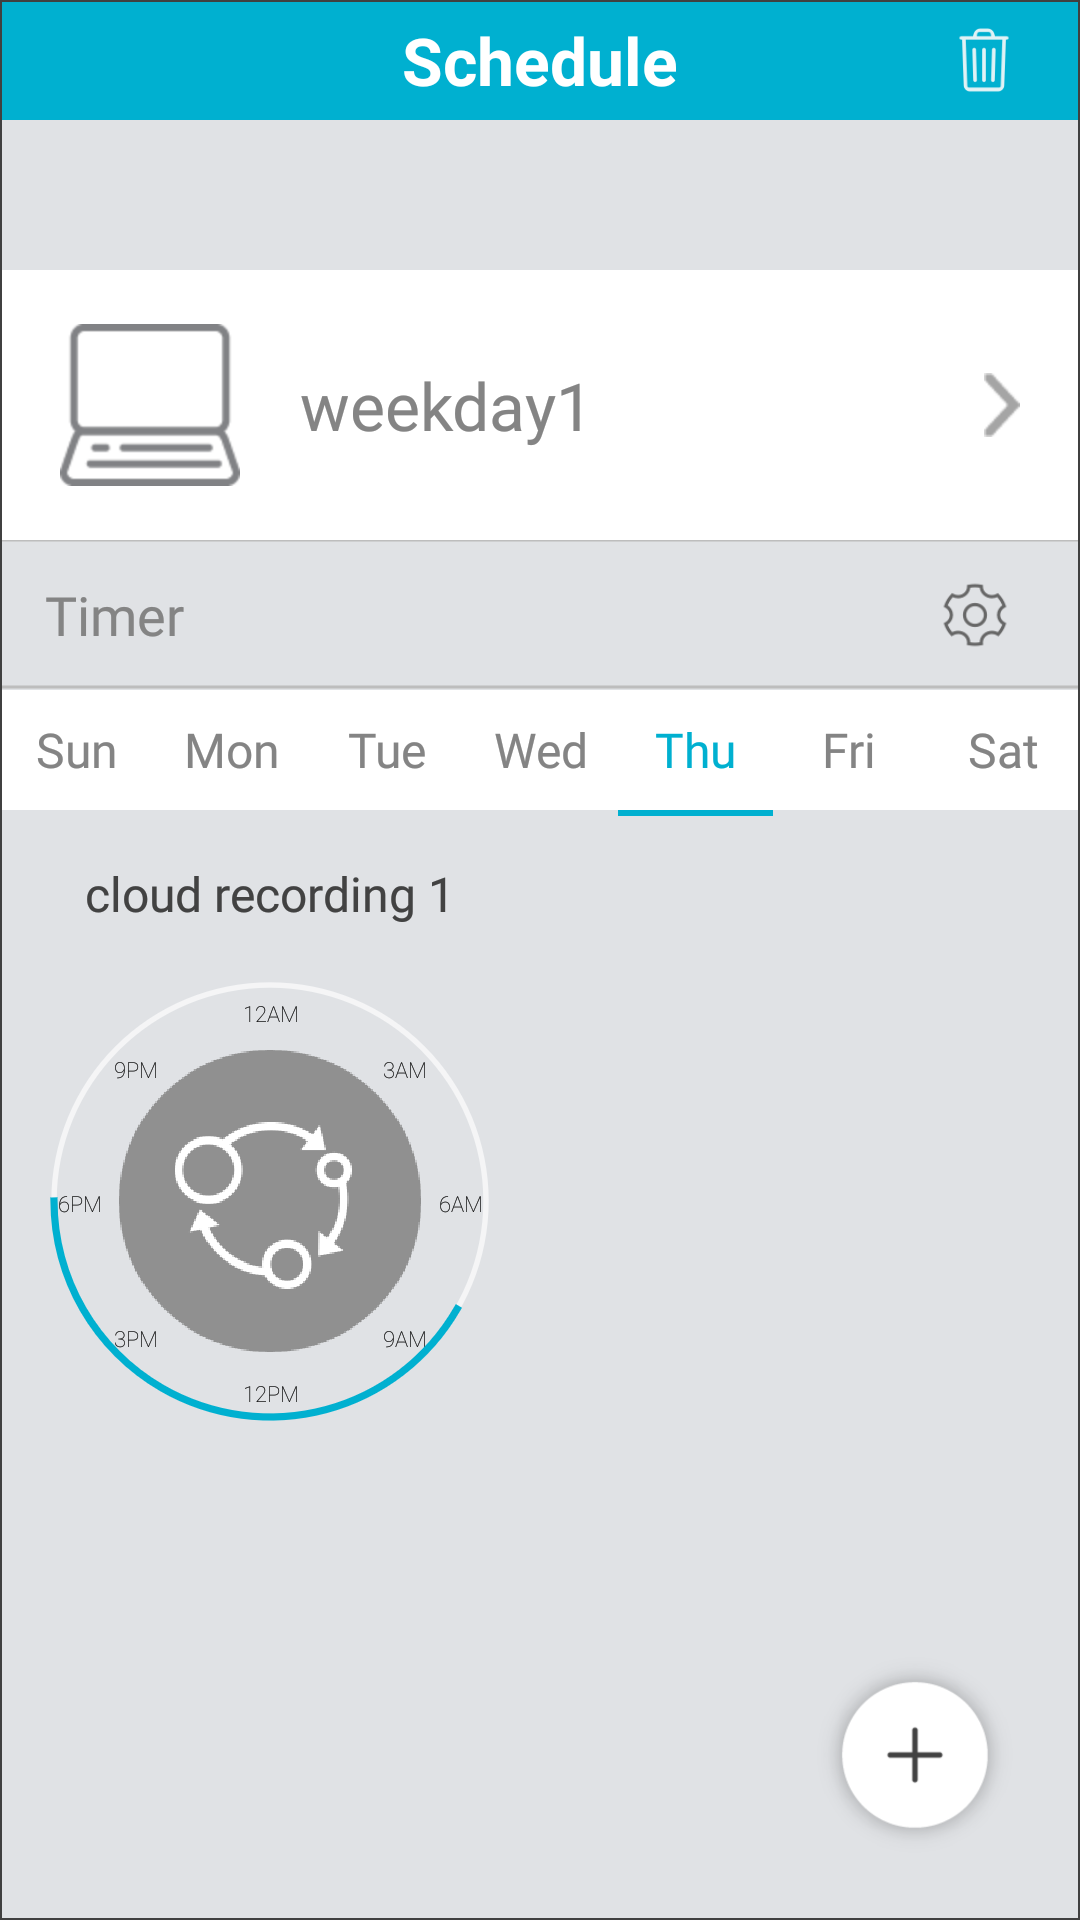
Step 11: Your newly created schedule will appear. You can tap the trash can icon in the upper right corner to delete, or the + in the lower right to create another schedule. Tap on the created schedule to edit.
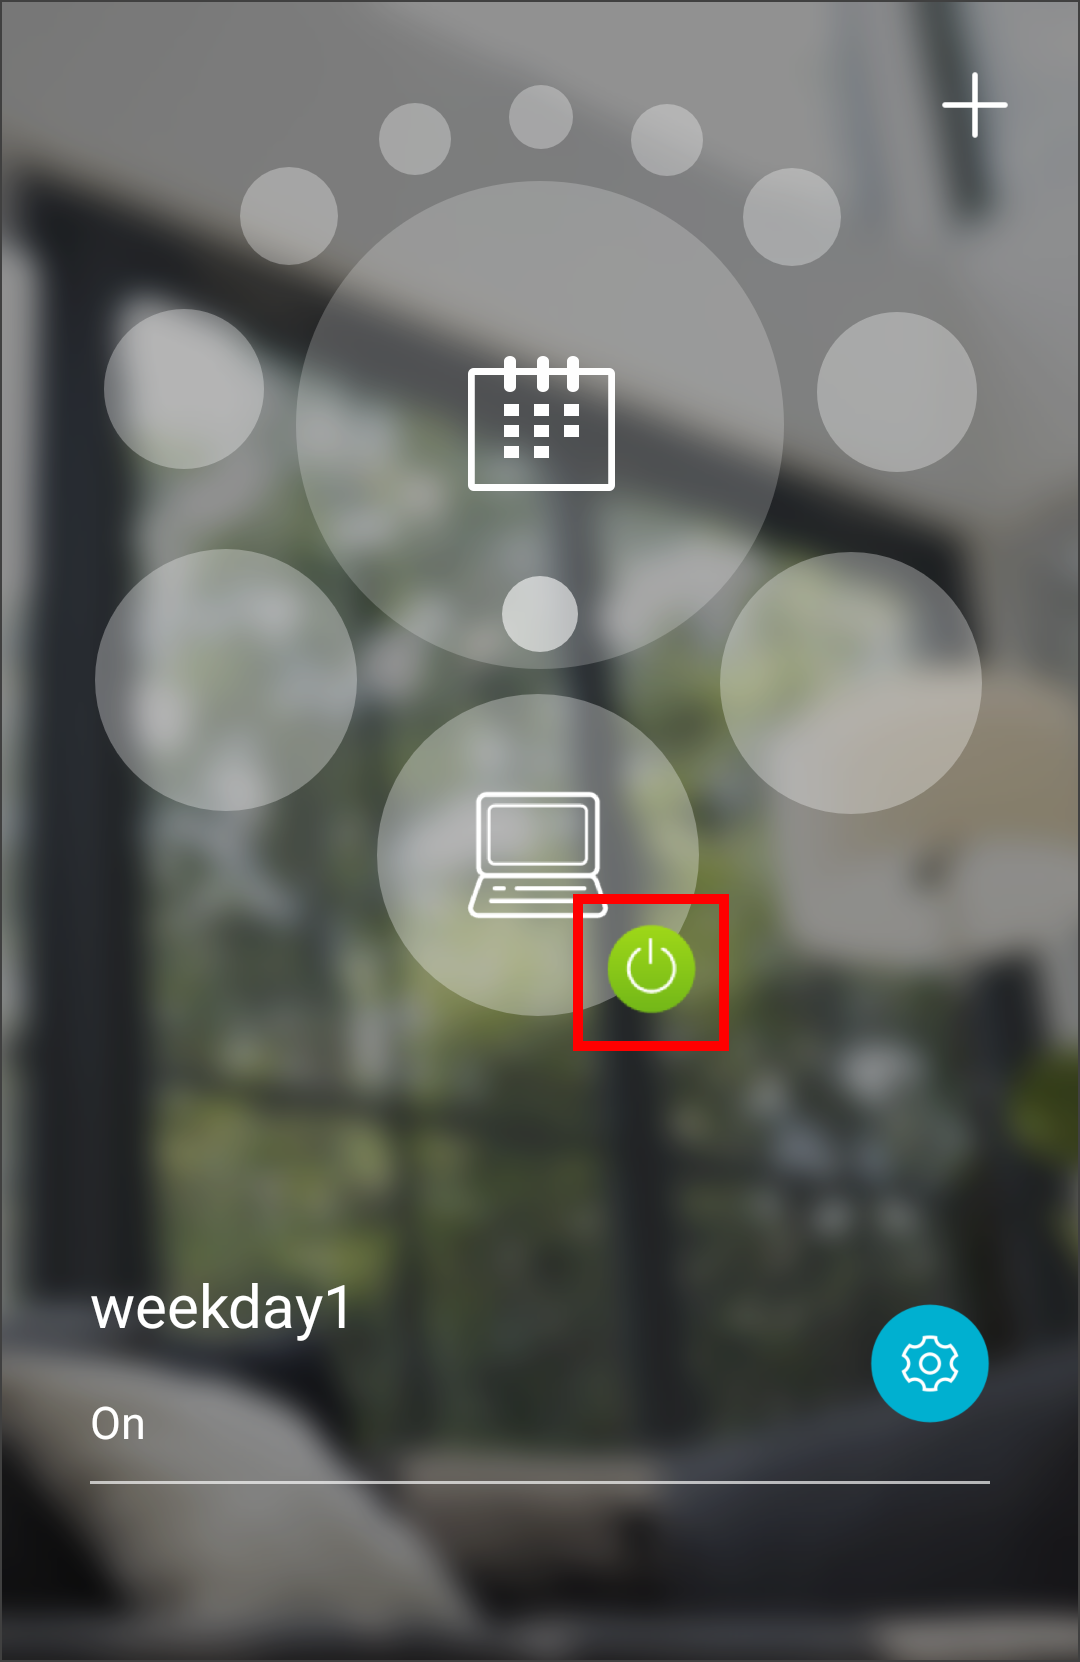
Step 12: Tap back. You will need to tap the power icon to enable (green) or disable (gray). Tap the gear icon to edit.