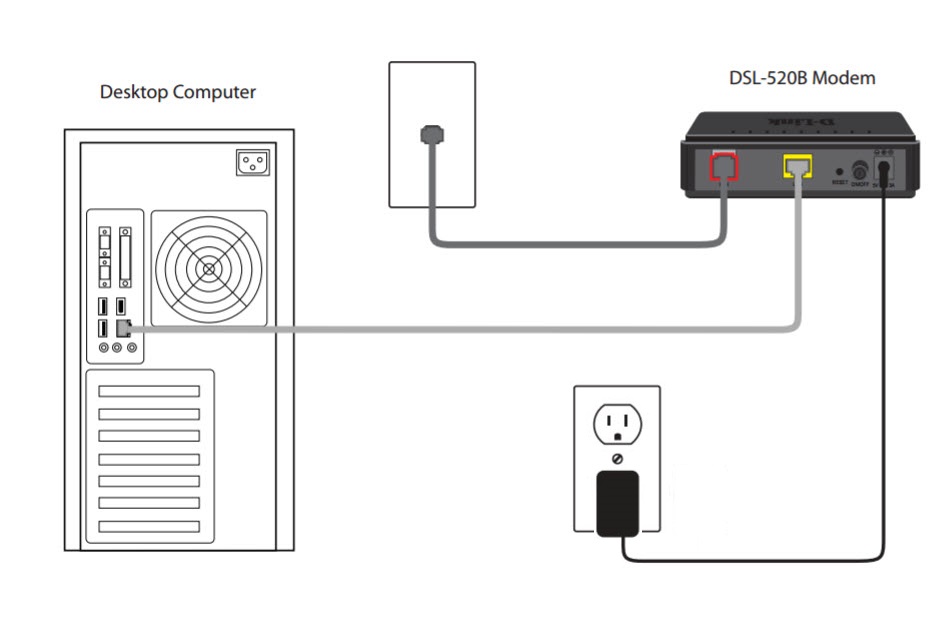
Step 1: Power on the modem.
Step 2: Connect an RJ-11 cable (telephone cable) between the wall phone jack and the DSL port on the back of the modem.
Step 3: Connect an Ethernet cable from your computer/laptop to the LAN port on the back of the modem. This is for setup purposes. After setup you can connect the DSL-520B to a switch.
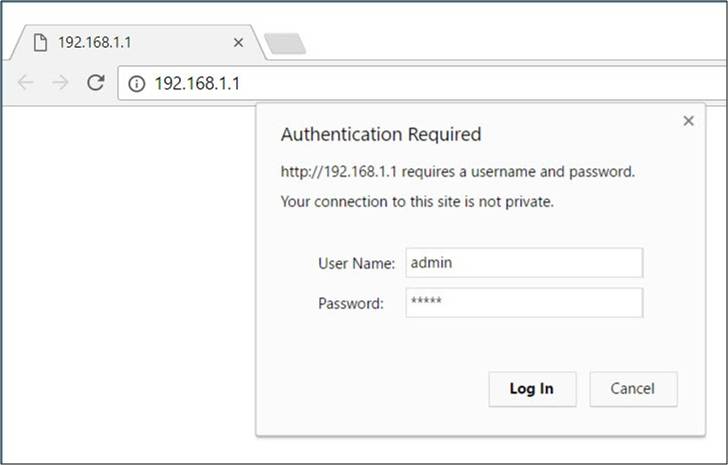
Step 4: Open your web browser and enter the IP address of the DSL-520B modem into the address bar. The default IP is 192.168.1.1. You should be taken to the login page. By default, the username and password is admin.
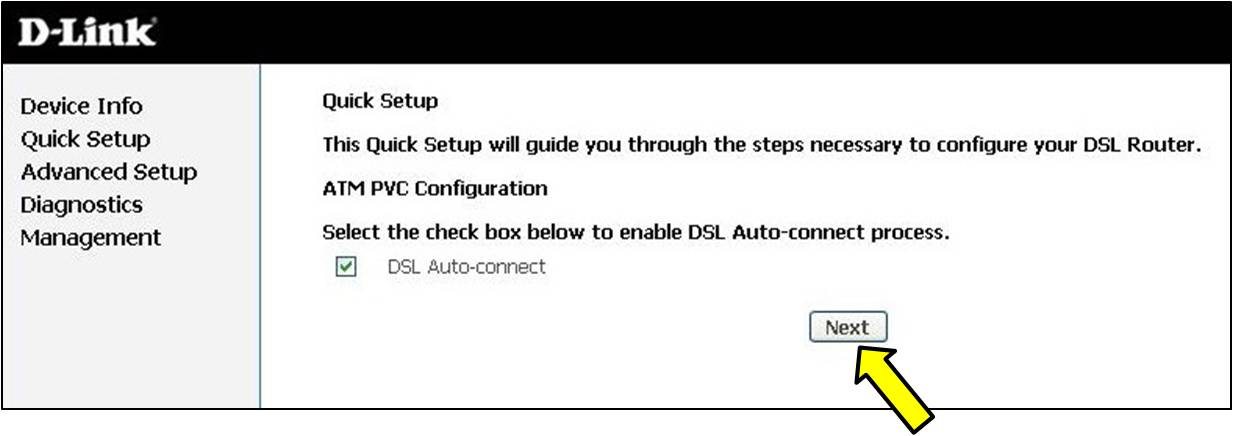
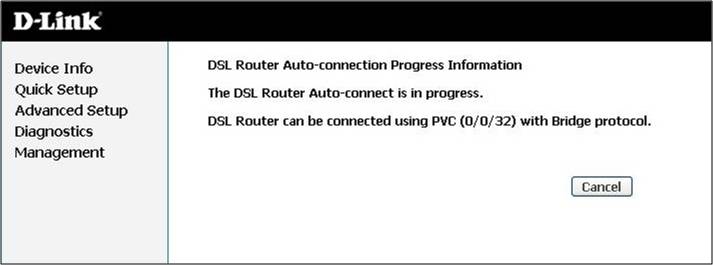
Step 5: Enable DSL Auto-Connect and click Next.
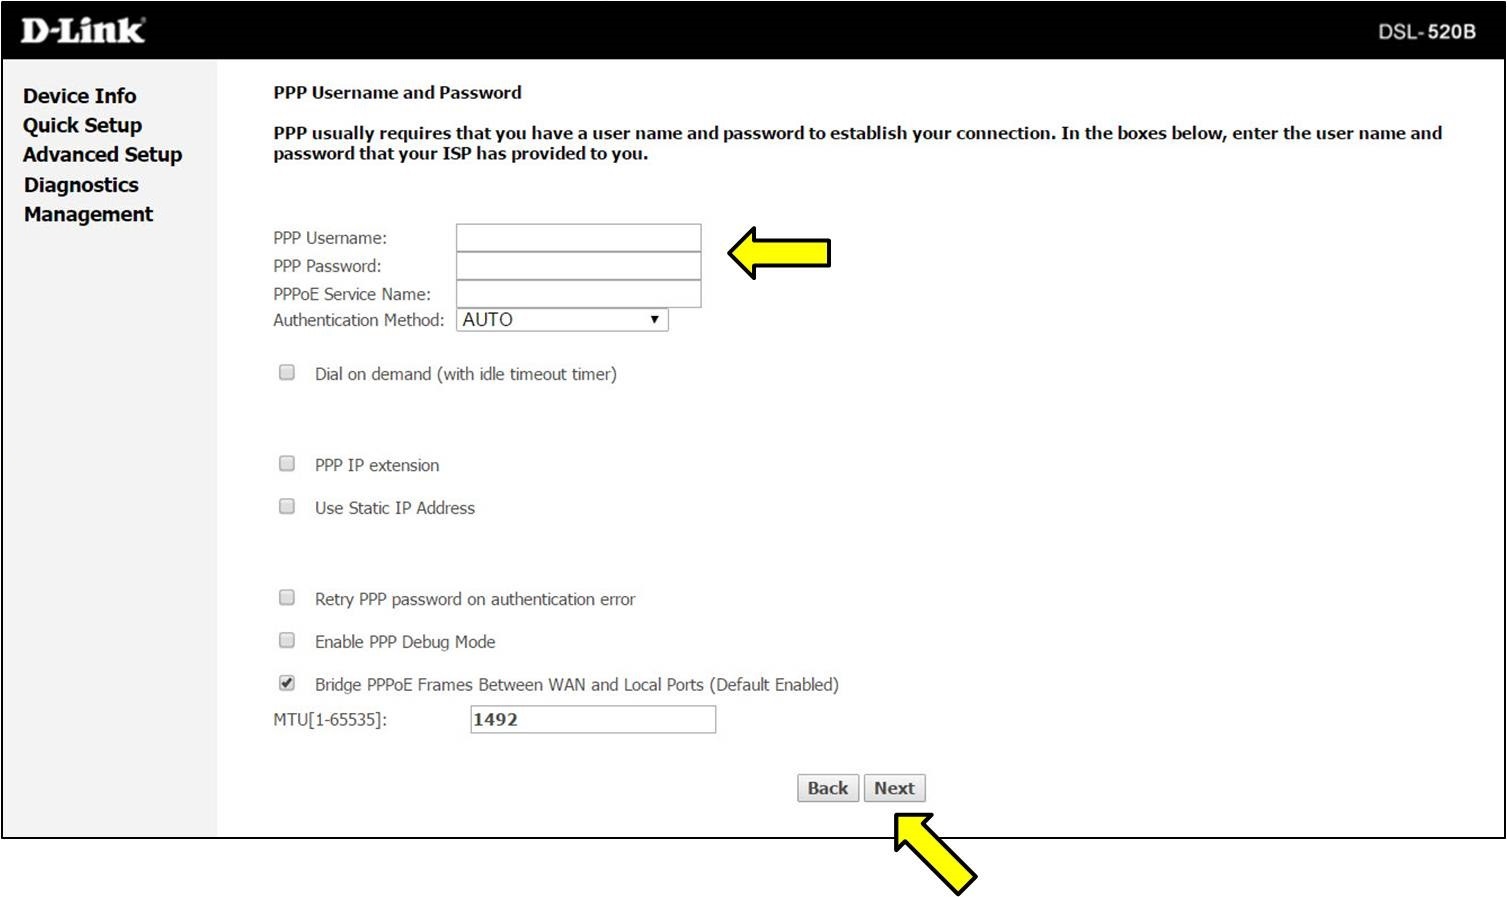
Step 6: Input your PPPoE username and password (supplied by your ISP) and click Next.
Note: If you are unsure of the username and password you will need to contact your Internet Service Provider. Also, if your Internet Service Provider requires a PPPoE service name then input the name, otherwise leave it blank.
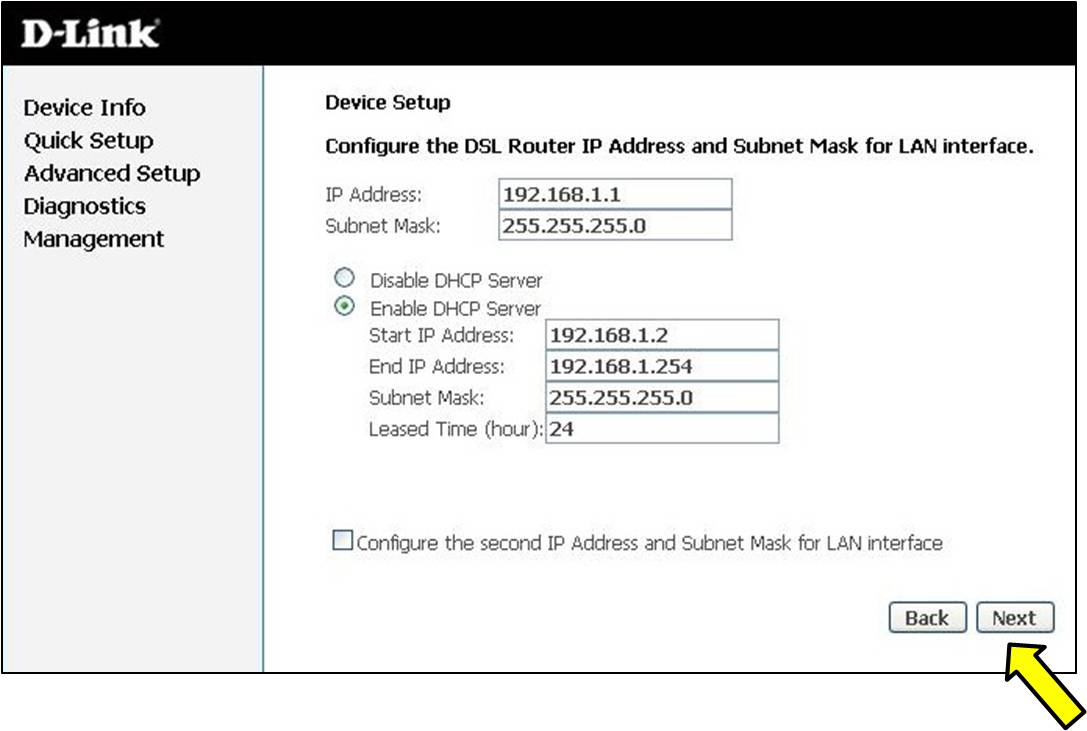
Step 7: Click Next.
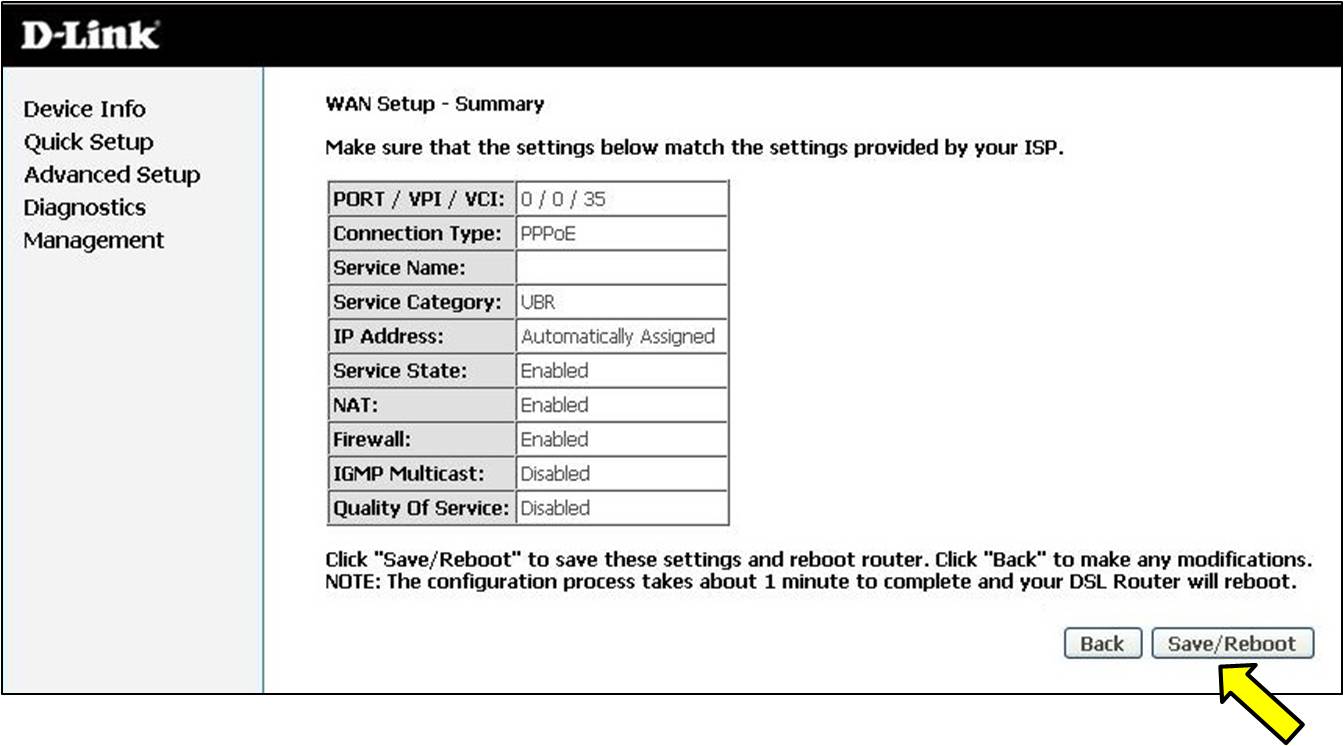
Step 8: Click Save/Reboot.
If you do not get Internet connectivity, you may need to enter the VPI/VCI settings manually. Click here for a list of ISP and their settings.