Step 1: Log into the ShareCenter Pro
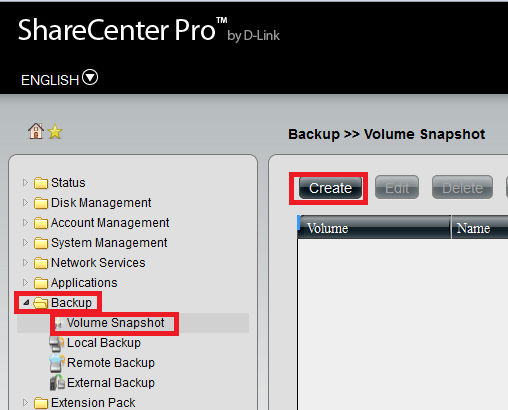
Step 2: Click Backup,then Volume Snapshot
Step 3: Click on Create
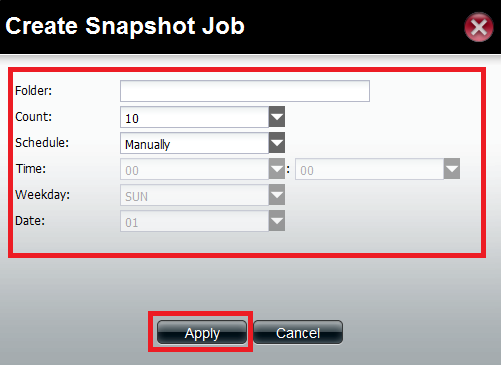
Step 4:Fill in required information and Click apply
- Folder Click the field to show the available folders. Click a folder to see the sub-folders. Double-click a folder to select it.
- Count Use the drop-down menu to select the number of snapshots for this job.
- Schedule Use the drop-down menu to select manually schedule the job, or schedule to take the snapshot on a daily, weekly or monthly basis.Time Use the drop-down menus to select hour and minute of the day.
- Weekday Use the drop-down menu to select the day of-áthe week. Date Use the drop-down menu to select
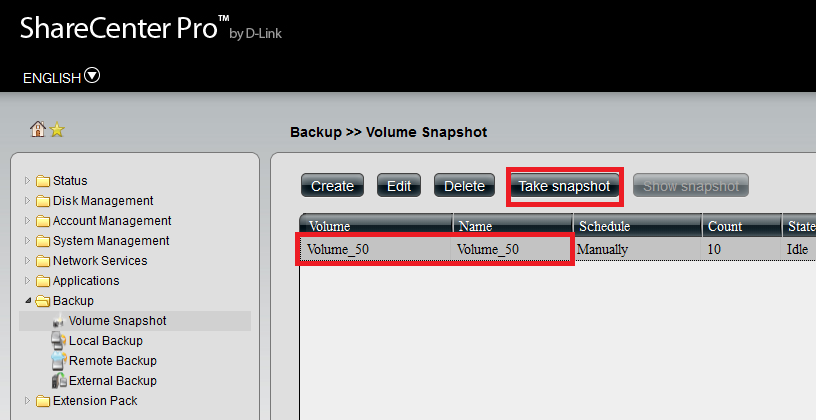
Step 5: Select the Volume and Click Take Snapshot
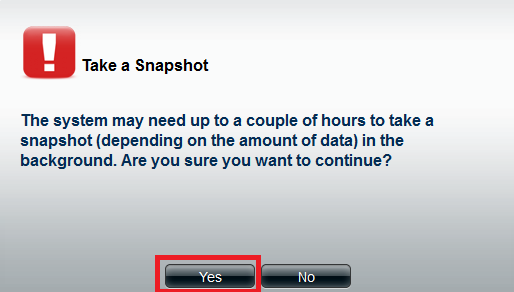
Step 6: Click on Yes to start the Job